The NVIDIA GPU drivers are essential for utilizing the full capabilities of NVIDIA graphics cards on Linux systems. Whether you’re setting up a bare metal Debian installation or configuring GPU passthrough in a virtualized environment, the driver installation process remains consistent. This guide will walk you through installing the proprietary NVIDIA drivers on Debian 13 (Trixie), ensuring your graphics card is properly recognized and functional for gaming, CUDA computing, or professional workloads.
In this tutorial you will learn:
- How to enable non-free repositories in Debian
- How to install NVIDIA drivers and kernel modules
- How to verify successful driver installation
- How to troubleshoot common driver issues
| Category | Requirements, Conventions or Software Version Used |
|---|---|
| System | Debian 12 (Bookworm) or Debian 13 (Trixie) |
| Software | nvidia-driver 550+, DKMS, kernel headers |
| Other | NVIDIA GPU (GeForce, RTX, or Quadro series) |
| Conventions | # – requires given linux commands to be executed with root privileges either directly as a root user or by use of sudo command$ – requires given linux commands to be executed as a regular non-privileged user |
Installing NVIDIA Drivers on Debian
DEBIAN 13 NVIDIA DRIVER INSTALLATION NOTE
As of September 2025, unlike previous Debian versions, Debian 13 with kernel 6.12 LTS requires explicit installation of kernel headers before installing the NVIDIA driver. Simply running apt install nvidia-driver and rebooting will fail because DKMS cannot build the kernel module without the headers present. The kernel headers must be installed first with apt install linux-headers-$(uname -r), then the nvidia-driver and nvidia-kernel-dkms packages can be installed. This change from previous Debian releases is due to the newer kernel 6.12 not including headers by default and the DKMS build process not automatically pulling them as dependencies. Following the complete installation steps in this guide ensures the NVIDIA module builds correctly and loads after reboot.
The NVIDIA proprietary drivers provide superior performance compared to the open-source Nouveau drivers. These drivers are distributed through Debian’s non-free repository, which must be enabled before installation. The process involves configuring package sources, installing the driver packages, and ensuring the kernel modules are properly built for your system.
- Enable Non-Free Repositories: First, add the non-free repositories to your APT sources to access the proprietary NVIDIA packages
$ sudo sed -i 's/main/main non-free contrib/g' /etc/apt/sources.list
$ sudo apt update
The sed command modifies your sources.list file to include both non-free and contrib components alongside the main repository. This is necessary because NVIDIA drivers are proprietary software not included in Debian’s main repository.

Enable Non-Free Repositories - Install Prerequisites and Detect GPU: Install the necessary build tools, kernel headers, and the nvidia-detect utility
$ sudo apt install linux-headers-$(uname -r) build-essential dkms nvidia-detect
$ nvidia-detect
The kernel headers matching your current kernel version are essential for building the NVIDIA kernel module. The nvidia-detect command will identify your GPU and recommend the appropriate driver version.

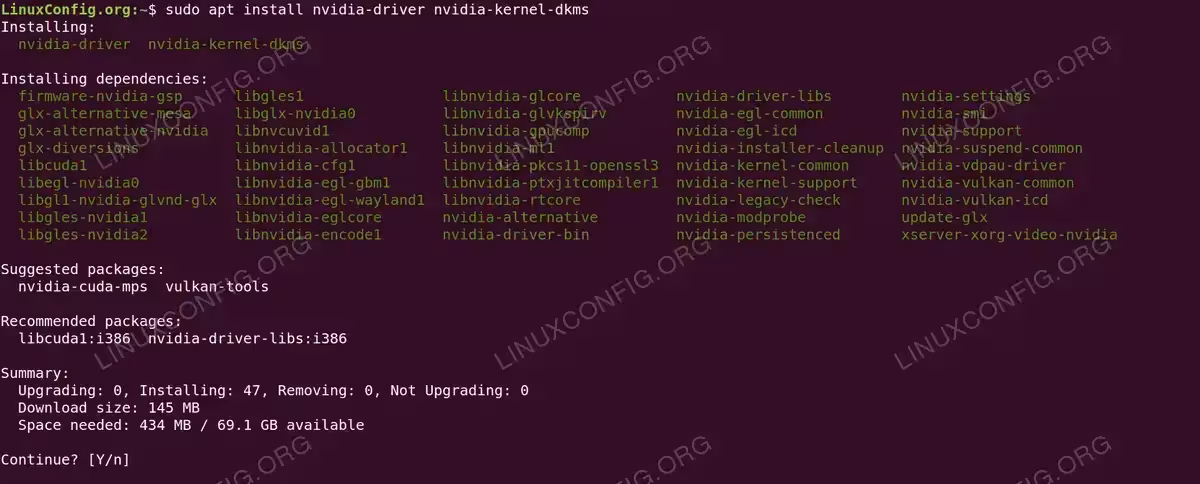
Detect GPU - Install NVIDIA Driver Package: Install the NVIDIA driver and ensure the kernel module is built
$ sudo apt install nvidia-driver nvidia-kernel-dkms
$ sudo reboot
The nvidia-driver metapackage pulls in all necessary components including libraries and utilities. The nvidia-kernel-dkms package ensures the kernel module is automatically rebuilt when you update your kernel. A reboot is required to load the new driver.

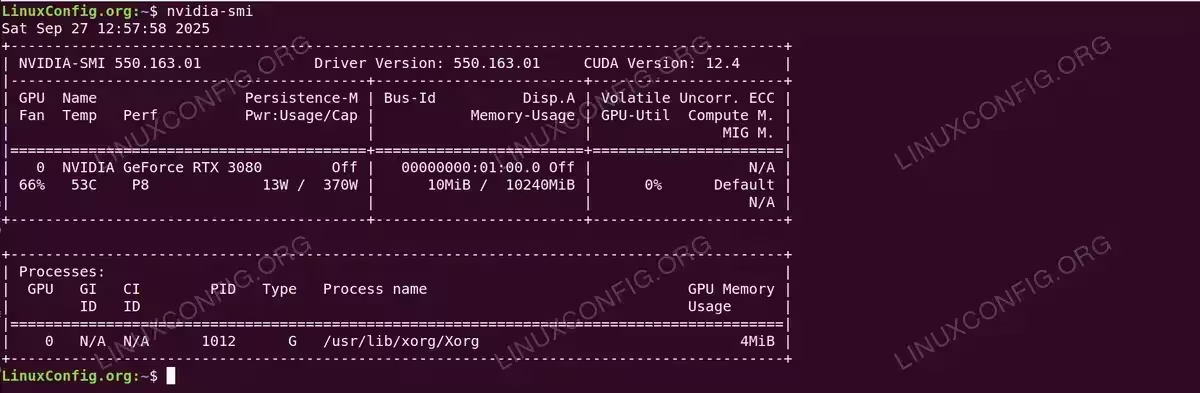
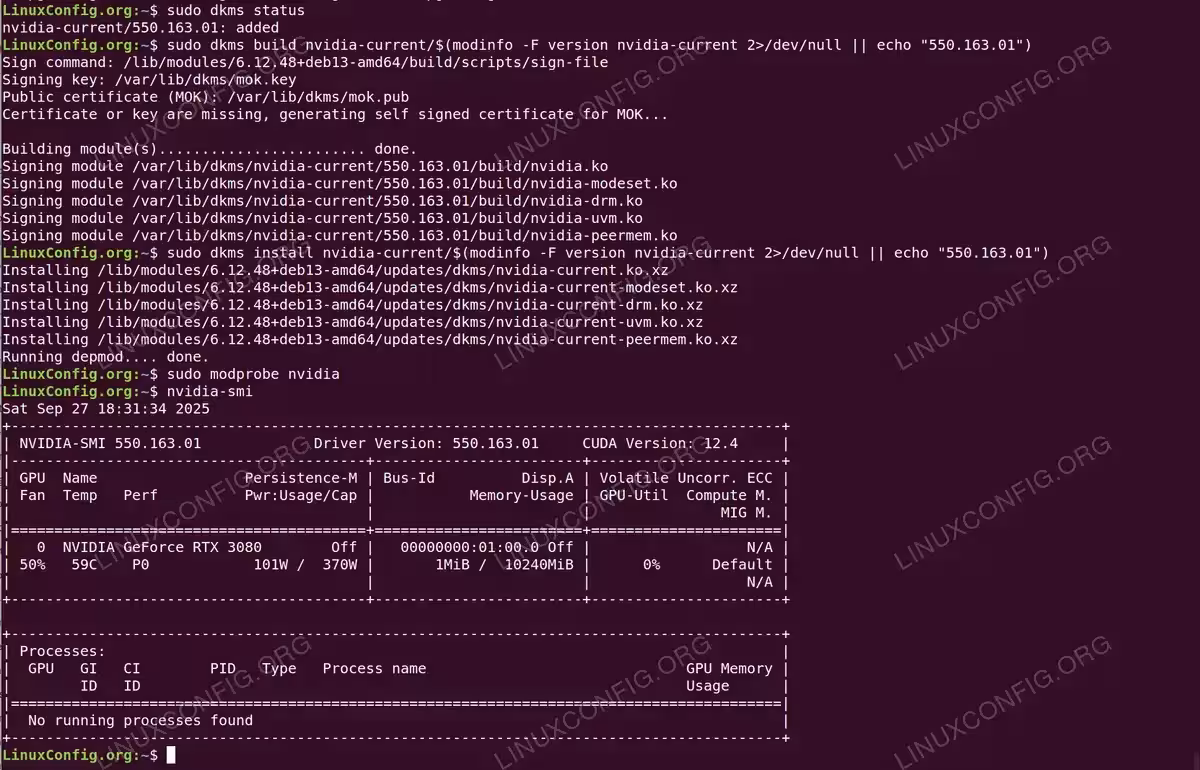
Install NVIDIA Driver Package - Verify Driver Installation: After rebooting, confirm the driver is loaded and functioning
$ nvidia-smi
The nvidia-smi utility displays detailed information about your GPU including driver version, temperature, power usage, and memory utilization. If this command shows your GPU details, the installation was successful.

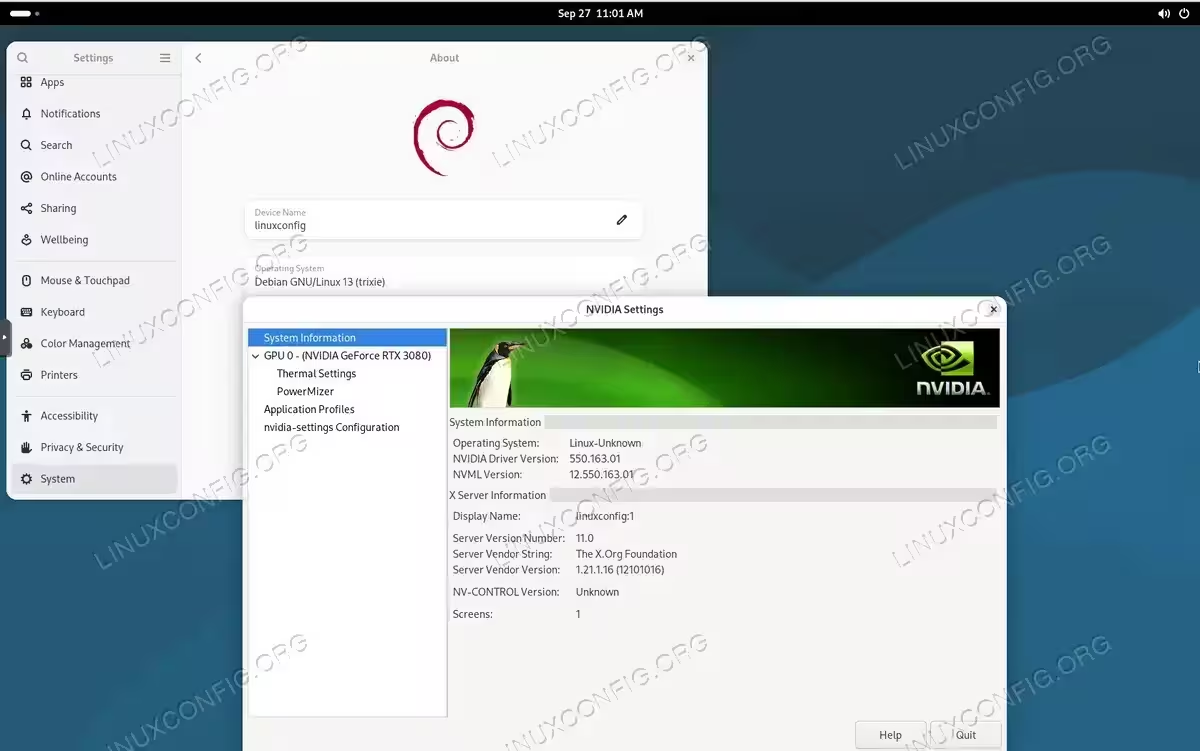
Verify Driver Installation 
Debian 13 with NVIDIA drivers installed


Troubleshooting
NVIDIA-SMI Communication Error
If you encounter the error NVIDIA-SMI has failed because it couldn't communicate with the NVIDIA driver, this typically means the kernel module isn’t loaded or wasn’t built for your current kernel version. This commonly occurs after kernel updates or when using newer kernels from backports.
- Check if NVIDIA Module is Loaded: Verify whether the nvidia kernel module is currently loaded
$ lsmod | grep nvidia
If no output appears, the module isn’t loaded. Proceed to the next steps to rebuild and load it.
- Verify Kernel Headers are Installed: Ensure headers for your current kernel are present
$ uname -r
$ sudo apt install linux-headers-$(uname -r)
The kernel headers must match your running kernel exactly. The first command shows your kernel version, the second installs the corresponding headers.
- Check DKMS Status: Verify the current status of your NVIDIA DKMS module
$ sudo dkms status
Look for output like:
nvidia-current/550.163.01, 6.1.0-18-amd64, x86_64: installed– Module is ready (good)nvidia-current/550.163.01: added– Module needs building
The status shows whether your module is “added” (source registered), “built” (compiled), or “installed” (ready to use).
- Find Your NVIDIA Driver Version: Identify the exact version number of your installed NVIDIA driver
$ dpkg -l | grep nvidia-kernel-dkms
or alternatively:
$ ls /usr/src/ | grep nvidia
You’ll see output like
nvidia-current-550.163.01where550.163.01is your version number. Note this version for the next step. - Rebuild the DKMS Module: If the module status shows “added” but not “installed”, rebuild it using your version
$ sudo dkms build nvidia-current/550.163.01
$ sudo dkms install nvidia-current/550.163.01
Replace
550.163.01with your actual version number from the previous step. The build command compiles the module, and the install command installs it to your kernel. - Load the Module and Verify: Manually load the nvidia module and test functionality
$ sudo modprobe nvidia
$ nvidia-smi
If successful, nvidia-smi should now display your GPU information. If modprobe fails, check dmesg for specific error messages using
sudo dmesg | grep -i nvidia. - Alternative: Reinstall DKMS Module: If the above steps don’t work, completely reinstall the DKMS module
$ sudo apt install --reinstall nvidia-kernel-dkms
$ sudo dkms autoinstall
$ sudo modprobe nvidia
This forces a complete rebuild of the NVIDIA kernel module for all installed kernels.

Fixing the NVIDIA-SMI has failed because it couldn’t communicate with the NVIDIA driver error
Conclusion
You have successfully installed the NVIDIA proprietary drivers on your Debian system. The drivers are now active and your GPU is ready for use with applications requiring hardware acceleration, CUDA computing, or high-performance graphics. Remember that kernel updates may require the NVIDIA module to be rebuilt, but with DKMS installed, this process happens automatically. If you encounter issues after a kernel update, following the troubleshooting steps will resolve most driver communication problems. For persistent issues, ensure your system is fully updated and consider checking the Debian NVIDIA documentation for version-specific considerations.