The Nvidia CUDA toolkit is an extension of the GPU parallel computing platform and programming model. The Nvidia CUDA installation consists of inclusion of the official Nvidia CUDA repository followed by the installation of relevant meta package and configuring path the the executable CUDA binaries. In this tutorial, you will see how to install CUDA on Ubuntu Linux. This will get your video graphics running with the latest drivers and software available.
The methods covered below will include installing CUDA from either the default Ubuntu repository or from the (slightly more up to date) CUDA repository. At the end, you will also see how to compile an example CUDA C program to test the installation. If you prefer to use CUDA in a containerized environment, check out our guide on setting up NVIDIA CUDA Toolkit in a Docker container.
In this tutorial you will learn:
- How to install CUDA toolkit from Ubuntu Repository
- How to install CUDA toolkit from CUDA repository
- How to compile example CUDA C code and execute program
- How to Check CUDA version

Software Requirements and Conventions Used
| Category | Requirements, Conventions or Software Version Used |
|---|---|
| System | Ubuntu Linux (LTS versions recommended) |
| Software | CUDA |
| Other | Privileged access to your Linux system as root or via the sudo command. |
| Conventions | # – requires given linux commands to be executed with root privileges either directly as a root user or by use of sudo command$ – requires given linux commands to be executed as a regular non-privileged user |
How to install CUDA on Ubuntu step by step instructions
DID YOU KNOW?
CUDA’s name originally stood for “Compute Unified Device Architecture,” but NVIDIA dropped the acronym explanation and now simply calls it “CUDA” as a brand name. The technology revolutionized scientific computing when it launched in 2007 by allowing developers to write general-purpose programs for GPUs using standard C language, rather than complex graphics APIs. Before CUDA, GPUs were primarily limited to rendering graphics, but this innovation transformed them into powerful parallel processors capable of accelerating everything from AI training to cryptocurrency mining, fundamentally changing how we approach computationally intensive tasks.
How to install CUDA toolkit from Ubuntu Repository
- Although you might not end up with the latest CUDA toolkit version, the easiest way to install CUDA on Ubuntu is to perform the installation from Ubuntu’s standard repositories. To install CUDA execute the following commands:
$ sudo apt update
$ sudo apt install nvidia-cuda-toolkit
- All should be ready now. Check your CUDA version:
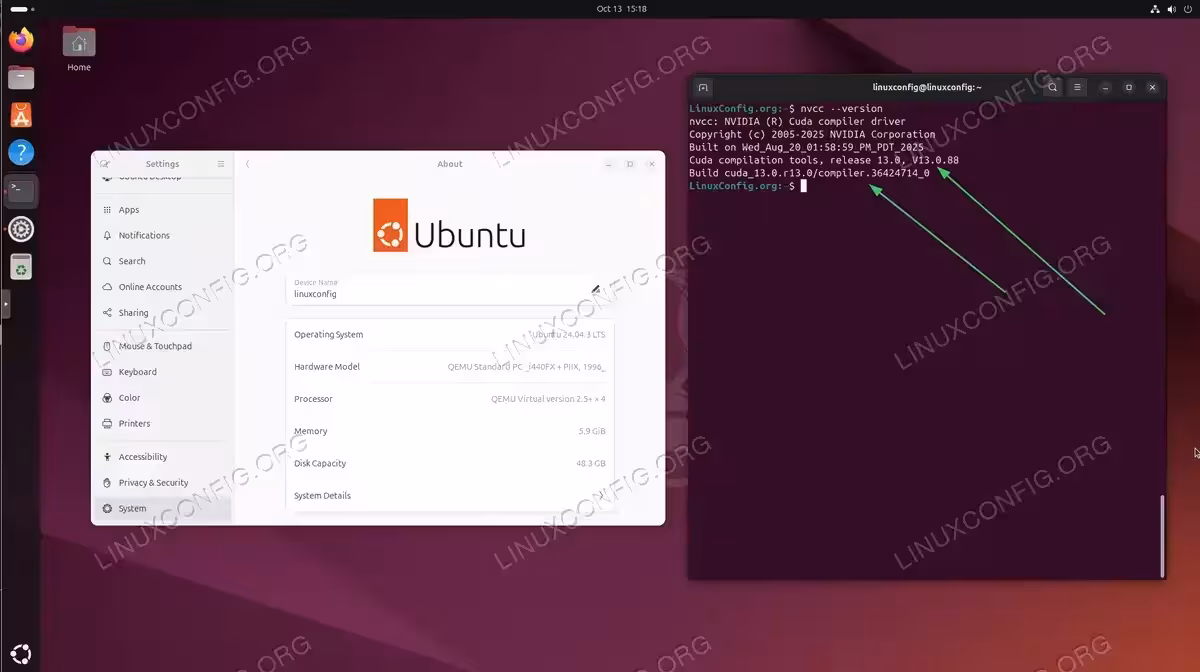
$ nvcc --version
NOTE
To install latest and more up to date CUDA version see below How to install CUDA toolkit from CUDA repository section.dd

Verifying CUDA installation with nvcc –version command on Ubuntu 24.04 - Confirm the CUDA toolkit installation by sample CUDA C code compilation. See the below Compile a Sample CUDA code section.
How to install CUDA toolkit from CUDA repository
- In case you have not done so yet, make sure that you have installed the Nvidia driver for your VGA. To do so follow our guide on How to install the NVIDIA drivers on Ubuntu.
- Setup Nvidia CUDA repository. Execute the following commands to enable CUDA repository.For Ubuntu 24.04:
$ wget https://developer.download.nvidia.com/compute/cuda/repos/ubuntu2404/x86_64/cuda-keyring_1.1-1_all.deb
$ sudo dpkg -i cuda-keyring_1.1-1_all.deb
$ sudo apt update
For Ubuntu 22.04:
$ wget https://developer.download.nvidia.com/compute/cuda/repos/ubuntu2204/x86_64/cuda-keyring_1.1-1_all.deb
$ sudo dpkg -i cuda-keyring_1.1-1_all.deb
$ sudo apt update
- At this stage all should be ready to install CUDA. Execute the following
aptcommand:$ sudo apt install cuda
- Once ready, set your path to point to CUDA binaries:
$ echo 'export PATH=/usr/local/cuda/bin${PATH:+:${PATH}}' >> ~/.bashrc $ source ~/.bashrc - Check CUDA version to confirm the installation:
$ nvcc --version
Compile a Sample CUDA code
Confirm the installation by compiling a simple CUDA C program. Save the following code into a file named test.cu:
#include <stdio.h>

__global__ void hello_cuda() {
    printf("Hello from GPU thread %d!\n", threadIdx.x);
}

int main() {
    hello_cuda<<<1, 10>>>();
    cudaDeviceSynchronize();
    return 0;
}
Next, use nvcc the Nvidia CUDA compiler to compile the code and run the newly compiled binary:
$ nvcc -o test test.cu
$ ./test
Hello from GPU thread 0!
Hello from GPU thread 1!
Hello from GPU thread 2!
Hello from GPU thread 3!
Hello from GPU thread 4!
Hello from GPU thread 5!
Hello from GPU thread 6!
Hello from GPU thread 7!
Hello from GPU thread 8!
Hello from GPU thread 9!
If you see messages from all 10 GPU threads, your CUDA installation is working correctly.

Troubleshooting
File Conflict During CUDA Installation
If you encounter an error during installation similar to:
dpkg: error processing archive ... (--unpack):
 trying to overwrite '/usr/share/nvidia/files.d/sandboxutils-filelist.json', which is also in package libnvidia-common-580
This occurs when upgrading existing NVIDIA drivers. To resolve:
$ sudo dpkg -i --force-overwrite /var/cache/apt/archives/libnvidia-compute-580_*.deb
$ sudo apt --fix-broken install
The installation will complete successfully after running these commands.
GCC Version Compatibility
Modern CUDA versions (13.0 and later) support GCC up to version 15. However, if you’re using an older CUDA version and encounter a GCC compatibility error like:
error: #error -- unsupported GNU version! gcc versions later than X are not supported!
You have two options:
- Upgrade to the latest CUDA version which supports newer GCC versions
- Install a compatible GCC version – follow our guide on how to switch between multiple GCC versions
Closing Thoughts
In this tutorial, we saw how to install CUDA on Ubuntu Linux. It’s possible to install the CUDA toolkit through several different methods, which we’ve shown here. The most bleeding edge CUDA software can be installed from NVIDIA’s official repository, although the most convenient installation method is via official package manager download from Ubuntu’s standard repositories.