Podman on Ubuntu 26.04 provides a powerful, daemonless container engine that serves as a drop-in replacement for Docker. This guide covers essential Podman commands for managing containers, images, volumes, and networks on your Ubuntu system. Whether you are running development environments or deploying production workloads, Podman offers rootless container execution with enhanced security.
Table of Contents
In this tutorial you will learn:
- How to run and manage containers with Podman
- Essential container lifecycle commands
- How to pull, list, and remove container images
- How to create and use persistent volumes
- Container networking fundamentals
- Running rootless containers for enhanced security
Software Requirements
| Category | Requirements, Conventions or Software Version Used |
|---|---|
| System | Ubuntu 26.04 Resolute Raccoon |
| Software | Podman 4.x or later |
| Other | Privileged access to your Linux system as root or via the sudo command. |
| Conventions | # – requires given linux commands to be executed with root privileges either directly as a root user or by use of sudo command$ – requires given linux commands to be executed as a regular non-privileged user |
podman run, list them with podman ps, and manage the lifecycle with start, stop, and rm commands.
| Step | Command/Action |
|---|---|
| 1. Pull an image | podman pull docker.io/library/nginx:latest |
| 2. Run a container | podman run -d -p 8080:80 --name webserver docker.io/library/nginx |
| 3. List running containers | podman ps |
| 4. Stop and remove | podman stop webserver && podman rm webserver |
Running Containers with Podman on Ubuntu 26.04
Running containers with Podman on Ubuntu 26.04 follows a syntax nearly identical to Docker, making migration straightforward. Before you begin, ensure you have Podman installed on your system. If not, you can install Podman using the official Ubuntu repositories.
The podman run command creates and starts a container from a specified image. When you run a container, Podman automatically pulls the image from a registry if it does not exist locally.
IMPORTANT
Ubuntu 26.04 ships Podman with strict registry configuration. You must use fully qualified image names including the registry domain. Using short names like nginx:latest results in an error:
Error: short-name “nginx:latest” did not resolve to an alias and no unqualified-search registries are defined in “/etc/containers/registries.conf”
Always specify the full image path, for example docker.io/library/nginx:latest for Docker Hub images.
- Run a basic container interactively: Start an Ubuntu container with an interactive shell.
$ podman run -it docker.io/library/ubuntu:26.04 /bin/bash
The
-itflags allocate a pseudo-TTY and keep STDIN open, allowing you to interact with the container shell. Typeexitto leave the container.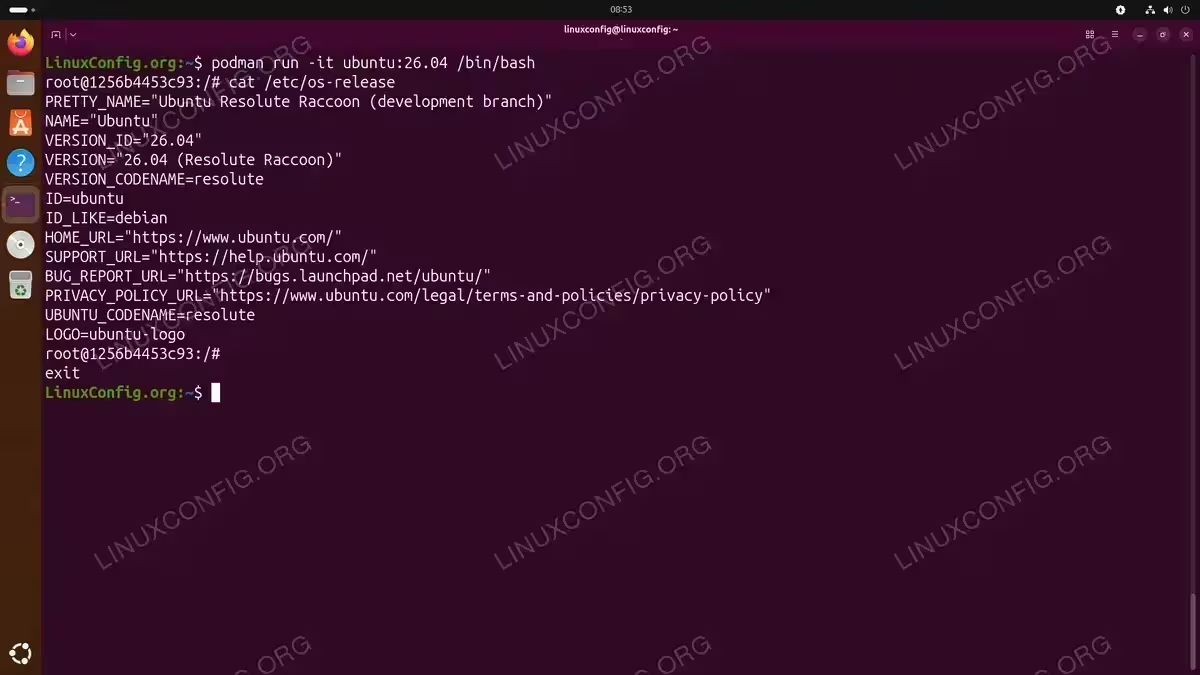
Starting an interactive Ubuntu 26.04 container and verifying the OS release - Run a container in detached mode: Start an Nginx web server in the background.
$ podman run -d -p 8080:80 --name webserver docker.io/library/nginx:latest
The
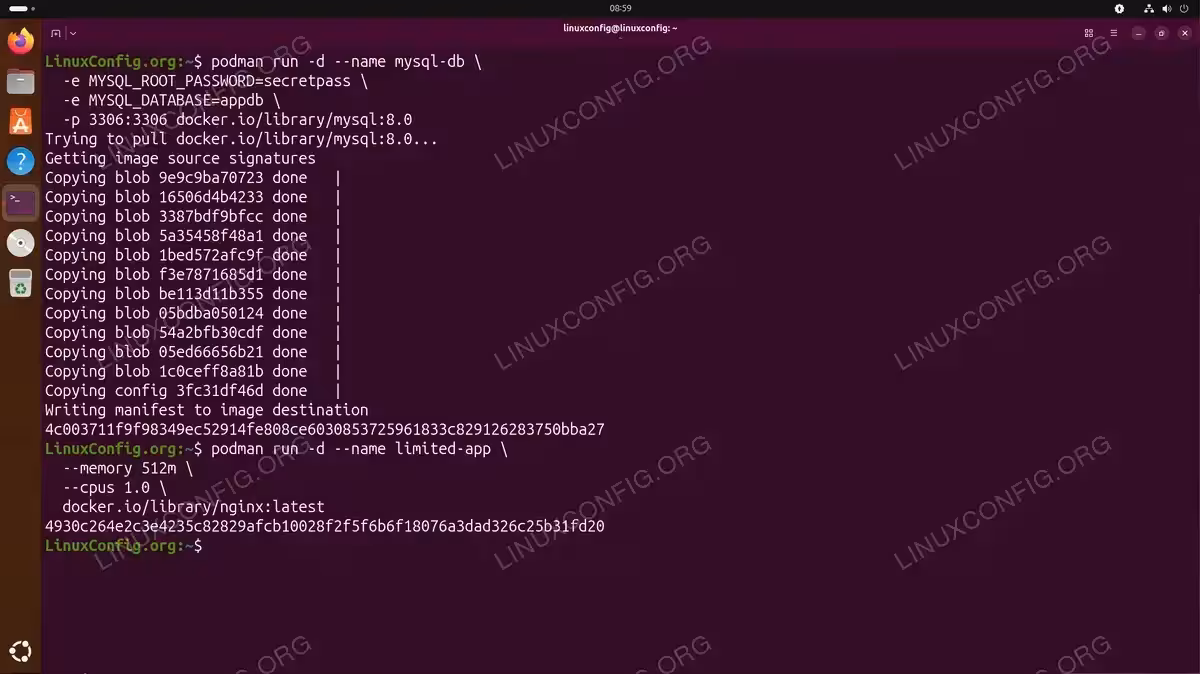
-dflag runs the container in detached mode. The-p 8080:80option maps port 8080 on your host to port 80 in the container. Access the web server athttp://localhost:8080. - Run a container with environment variables: Pass configuration to a MySQL container.
$ podman run -d --name mysql-db \
  -e MYSQL_ROOT_PASSWORD=secretpass \
  -e MYSQL_DATABASE=appdb \
  -p 3306:3306 docker.io/library/mysql:8.0
Environment variables configure the container at runtime. The MySQL image uses these variables to set up the database automatically.
- Run a container with resource limits: Restrict CPU and memory usage.
$ podman run -d --name limited-app \
  --memory 512m \
  --cpus 1.0 \
  docker.io/library/nginx:latest
Resource limits prevent a single container from consuming excessive system resources.
Container Management Commands
Managing container lifecycles is fundamental when working with Podman on Ubuntu 26.04. The following commands allow you to control running containers, inspect their status, and perform maintenance operations.
Listing Containers
View running and stopped containers using the podman ps command:
$ podman ps
This displays only running containers. To see all containers including stopped ones:
$ podman ps -a
For a more compact output showing only container IDs:
$ podman ps -q
Starting, Stopping, and Restarting Containers
- Stop a running container: Gracefully stop the webserver container.
$ podman stop webserver
Podman sends a SIGTERM signal to the main process, allowing it to shut down gracefully. After a timeout (default 10 seconds), it sends SIGKILL.
- Start a stopped container: Resume the webserver container.
$ podman start webserver
The container restarts with its original configuration and any data persisted in volumes.
- Restart a container: Stop and immediately start a container.
$ podman restart webserver
This is useful when applying configuration changes or recovering from issues.
- Force stop a container: Immediately terminate an unresponsive container.
$ podman kill webserver
The kill command sends SIGKILL by default, immediately terminating the container without cleanup.
Removing Containers
Remove stopped containers to free up system resources:
$ podman rm webserver
To remove a running container, add the -f flag:
$ podman rm -f webserver
Remove all stopped containers at once:
$ podman container prune
IMPORTANT
The podman container prune command prompts for confirmation before removing containers. Add the -f flag to skip the prompt in automated scripts.
Inspecting and Logging
View detailed container information:
$ podman inspect webserver
This outputs JSON with complete container configuration including network settings, mounts, and environment variables.
DID YOU KNOW
Rootless Podman uses slirp4netns networking by default, which does not assign routable IP addresses to containers. Containers communicate with the outside world through port forwarding only. This is why the IPAddress field appears empty when inspecting rootless containers.
View container logs:
$ podman logs webserver
Follow logs in real-time:
$ podman logs -f webserver
Working with Container Images
Container images are the foundation of Podman containers on Ubuntu 26.04. Understanding how to pull, list, and manage images is essential for effective container operations.
Pulling Images
Download images from container registries:
$ podman pull docker.io/library/nginx:latest
Podman supports multiple registries including Docker Hub, Quay.io, and private registries. The default search order is configured in /etc/containers/registries.conf.
Listing Images
View all local images:
$ podman images
Removing Images
Delete a specific image:
$ podman rmi docker.io/library/nginx:latest
Remove all unused images:
$ podman image prune -a
WARNING
The podman image prune -a command removes all images not associated with a container. Ensure you have pulled any required images before running this command.
Building Images
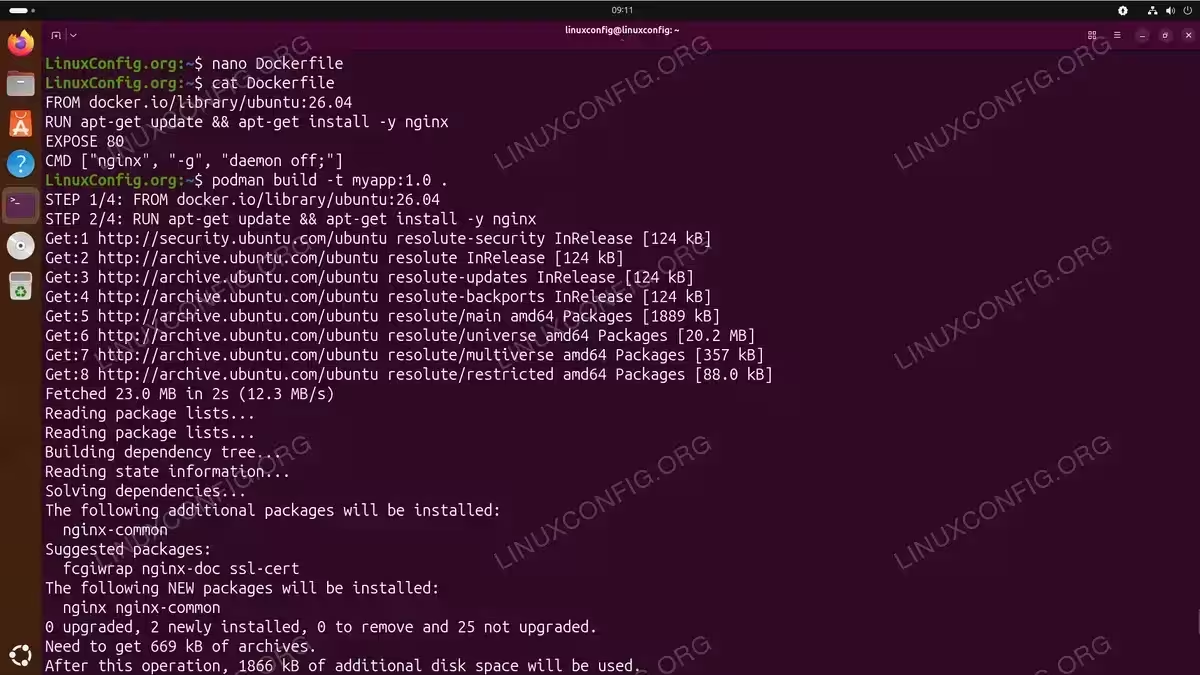
Create custom images using a Containerfile (Dockerfile-compatible). First, create a simple Containerfile in your project directory:
FROM docker.io/library/ubuntu:26.04
RUN apt-get update && apt-get install -y nginx
EXPOSE 80
CMD ["nginx", "-g", "daemon off;"]
Build the image from the Containerfile:
$ podman build -t myapp:1.0 .
This builds an image from the Containerfile in the current directory and tags it as myapp:1.0.
Volumes and Persistent Storage
Containers are ephemeral by default. Volumes provide persistent storage that survives container removal, making them essential for databases and stateful applications.
Creating and Using Volumes
- Create a named volume: Create persistent storage for a database.
$ podman volume create mysql-data
Named volumes are managed by Podman and stored in
~/.local/share/containers/storage/volumes/for rootless users. - Run a container with a volume: Attach the volume to a MySQL container.
$ podman run -d --name mysql-db \
  -v mysql-data:/var/lib/mysql \
  -e MYSQL_ROOT_PASSWORD=secretpass \
  docker.io/library/mysql:8.0
The
-v mysql-data:/var/lib/mysqloption mounts the volume at the specified path inside the container. - List all volumes: View available volumes.
$ podman volume ls
Output shows volume names and drivers.
- Inspect a volume: View volume details including mount point.
$ podman volume inspect mysql-data
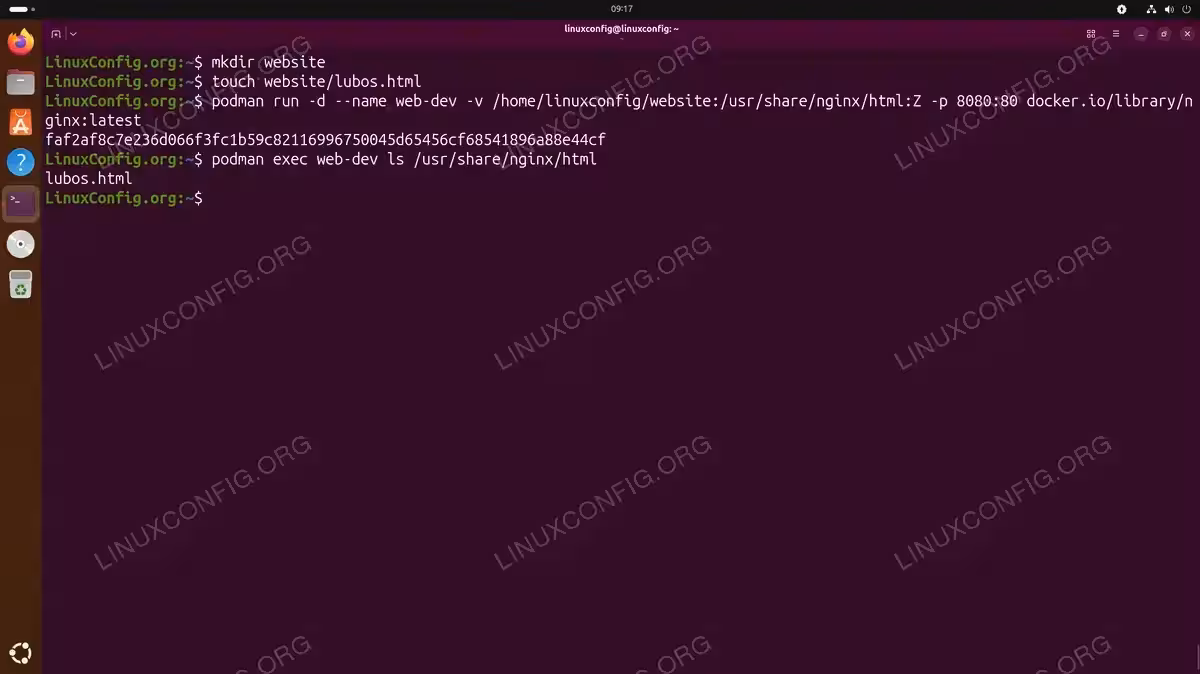
Bind Mounts
Mount a host directory directly into a container:
$ podman run -d --name web-dev \
  -v /home/linuxconfig/website:/usr/share/nginx/html:Z \
  -p 8080:80 docker.io/library/nginx:latest
The :Z suffix tells Podman to relabel the content for SELinux compatibility. This is important on systems with SELinux enabled.
Removing Volumes
Delete a specific volume:
$ podman volume rm mysql-data
Remove all unused volumes:
$ podman volume prune
Container Networking
Podman on Ubuntu 26.04 provides flexible networking options for container communication. Understanding these options helps you design secure and efficient container deployments.
Default Networking
By default, Podman creates a bridge network called podman. Containers on this network can communicate with each other and access external networks through NAT.
View available networks:
$ podman network ls
Port Mapping
Expose container ports to the host:
$ podman run -d -p 8080:80 docker.io/library/nginx
Map to a specific interface:
$ podman run -d -p 127.0.0.1:8080:80 docker.io/library/nginx
Map a range of ports:
$ podman run -d -p 8080-8090:80-90 myapp
Creating Custom Networks
- Create a network: Define an isolated network for your application stack.
$ podman network create app-network
- Run containers on the network: Connect application containers.
$ podman run -d --name app-db --network app-network docker.io/library/mysql:8.0
$ podman run -d --name app-web --network app-network -p 8080:80 docker.io/library/nginx
Containers on the same network can reach each other by container name.
- Connect an existing container to a network: Add network connectivity.
$ podman network connect app-network existing-container
Host Networking
For maximum performance, use host networking to bypass network namespace isolation:
$ podman run -d --network host docker.io/library/nginx
SECURITY ALERT
Host networking removes network isolation between the container and host. Use this option only when necessary and understand the security implications.
Rootless Container Execution
One of Podman’s key advantages over Docker is native support for rootless containers. Running containers without root privileges significantly improves security by limiting the potential impact of container escapes.
How Rootless Containers Work
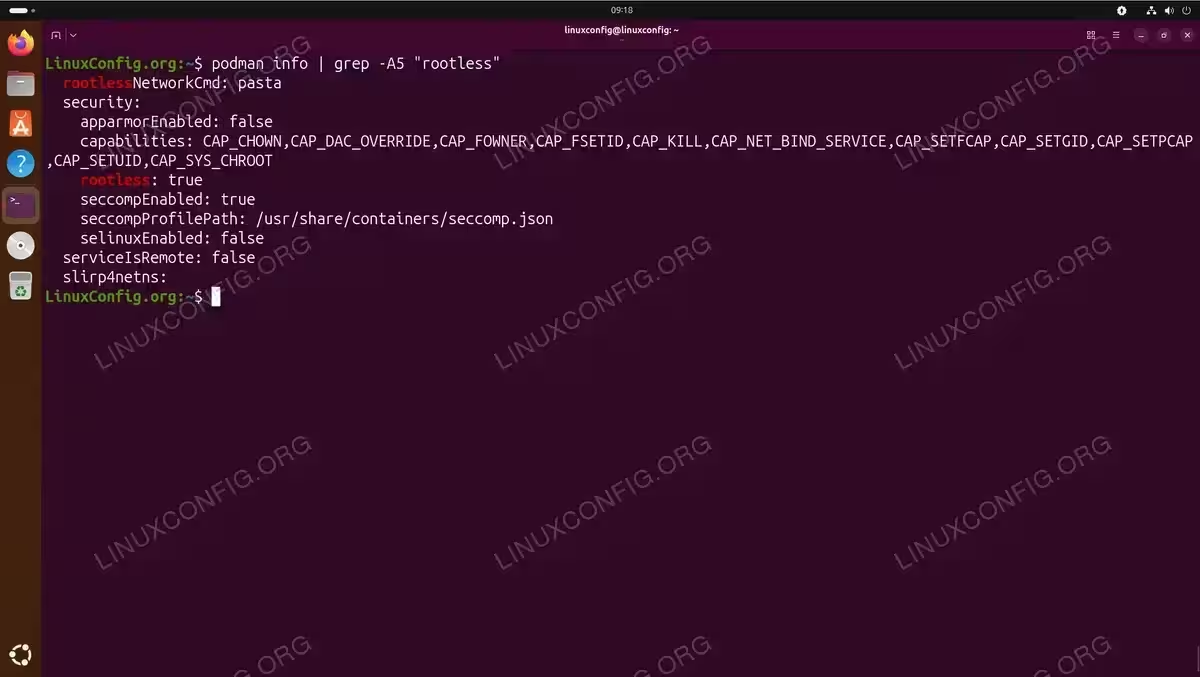
Rootless Podman uses user namespaces to map container user IDs to unprivileged host user IDs. This means a process running as root inside a container is actually an unprivileged user on the host system.
Verify your rootless configuration:
$ podman info | grep -A5 "rootless"
Running Rootless Containers
Simply run Podman commands as a regular user:
$ podman run -d --name rootless-web -p 8080:80 docker.io/library/nginx
No sudo is required. The container runs entirely within your user’s namespace.
Rootless Storage Location
Rootless Podman stores data in your home directory:
- Images and containers:
~/.local/share/containers/storage/ - Volumes:
~/.local/share/containers/storage/volumes/ - Configuration:
~/.config/containers/
Limitations of Rootless Mode
Some operations require root privileges:
- Binding to ports below 1024 (workaround: use ports above 1024 or configure
net.ipv4.ip_unprivileged_port_start) - Certain network configurations requiring CAP_NET_ADMIN
- Accessing some host devices
To allow unprivileged users to bind to lower ports:
$ sudo sysctl net.ipv4.ip_unprivileged_port_start=80
Make this permanent by adding to /etc/sysctl.conf.
COMPLETED
You now understand the fundamentals of using Podman containers on Ubuntu 26.04. From basic container operations to advanced networking and rootless execution, these skills form the foundation for container-based workflows.
For orchestrating multiple containers across clusters, consider learning how to install Kubernetes which integrates well with Podman-built images.
Conclusion
Podman on Ubuntu 26.04 provides a secure, daemonless alternative to Docker for container management. The Docker-compatible command syntax makes migration straightforward, while rootless execution offers enhanced security for development and production environments. By mastering container lifecycle management, image handling, persistent storage with volumes, and networking configurations, you can effectively deploy and manage containerized applications on your Ubuntu system. For comprehensive documentation and advanced features, consult the official Podman documentation.
Frequently Asked Questions
- Can I use Docker Compose with Podman on Ubuntu 26.04? Yes, Podman supports Docker Compose through
podman-composeor the built-inpodman composecommand. Install podman-compose withsudo apt install podman-composeand use your existing docker-compose.yml files without modification. - How do I migrate my Docker containers to Podman? Podman uses Docker-compatible commands, so most Docker commands work by simply replacing
dockerwithpodman. Export your Docker images withdocker saveand import them into Podman withpodman load. Your Dockerfiles work as Containerfiles without changes. - Why does Podman not require a daemon like Docker? Podman uses a fork-exec model where each container runs as a child process of the Podman command. This eliminates the single point of failure that a daemon represents, improves security by not requiring a privileged service, and allows containers to survive Podman upgrades.
- How do I enable Podman socket for Docker compatibility? Enable the Podman socket service with
systemctl --user enable --now podman.socket. This creates a socket at/run/user/$(id -u)/podman/podman.sockthat Docker-compatible tools can use by settingDOCKER_HOST=unix:///run/user/$(id -u)/podman/podman.sock.