KVM (Kernel-based Virtual Machine) is a powerful open-source virtualization technology built directly into the Linux kernel. If you need to run virtual machines on your Ubuntu system, understanding how to install KVM on Ubuntu 26.04 is essential for both development and production environments. This guide walks you through the complete KVM install process on Ubuntu 26.04, from verifying hardware support to creating your first virtual machine.
Table of Contents
In this tutorial you will learn:
- How to verify CPU virtualization support
- How to install KVM and related packages
- How to configure user permissions for KVM access
- How to verify the KVM installation works correctly
- How to create a virtual machine using virt-manager

Software Requirements
| Category | Requirements, Conventions or Software Version Used |
|---|---|
| System | Ubuntu 26.04 Resolute Raccoon |
| Software | qemu-kvm, libvirt-daemon-system, virt-manager |
| Other | Privileged access to your Linux system as root or via the sudo command. CPU with virtualization extensions (Intel VT-x or AMD-V). |
| Conventions | # – requires given linux commands to be executed with root privileges either directly as a root user or by use of sudo command$ – requires given linux commands to be executed as a regular non-privileged user |
| Step | Command/Action |
|---|---|
| 1. Verify CPU support | egrep -c '(vmx|svm)' /proc/cpuinfo |
| 2. Install KVM packages | sudo apt install qemu-kvm libvirt-daemon-system virt-manager |
| 3. Add user to groups | sudo usermod -aG libvirt,kvm $USER |
| 4. Verify installation | virsh list --all |
Virtualization Options on Ubuntu 26.04
Ubuntu 26.04 supports several virtualization solutions, each with different strengths. KVM stands out as the recommended choice for Linux users because it integrates directly into the kernel, delivering near-native performance without additional licensing costs. The following table compares the available options to help you choose the right solution for your needs.
| Software | Type | License | Performance | Best For |
|---|---|---|---|---|
| KVM/QEMU | Type-1 (kernel) | Open source | Excellent | Servers, production workloads |
| VirtualBox | Type-2 | Free / Proprietary (Extension Pack) | Good | Desktop users, cross-platform |
| VMware Workstation Pro | Type-2 | Proprietary (paid) | Very good | Enterprise development, Windows guests |
| VMware Workstation Player | Type-2 | Free (personal use) | Very good | Personal use, simple VM needs |
| GNOME Boxes | Type-1 (KVM frontend) | Open source | Excellent | Beginners, quick VM testing |
| Multipass | Type-1 (KVM backend) | Open source | Excellent | Ubuntu VMs, cloud-init workflows |
Prerequisites for KVM Install on Ubuntu 26.04
Before installing KVM, you must verify that your CPU supports hardware virtualization. Modern Intel processors include VT-x technology, while AMD processors include AMD-V. Without these extensions enabled, KVM cannot function properly.
- Check CPU virtualization support: Run the following command to verify your processor supports virtualization extensions:
$ egrep -c '(vmx|svm)' /proc/cpuinfo
A result greater than 0 indicates your CPU supports virtualization. The output shows the number of CPU cores with virtualization capability. If you see 0, you need to enable virtualization in your BIOS/UEFI settings.
- Verify KVM module availability: Install the cpu-checker package and run kvm-ok to confirm your system can run KVM:
$ sudo apt install cpu-checker
$ kvm-ok
A successful output shows “KVM acceleration can be used”. If KVM cannot be used, verify virtualization is enabled in your BIOS/UEFI settings.
IMPORTANT
If virtualization is disabled in your BIOS/UEFI, you must reboot and enable Intel VT-x or AMD-V in your firmware settings before proceeding.

Install KVM Packages on Ubuntu 26.04
Ubuntu 26.04 provides all necessary KVM components through its official repositories. The installation includes QEMU as the machine emulator, libvirt for managing virtual machines, and virt-manager for a graphical interface. If you prefer working with QEMU-KVM directly from the command line, the same packages apply.
- Update the package index: Ensure your package lists are current before installing:
$ sudo apt update
- Install the KVM virtualization stack: Install all required packages with a single command:
$ sudo apt install qemu-kvm libvirt-daemon-system libvirt-clients bridge-utils virt-manager
This command installs:
qemu-kvm– The QEMU emulator with KVM supportlibvirt-daemon-system– The libvirt daemon and system configurationlibvirt-clients– Command-line utilities for managing VMsbridge-utils– Utilities for configuring network bridgesvirt-manager– Graphical VM management application
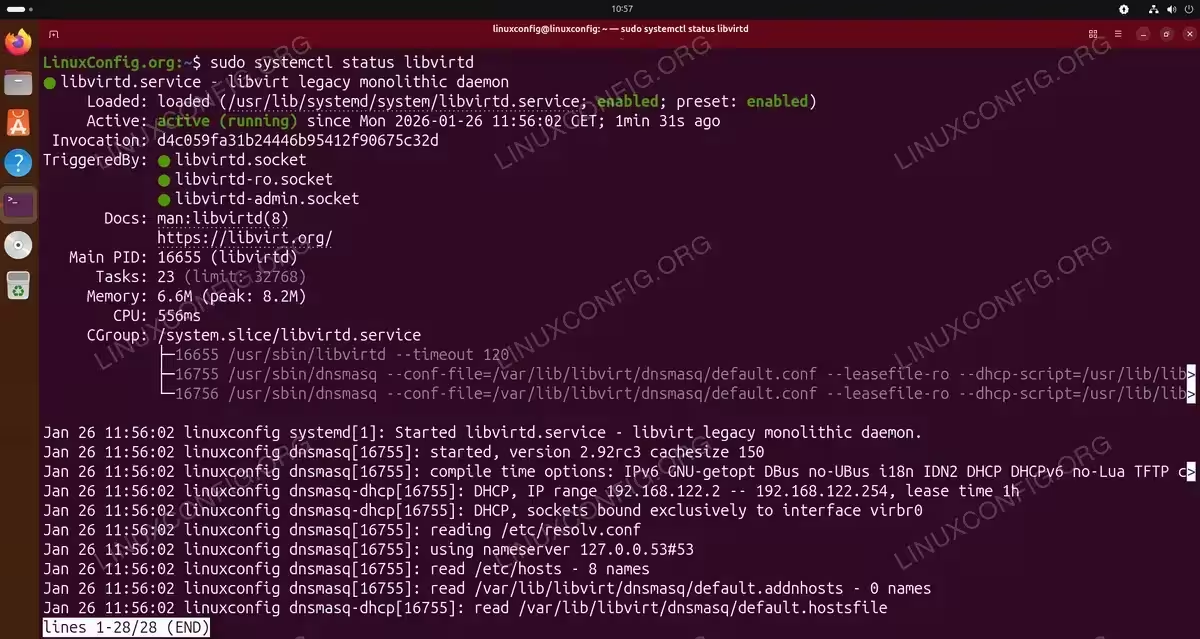
- Verify the libvirt service is running: The libvirtd service should start automatically after installation:
$ sudo systemctl status libvirtd
You should see “active (running)” in the output. If the service shows “inactive (dead)” with an error like
User record for user 'libvirt-qemu' was not found, this is a timing issue during installation. Simply restart the service:$ sudo systemctl restart libvirtd
If the service is not enabled, enable it with:
$ sudo systemctl enable --now libvirtd
INSTALLATION TIPS
Immediately after installation, libvirtd may fail to start due to a race condition where the service starts before the libvirt-qemu user is fully created. Running sudo systemctl restart libvirtd resolves this issue.
Configure User Permissions for KVM
By default, only root can manage virtual machines. To use KVM as a regular user, you must add your account to the libvirt and kvm groups. This step is essential for running virt-manager without requiring sudo.
- Add your user to the required groups: Execute the following command to grant your user access to KVM:
$ sudo usermod -aG libvirt,kvm $USER
The
-aGflag appends these groups without removing existing group memberships. - Apply the group changes: Log out and log back in for the group membership to take effect. Alternatively, use the newgrp command to apply changes in the current session:
$ newgrp libvirt
- Verify group membership: Confirm your user belongs to the correct groups:
$ groups
The output should include both
libvirtandkvmin the list.
Adding the linuxconfig user to libvirt and kvm groups for KVM access

IMPORTANT
Group changes require a complete logout from your desktop session. If virt-manager launched from the GUI menu shows “Unable to connect to libvirt qemu:///system”, open a terminal and run newgrp libvirt followed by virt-manager to apply group membership immediately.
SECURITY ALERT
Adding users to the libvirt group grants them full control over virtual machines and virtual networks. Only add trusted users to this group.
Verify KVM Installation on Ubuntu 26.04
After completing the installation and configuring permissions, verify that KVM is working correctly. These verification steps confirm that both the kernel modules and the libvirt management layer function properly.
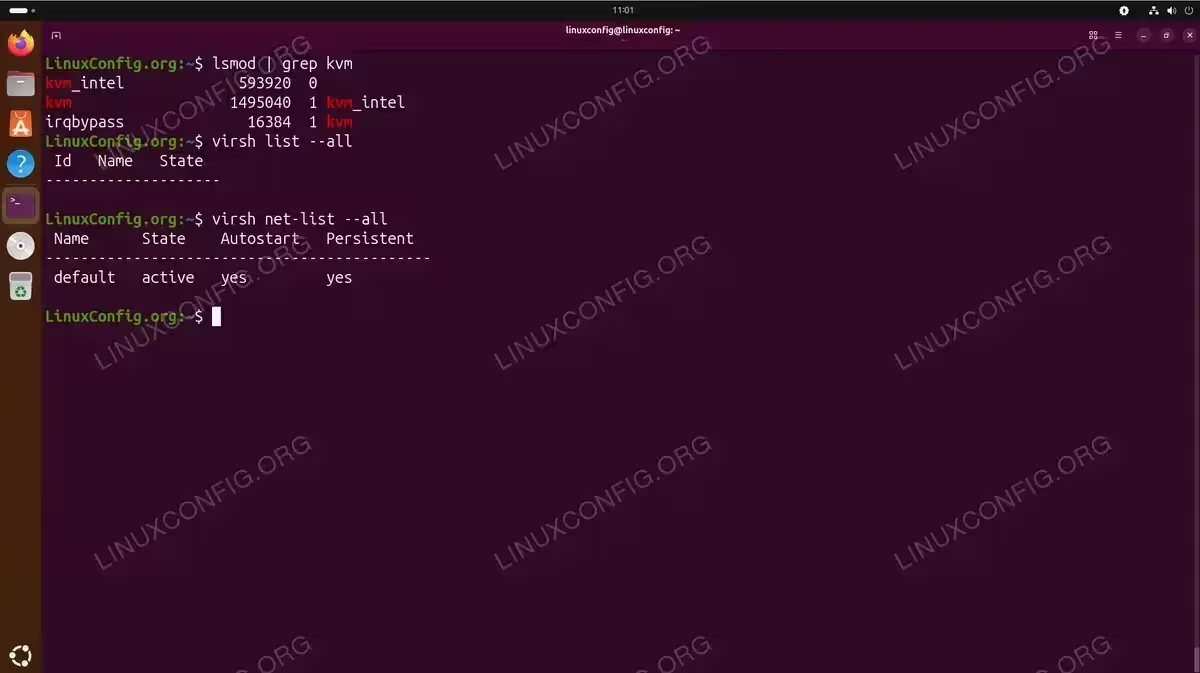
- Check KVM kernel modules: Verify the KVM modules are loaded in the kernel:
$ lsmod | grep kvm
kvm_intel             593920  0
kvm                  1495040  1 kvm_intel
irqbypass              16384  1 kvm
On AMD systems, you will see
kvm_amdinstead ofkvm_intel. - Test libvirt connectivity: Verify you can connect to the libvirt daemon:
$ virsh list --all
 Id   Name   State
--------------------
An empty list is normal for a fresh installation. If you receive a permission error, ensure you logged out and back in after adding group memberships.
- Check the default network: Verify the default NAT network is available:
$ virsh net-list --all
 Name      State    Autostart   Persistent
--------------------------------------------
 default   active   yes         yes
If it shows as inactive, start it with:
$ sudo virsh net-start default
$ sudo virsh net-autostart default
Create Your First Virtual Machine
With KVM successfully installed, you can now create virtual machines. The virt-manager application provides an intuitive graphical interface for VM creation and management. For lightweight Ubuntu VMs, you might also consider Multipass as an alternative.
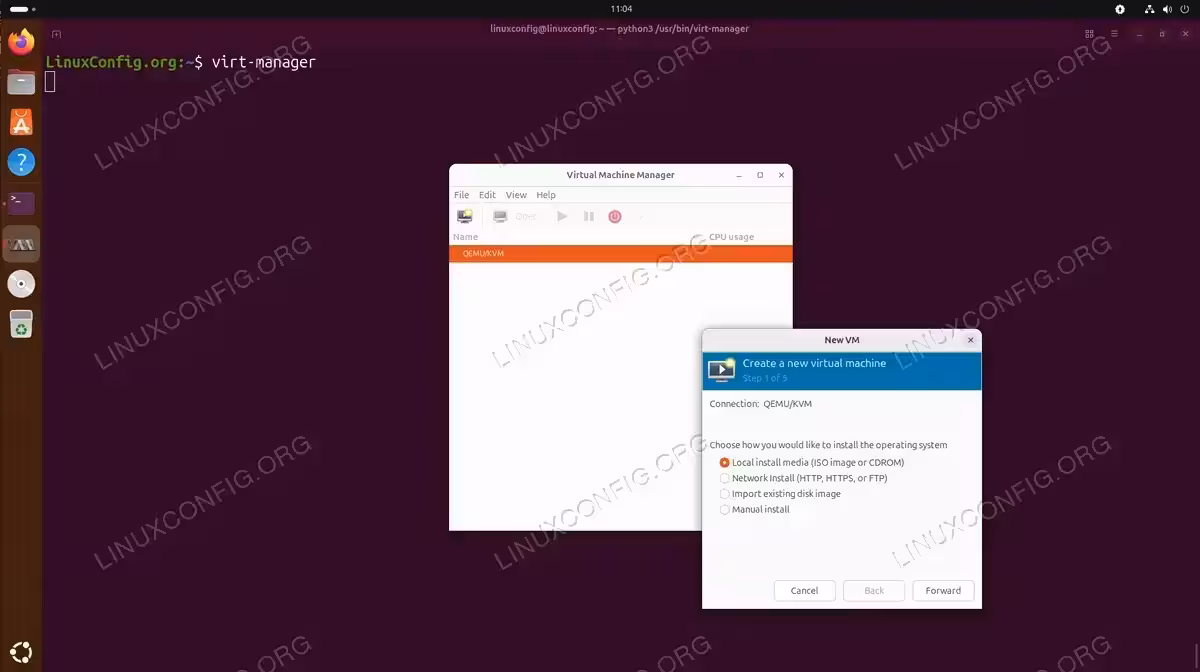
- Launch virt-manager: Open the Virtual Machine Manager from your applications menu or run:
$ virt-manager
- Create a new virtual machine: Click the “Create a new virtual machine” button or select File > New Virtual Machine. The wizard guides you through selecting an installation source (ISO image, network install, or existing disk), allocating memory and CPU cores, and configuring storage.
- Configure VM resources: For a basic Ubuntu guest, allocate at least 2 GB RAM and 2 CPU cores. Create a virtual disk of at least 25 GB for a comfortable installation.
For more information on KVM capabilities and advanced configuration options, consult the official Ubuntu virtualization documentation.
Conclusion
You have successfully completed the KVM install on Ubuntu 26.04. Your system is now ready to run virtual machines using the powerful KVM hypervisor integrated into the Linux kernel. The combination of QEMU, libvirt, and virt-manager provides a complete virtualization solution suitable for development, testing, and production workloads.
Frequently Asked Questions
- How do I check if KVM is installed on Ubuntu 26.04? Run
virsh list --allto verify KVM is installed and functioning. If the command returns a list (even empty), KVM is properly installed. You can also check for KVM kernel modules withlsmod | grep kvm. - Why does virt-manager show “Unable to connect to libvirt”? This error typically occurs when your user is not in the libvirt group or when the libvirtd service is not running. Add your user to the libvirt group with
sudo usermod -aG libvirt $USER, log out and back in, then verify the service is running withsudo systemctl status libvirtd. - Can I run KVM inside a virtual machine (nested virtualization)? Yes, but nested virtualization must be enabled on the host. For Intel processors, check if nested virtualization is enabled with
cat /sys/module/kvm_intel/parameters/nested. If it shows “N”, you need to enable it by addingoptions kvm_intel nested=1to/etc/modprobe.d/kvm.confand reloading the module. - What is the difference between KVM and VirtualBox? KVM is a Type-1 hypervisor integrated directly into the Linux kernel, offering near-native performance for Linux hosts. VirtualBox is a Type-2 hypervisor that runs as an application on top of the operating system. KVM generally provides better performance for Linux guests, while VirtualBox offers broader host OS support and may be easier to set up for beginners.