In a previous article, we learned how to create secure and efficient backups with Restic on Linux. Restic works on multiple platforms, but comes without a GUI. In this article, we learn how to install and use Backrest, a free and open source, user-friendly web-based interface for Restic.
In this tutorial you will learn:
- How to install Backrest on Linux
- How to configure Backrest
- How to use Backrest to create and manage Restic backups

| Category | Requirements, Conventions or Software Version Used |
|---|---|
| System | Distribution-agnostic |
| Software | Backrest |
| Other | Root privileges if performing a system-wide installation |
| Conventions | # – requires given linux-commands to be executed with root privileges either directly as a root user or by use of sudo command$ – requires given linux-commands to be executed as a regular non-privileged user |
Installing Backrest
Like Restic itself, Backrest is free and open source software (source code is hosted on GitHub). It is written in Go and released under the GPLv3 license. The easiest way to install Backrest is to download the pre-compiled binary for our favorite operating system and architecture, from the repository releases page.
At the moment of writing, the latest available version of Backrest is
1.7.1. If you are reading this article, you probably want to install the linux version, which is available for the arm64, armv6, and x86_64 architectures. For the sake of this article, we will use the latter. Backrest binary is distributed inside a tarball, which we can download and extract with a single command:
$ curl -L https://github.com/garethgeorge/backrest/releases/download/v1.7.1/backrest_Linux_x86_64.tar.gz | tar -xz
After launching the command above, we should find the content of the Backrest tarball in our current working directory:
├── backrest
├── CHANGELOG.md
├── install.sh
├── LICENSE
├── README.md
└── uninstall.sh
The backrest file, is the pre-compiled binary. It includes an embed version of Restic, so we don’t have to install it separately (although we can pass the path of an existing Restic binary as argument to the --restic-cmd option). We can execute the Backrest binary directly, or we can use the install.sh script to perform a system-wide installation. The script copies the binary in the /usr/local/bin directory, and creates a systemd service at /etc/systemd/system/backrest.service; it then starts and enables the service, so that it automatically launched at boot.
Configuring Backrest
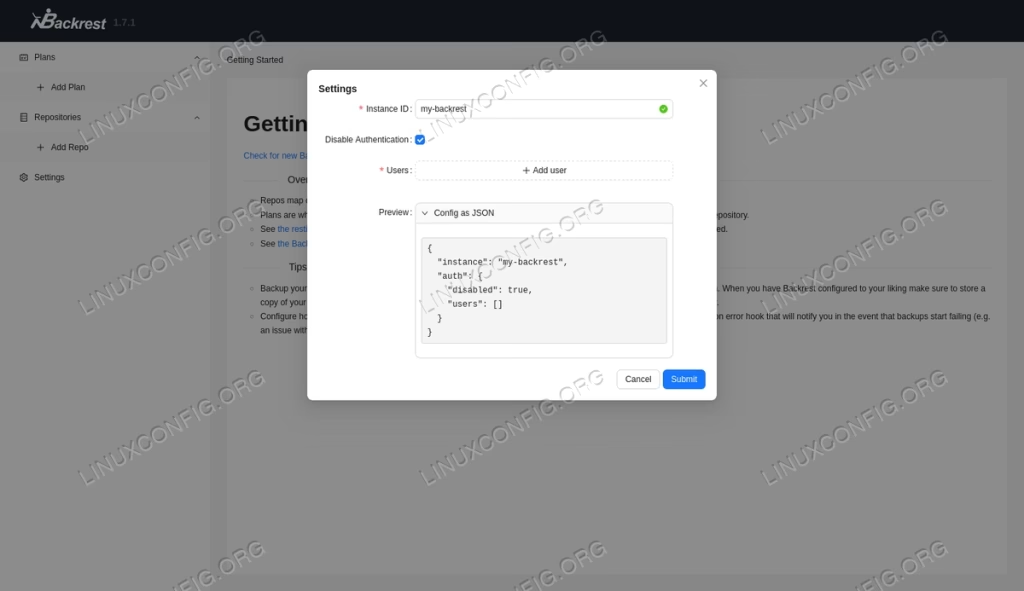
The first time we reach Backrest web interface, at http://localhost:9898, we are prompted to enter a unique instance ID, and choose whether to disable authentication or add a username and password to restrict access to the interface itself. We can click on the “Submit” button, to confirm our choices:
Creating a repository
After the initial configuration, we can proceed to create a Restic repository (or use an already existing one), and a backup plan. To create a repository, we click on the “Add Repo” link, in the left vertical menu, and provide, at minimum: the repository name, its URI and the encryption password:
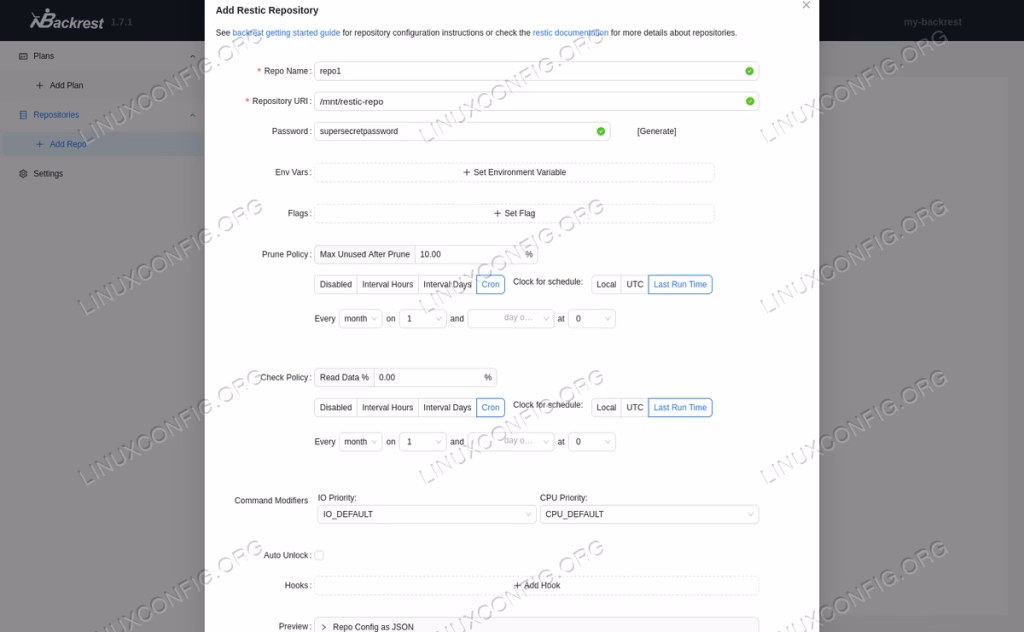
As you can see in the screenshot above, we have the chance to define some environment variables, among those supported by Restic (e.g. the RESTIC_COMPRESSION variable can be used to specify the compression mode Restic should use.). We can also specify additional flags which should be passed to the Restic command line when performing a backup to this repository, configure a policy for pruning, and one for checking the integrity of the repository.
Finally, we can select a hook: hooks are specific actions to be performed on specific conditions. We can choose to run a shell command, for example, or contact an endpoint like healthchecks.io, which will help use monitoring our backups and their state. To save our repository, once again, we click on the “Submit” button.
Creating a backup plan
We can now proceed to create a backup plan by clicking on the “Add Plan” link in the interface vertical menu. To create a plan, all we have to do, is to provide a meaningful name for it (e.g. local-backup), choose a target repository from the dropdown menu, and enter the paths of the files we want to include in the backup:
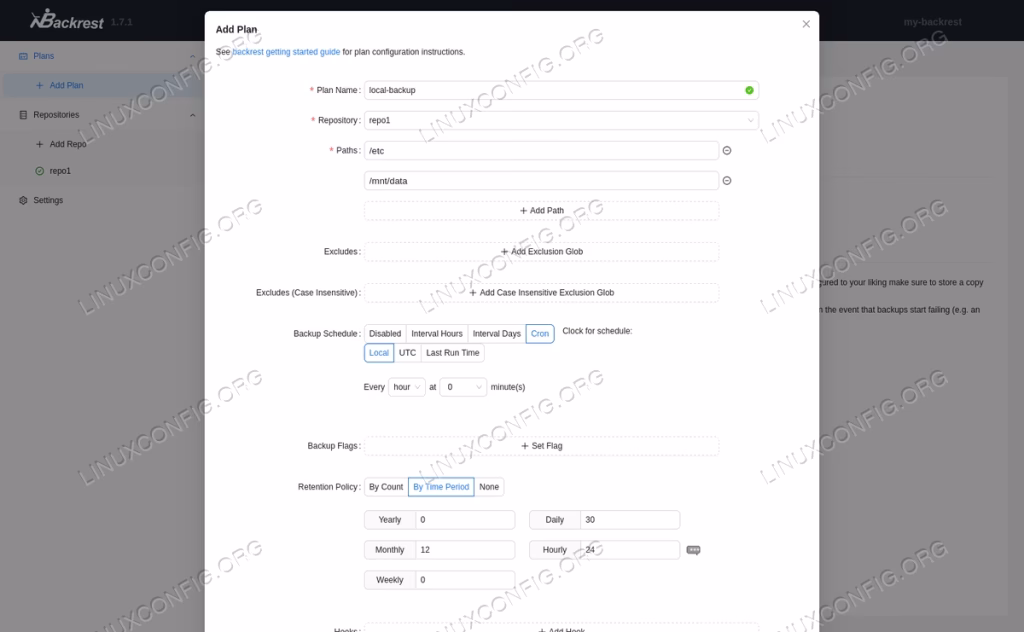
The interface let us provide also a list of case-sensitive and case-insensitive exclude patterns. We can define a backup schedule (the default is to perform a backup at the beginning of every hour), and a retention policy based on the number of existing backups, or on a time period. A retention policy is useful to free space in the target repository by removing old backups. As for repositories, we can associate one or more hooks to a backup plan.
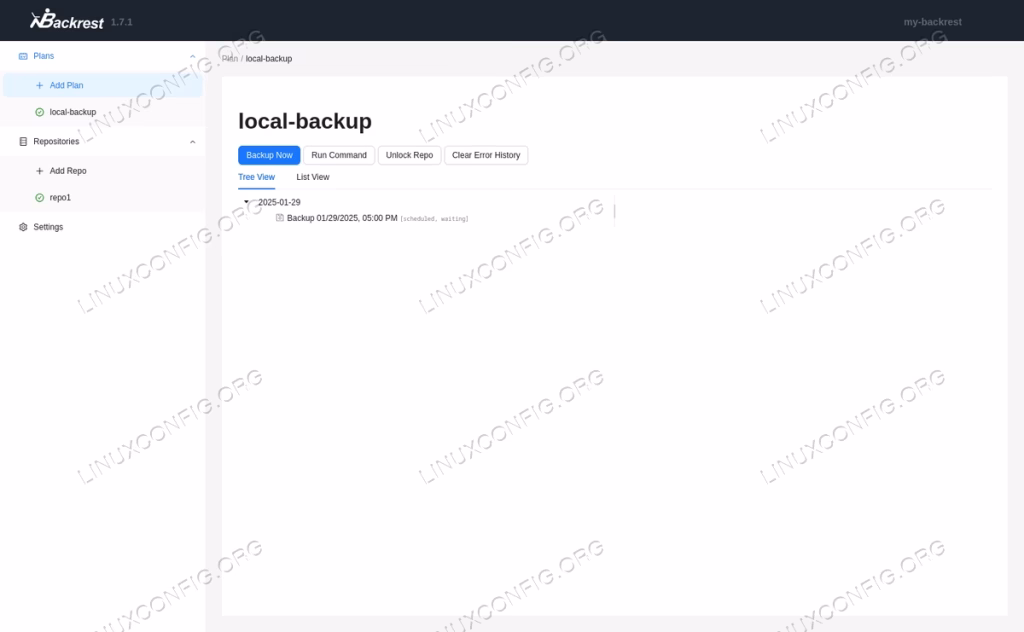
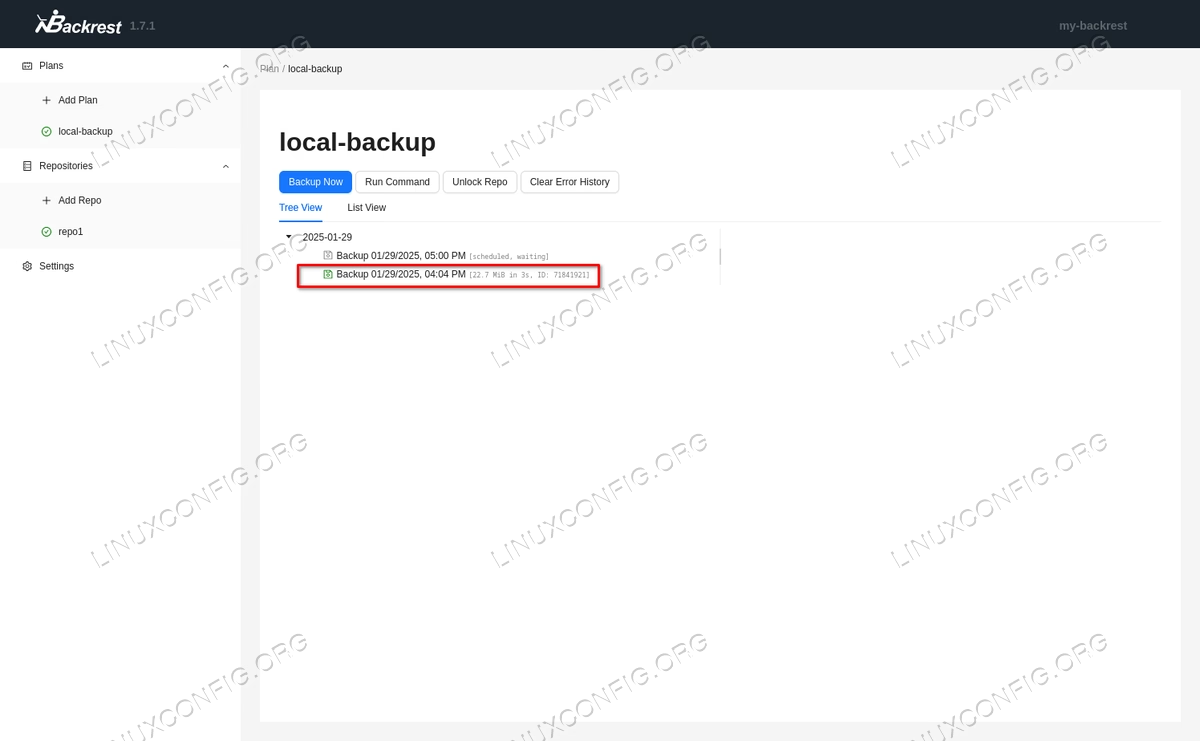
Once our first backup plan is defined, we can click on “Submit”, to save its configuration. The backup plan name, will appear in the Backrest WebUI interface vertical menu. Once we click on it, we will be able to check the next date in which the backup will be executed (according to the schedule we defined), and run a backup or a Restic command immediately, by clicking on the “Backup Now” and “Unlock Repo” buttons, respectively.
Once a backup is complete, it will appear in the list, associated to a green icon, if executed successfully:
By clicking on the backup entry, we can access details like the snapshot ID and the number of files and bytes added. We can also browse the snapshot content, and download individual files:

Similarly, by clicking on the repository entry related to a repository, we can perform immediate actions such as pruning and checking.
Backrest configuration file
Backrest automatically creates a configuration file which reflects the choices we make in the WebUI. We can be use it to easily replicate our setup on new installations. The configuration file is in JSON format, and, by default, it is created in the ~/.config/backrest directory of the user we launch the Backrest binary as. We can, however, pass the path to an alternative configuration, as argument to the --config-file option. Here is the content of the configuration file corresponding to our current setup:
{
  "modno": 2,
  "version": 4,
  "instance": "my-backrest",
  "repos": [
    {
      "id": "repo1",
      "uri": "/mnt/restic-repo",
      "guid": "ab83d9257d5ae451173ea4b6a305645aea26e69d3046f98eef7e0cc87e774005",
      "password": "supersecretpassword",
      "prunePolicy": {
        "schedule": {
          "cron": "0 0 1 * *",
          "clock": "CLOCK_LAST_RUN_TIME"
        },
        "maxUnusedPercent": 10
      },
      "checkPolicy": {
        "schedule": {
          "cron": "0 0 1 * *",
          "clock": "CLOCK_LAST_RUN_TIME"
        },
        "readDataSubsetPercent": 0
      },
      "commandPrefix": {}
    }
  ],
  "plans": [
    {
      "id": "local-backup",
      "repo": "repo1",
      "paths": [
        "/etc",
        "/mnt/data"
      ],
      "schedule": {
        "cron": "0 * * * *",
        "clock": "CLOCK_LOCAL"
      },
      "retention": {
        "policyTimeBucketed": {
          "hourly": 24,
          "daily": 30,
          "monthly": 12
        }
      }
    }
  ],
  "auth": {
    "disabled": true
  }
}
Conclusions
In this tutorial we learned how to download, install and configure Backrest, a wrapper around Restic, an excellent multi-platform tool we can use to create encrypted and efficient backups. Backrest simplifies Restic usage, providing a user-friendly WebUI which let us create repositories, backup plans, and manage existing backups.