The package manager is an integral part of every Linux operating system. Any Linux user that wishes to install, remove, or upgrade software will inevitably interact with the package manager in some capacity. Package management systems often differ in features across various Linux distributions, and the command syntax for each one is also slightly different. Since package managers play a big role in the upkeep of a system, they can sometimes be the deciding factor when picking out a Linux distro to use as a daily driver.
In this tutorial, we will compare some of the most common and popular package management systems that are default to major Linux distributions. Covering the major package managers will help us understand the differences between features and syntax, and allow users to make an informed decision about which package manager best suits their needs. We will also cover universal package managers that are available across various distros, such as Snap and Flatpak.
NOTE
Software repositories also go hand in hand with package managers. Even if two distributions use the same package manager, there could be certain software that is available in one distro’s default repositories that is not present in that of another. When the programs a user needs are available in the default repositority, it makes then much easier to install and maintain.
In this tutorial you will learn:
- Pros and cons of using one package manager over another
- How to search for, install, remove, and perform other functions with various Linux package managers
| Category | Requirements, Conventions or Software Version Used |
|---|---|
| System | Any Linux distro |
| Software | apt, dnf, pacman, pamac, yay, zypper, portage, snap, flatpak |
| Other | Privileged access to your Linux system as root or via the sudo command. |
| Conventions |
# – requires given linux commands to be executed with root privileges either directly as a root user or by use of sudo command$ – requires given linux commands to be executed as a regular non-privileged user |
Pros and Cons of Popular Package Managers
Before diving into the finer details of each package manager, let’s first go over some of the pros and cons of each one. The subsequent sections will shed more light on the advantages of each package manager, but the following table summarizes them in a way that is quicker to digest:
| Package manager | Pros | Cons |
|---|---|---|
| APT | Versatile with a lot of tools for different jobs (apt for general; apt-get for scripts; aptitude for interactive) |
A lot of tools with confusingly overlapping functionality; requires separate package cache updates |
| DNF | Straightforward and very simple to use | Less granular control and versatility than some other package managers |
| Pacman | Markedly faster than others; lightweight | Less intuitive command syntax; separate manager required for AUR |
| Zypper | Fast, robust, and efficient | Limited to SUSE distros; complex syntax for advanced uses |
| Portage | Highly customizable; compilation from source | Steep learning curve; slower at installing packages due to compilation time |
| Universal managers (Snapd, Flatpak) | Distro independent; sandboxed installations | Less customization; bloated packages due to portability requirements |
The APT Family
The APT package manager is default to Debian Linux and Debian-based distributions, such as Ubuntu Linux and Linux Mint. We have chosen the grouping “family” because there are various tools that make up the package management software in Debian-based distributions. Here is a quick overview:
- dpkg – this is the backend package manager that APT uses (dpkg is not technically part of APT), which handles the actual installation and removal of software. Typically, users never need to interact directly with dpkg
- APT – this is the middleware between the dpkg backend and frontend command-line tools like
aptandapt-get - apt – the frontend tool that users will typically use for installaton and removal of software packages
- apt-get – another frontend and older alternative to
apt, but one that is meant for scripts and system services to utilize - aptitude – another APT frontend tool which is more user friendly and interactive
The use of similar, overlapping names of package mangers that also overlap in functionality is why many users end up confused when trying to fully grasp the package management system of Debian or Ubuntu.
As an enduser, the only tool you really need to familiarize yourself with is apt – Notice the lowercase letters, meaning that we are referring to the command-line tool itself and not the APT library/middleware. Alternatively, you can also use aptitude, which is just a more modern replacement of apt. But, most documentation and users will typically stick with using the apt command.
DID YOU KNOW?
A lot of older documentation will refer to the apt-get command and instruct readers to use it. It should work fine, but, the modern, recommended way to install or manage software packages is with apt. More info: apt vs. apt-get
Updating package cache
Let’s first see how to update the package cache with the APT family. You will need to do this every time before updating or installing a package on the system. This is a process that is not required by most other package managers, but it only takes a moment and is not a big deal.
Updating the package cache just tells your system where to download the software from, and what version to install, since hosts and links are always changing. So, first, we will run this command:
$ sudo apt update
In aptitude, we would run:
$ sudo aptitude update
Installing packages
Now, we are ready to install the software by using the apt install command and the name of the software package. For example, to install vim:
$ sudo apt install vim
Or, to install the same package with aptitude:
$ sudo aptitude install vim
NOTE
These same commands can also be used to update an individual package. In other words, running sudo apt install vim will update the vim package if it has already been installed.
Updating packages
Next, let’s look at how to update currently installed packages with the APT family. Note that this method is used to update all packages currently on the system.
As always, update the package cache first:
$ sudo apt update
OR
$ sudo aptitude update
Then, run one of the following commands to update packages, without removing any installed packages:
$ sudo apt upgrade
OR
$ sudo aptitude safe-upgrade
Alternatively, if you want to allow apt to remove installed packages that are no longer needed, and/or if you want to update the kernel to the latest version, we change the upgrade command to:
$ sudo apt full-upgrade
OR
$ sudo aptitude full-upgrade
Searching for a package
An important function of APT is the ability to search for packages to install. It also allows us to see software that is currently installed.
The basic syntax for the apt command is:
$ apt search vim
This will list any packages that match your search term.
The syntax for the aptitude command is the same:
$ aptitude search vim
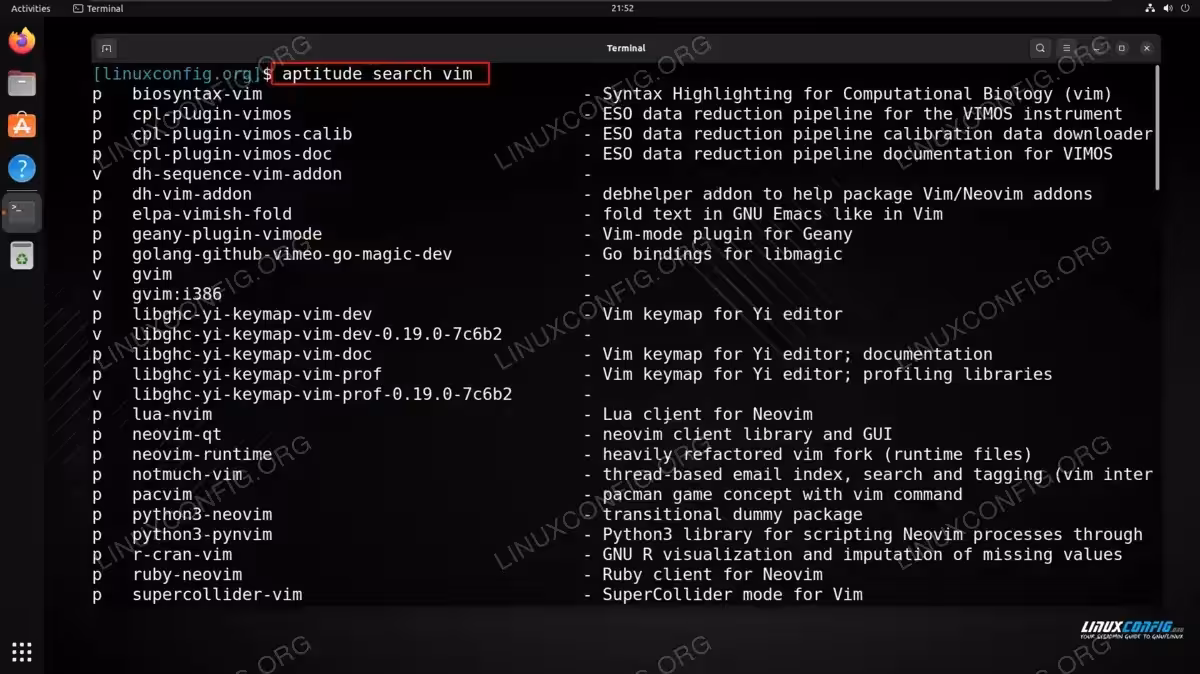
Being that aptitude is the more interactive and user-friendly alternative, the search output gives us some helpful info in the form of single characters next to each package which indicate:
p– not installedi– currently installedv– virtual package
We also get the name of each package that matches our search term, and a description of the software. Both APT tools will return this information.
Removing a package
To remove a package with apt or aptitude, there are two different commands: remove and purge. The remove option will uninstall the software but leave behind configuration files. This can be useful if you think that you might reinstall the program at a later time and do not want to lose the settings you had.
On the other hand, purge will uninstall the program and attempt to delete all extra files, such as configuration files that came with the software. Let’s take a look at both syntaxes:
To remove the package without touching config files:
$ sudo apt remove vim
OR
$ sudo aptitude remove vim
To remove the package along with its config files:
$ sudo apt purge vim
OR
$ sudo aptitude purge vim
Lastly, sometimes dependency packages need to be installed but then are no longer required; these are called orphaned dependencies. To remove these, we can use the following commands:
$ sudo apt autoremove
OR
$ sudo aptitude remove ~o
DNF
The dnf package manager supplanted yum on Red Hat based systems like Fedora, CentOS, Oracle Linux, Rocky Linux, AlmaLinux, etc. The yum command is still usable on many of these systems, but it is simply a symbolic link to the newer dnf command, which has introduced a lot of modern features.
What you will tend to notice about dnf is that it is very straightforward to use and does not have a lot of alternative commands or ways to utilize the tool. This will be appealing to users that want a streamlined experience, while others might feel that it is watered down and does not offer a lot of customization or unique ways to leverage the package manager.
Updating packages
Unlike apt, dnf will automatically refresh its package cache whenever a user interacts with the package manager, so there is no need to manually update it. To update all currently installed packages on the system, users can execute:
$ sudo dnf update
Installing packages
Installing packages with
dnf uses a straightforward syntax:
$ sudo dnf install neovim
Removing a package
To remove a package with fng:
$ sudo dnf remove neovim
Searching for a package
In case you do not know the name of the package you wish to install, we can use the search argument, followed by the keyword or search term of a package:
$ dnf search neovim
Pacman (and Pamac)
The pacman package manager is used on Arch Linux and its derivative distributions like Manjaro Linux. It is noticeably faster than many other package managers, and while it is simple to use, the syntax is less intuitive. It is a common favorite among Linux power users and those that crave flexibility and customization.
For those that find pacman difficult to use, Pamac is a graphical frontend for pacman, which is installed by default on Manjaro. It is a good alternative to pacman if you want something simpler to use, while still taking advantage of the power of pacman on the backend. Pamac can also be installed on Arch Linux.
Update all packages
You can update all installed packages, and thus the entire system (since Arch Linux is a rolling release), with the -Syu options:
$ sudo pacman -Syu
Here is what the options mean:
-S: synchronize your system’s packages with those in the official repo-y: download fresh package databases from the server-u: upgrade all installed packages
Install a package
To install a package with pacman, provide the -S option and the name of the package you wish to install:
$ sudo pacman -S vim
Remove a package
Supply the -R option to remove a package in pacman:
$ sudo pacman -R vim
To remove all unused dependencies along with the package you wish to uninstall, include the
-Rns options:
$ sudo pacman -Rns vim
Search for a package
To search for a package, use the -Ss options, followed by your search term:
$ sudo pacman -Ss vim
Pamac
Pacman is the user friendly alternative with a graphical interface. It can be used to search for, install, update, and remove packages as needed.
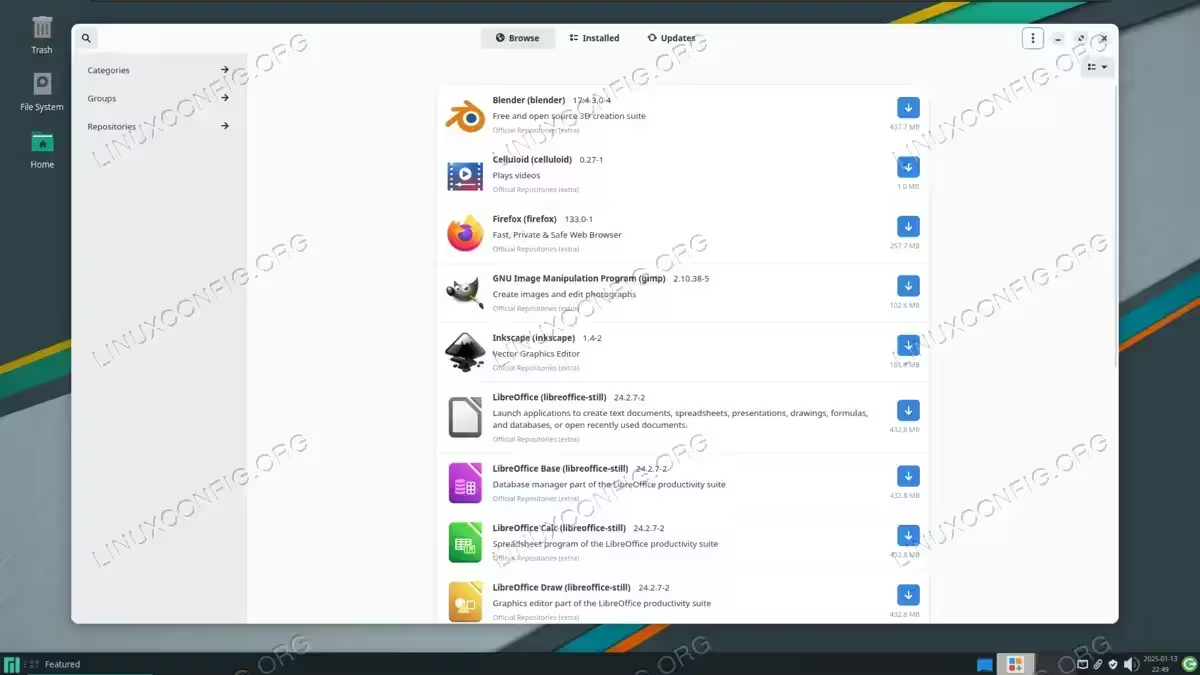
If you find the pacman a little difficult to use because of the unintuitive syntax, the pamac command offers simpler alternatives. For example, to install a package with pamac:
$ sudo pamac install vim
AUR Helpers
The AUR (Arch User Repository) is an online catalog of software that has been curated by the Arch Linux community. If a certain software package is not natively available for installation via pacman, there is often a high chance that the package you seek will have been uploaded by someone to the AUR.
The AUR is one of the most appealing parts of Arch Linux, since it drastically increases the amount of software that is available to install. Since pacman can’t interact with the AUR, you will need what is called an “AUR helper,” essentially a separate package manager that uses the AUR as its software repository.
One such AUR helper is Pamac, as we covered above. Another popular choice is yay, whose syntax we will cover below. You will notice that the command options are the same as those for pacman.
Install a package
To install a package from the AUR with yay, use the -S option. For example, let’s install Spotify:
$ yay -S spotify
To update all of the AUR packages on your system:
$ yay -Syu
Search for a package
To search the AUR for a package, you can always visit the official AUR website and find what you are looking for. Or, to search for an AUR package in yay, use the -Ss options:
$ yay -Ss [search term]
Remove a package
To remove an AUR package with yay, provide the -R option:
$ yay -R spotify
To remove an AUR package and any unused dependencies, add the -Rns options:
$ yay -Rns spotify
Check installed packages
If you forget whether a package came from AUR or from pacman, you can use yay to check which AUR packages you currently have installed on your system:
$ yay -Qm
Zypper
The zypper package manager is the default for openSUSE and SUSE Linux Enterprise. It is easy to use and offers both a command line interface and graphical frontend, so you can use whichever is more convenient.
Update cache and packages
To update the package cache and all installed packages, we run the following commands:
$ sudo zypper refresh
$ sudo zypper update
Install a package
To install a package with zypper, run:
$ sudo zypper install vim
Remove a package
To remove a package with zypper, supply the remove argument:
$ sudo zypper remove vim
Search for a package
Search for a package with zypper:
$ zypper search [search term]
Portage
The Gentoo Linux distribution uses Portage as its package manager. Portage is the most unique package manager on this list, because it compiles packages from source code. For those firmly entrenched in Linux that want to roll up their sleeves and get the most customization out of their system, they can learn to use Gentoo and Portage to have granular control over all aspects of their Linux system. Mastering Gentoo is a long journey, but one of the first things you will need to grasp is using Portage.
Portage gives users the ability to fine tune the compilation process of new packages with USE flags. That way, users can choose exactly what features or components to compile into a program that is being installed.
Syncing Portage tree
You will notice some of the terminology is different here. But syncing the Portage tree is the equivalent of updating the package cache in other mainstream package managers. To do that, we run:
$ sudo emerge --sync
Install a package
To install a package, such as vim, with Portage:
$ sudo emerge vim
The only thing different here is that the process will take longer than other package managers, since the code will be compiled from source, rather than installing already compiled binary files.
Removing a package
To remove a package with Portage, we execute:
$ sudo emerge --unmerge vim
Search for a package
We can use Portage to search for package by using the --search option:
$ emerge --search [search term]
Universal Package Managers – Snap, Flatpak, etc.
Package management systems like Snapd, Flatpak, and AppImage are frequently mentioned and compared. All three of them are distribution independent package managers, meaning that they can be used on any Linux system regardless of what distribution you are running.
Universal package managers offer the advantage of always using the same syntax, regardless of what distribution you are on. They also ensure that packages will behave similarly across all systems. These are nice features, but making packages portable across all systems means that certain customizations are lost in the process.
Snap commands
Installing a package:
$ sudo snap install spotify
Removing a package:
$ sudo snap remove spotify
Update all Snap packages:
$ sudo snap refresh
Flatpak commands
Flatpak can utilize different software repositories, which are called “remotes” in Flatpak jargon. Flathub is the most popular repository, so we can add it to our system by running:
$ sudo flatpak remote-add --if-not-exists flathub https://flathub.org/repo/flathub.flatpakrepo
Then, to install a program like GIMP, we would run:
$ sudo flatpak install flathub org.gimp.GIMP
To search the remote for software, we use this syntax:
$ flatpak search gimp
You can update all of your installed applications with:
$ sudo flatpak update
Lastly, to remove a package with Flatpak, execute:
$ sudo flatpak uninstall org.gimp.GIMP
Closing Thoughts
In this tutorial, we learned about the pros and cons of various Linux system package managers. We also saw the syntaxes used to interact with the package managers in order to install packages, remove them, and perform other functions. The package management system is a core part of every Linux distribution, and since they all have unique features and advantages, they can play a big role in choosing the Linux distro which best suits a user.