AppImage provides a convenient way to distribute and run desktop software on Linux without the need for installation or root privileges. This format packages applications in a way that allows them to run on various Linux distributions. Ubuntu supports running AppImages, providing users with a vast array of software options not necessarily available in the official repositories.
- How to install FUSE prerequisite for AppImage support
- How to download and run AppImages using GUI methods
- How to use command line methods for AppImage management
- How to create an application launcher for an AppImage
Software Requirements
| Category | Requirements, Conventions or Software Version Used |
|---|---|
| System | Ubuntu 20.04 or higher (all versions supported) |
| Software | Any AppImage file, FUSE library (libfuse2) |
| Other | Internet connection for downloading AppImages |
| Conventions | # – requires given linux commands to be executed with root privileges either directly as a root user or by use of sudo command$ – requires given linux commands to be executed as a regular non-privileged user |
sudo apt install libfuse2, then download your AppImage file, make it executable by right-clicking and enabling “Execute as Program” in Properties, and finally double-click to run it.
| Step | Action |
|---|---|
| 1. Install FUSE | sudo apt install libfuse2 |
| 2. Download AppImage | Download from software website to Downloads folder |
| 3. Make Executable | Right-click → Properties → Enable “Executable as Program” |
| 4. Run AppImage | Double-click the AppImage file or use ./filename.AppImage |
Installing FUSE Prerequisite
Before running AppImages on Ubuntu, you need to ensure FUSE (Filesystem in Userspace) is installed on your system. This library allows AppImages to function properly without requiring root access or system-wide installation.
To install FUSE, open a terminal and run:
$ sudo apt install libfuse2
This command installs the FUSE library. If FUSE is already installed on your system, this command will simply confirm its presence and make no changes. Therefore, running this command is safe even if you’re unsure whether FUSE is already present on your Ubuntu installation.
Using AppImage: GUI Method
The graphical user interface method is the most straightforward way to work with AppImages on Ubuntu. This approach requires no terminal commands and works entirely through your file manager and desktop environment.
Download the AppImage
Begin by downloading the AppImage file for the software you wish to use. Visit the official website of the application or a trusted repository that provides AppImage files. For this example, we’ll use the Electrum Bitcoin wallet, but you can download any AppImage application that suits your needs.
Download the AppImage file to your preferred location, typically the Downloads folder. The file will have a .AppImage extension and may include version information in its filename, such as electrum-4.6.2-x86_64.AppImage.
BEST STORAGE LOCATION
While you can run AppImages directly from your Downloads folder, it’s recommended to create a dedicated directory for organizing your AppImage files. Consider creating an Applications or AppImages folder in your home directory (~/Applications) to keep them organized and prevent accidental deletion during Downloads cleanup. Unlike traditional software installations, AppImages are self-contained and can be moved to any location without affecting functionality.
Make the AppImage Executable
Once downloaded, navigate to the location where you saved the AppImage file using your file manager. By default, AppImage files are not executable, so you need to change their permissions.
Right-click on the AppImage file and select Properties from the context menu. In the Properties window, navigate to the Permissions tab. Look for the option labeled Execute or Allow executing file as a program and enable it by checking the box or toggling the switch.
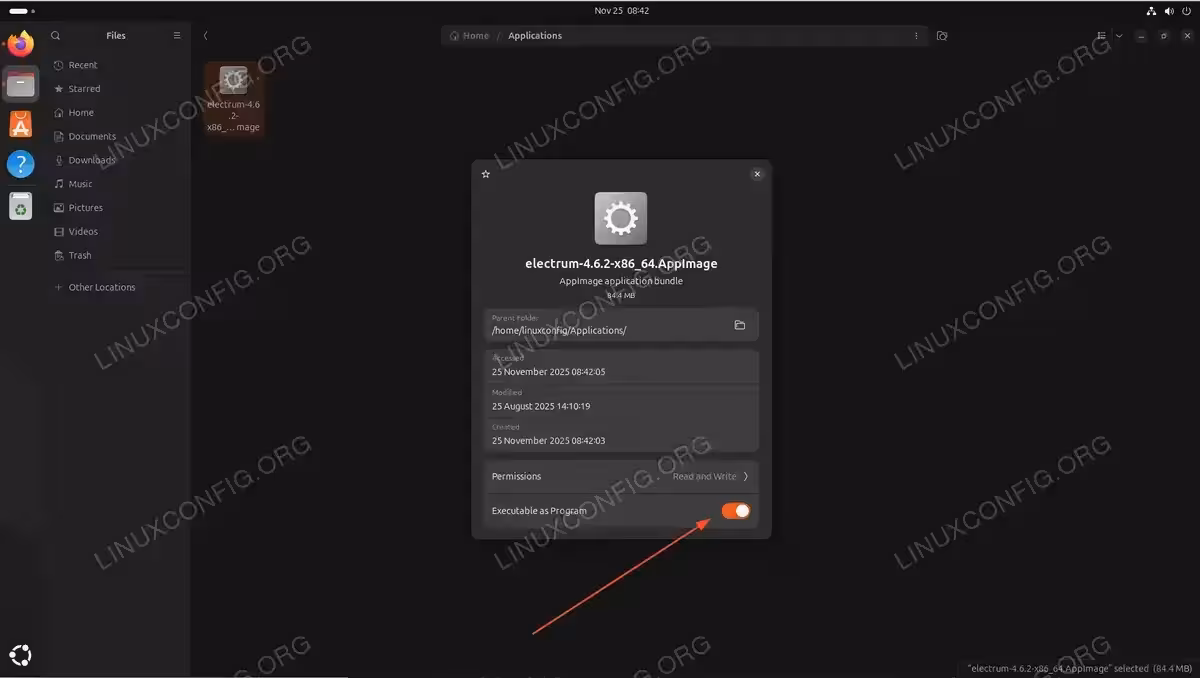
After enabling the executable permission, close the Properties window.
Run the AppImage
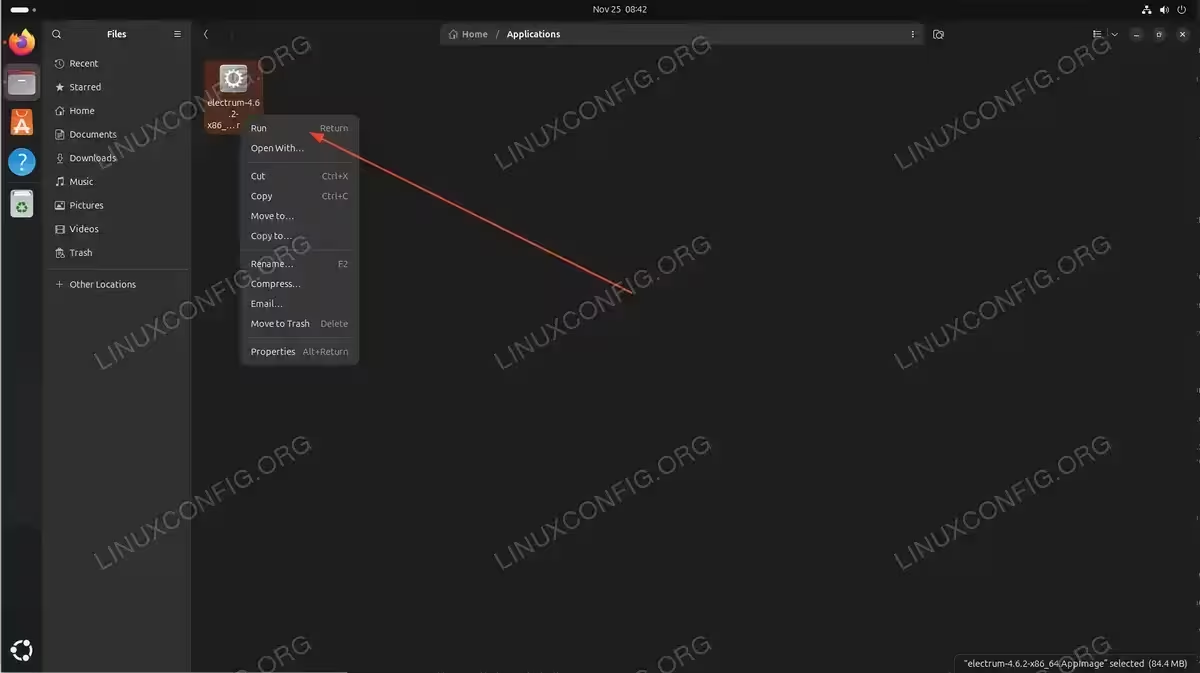
With the executable permission set, you can now run the AppImage. Simply double-click on the AppImage file in your file manager. The application will launch directly without any installation process.
Alternatively, you can right-click on the AppImage file and select Run from the context menu if your file manager provides this option.
The application will start running, and you can use it just like any other installed software on your system.
Using AppImage: Command Line Method
For users who prefer working with the terminal or need to automate AppImage management, the command line method provides a powerful alternative to the GUI approach.
Download the AppImage via Terminal
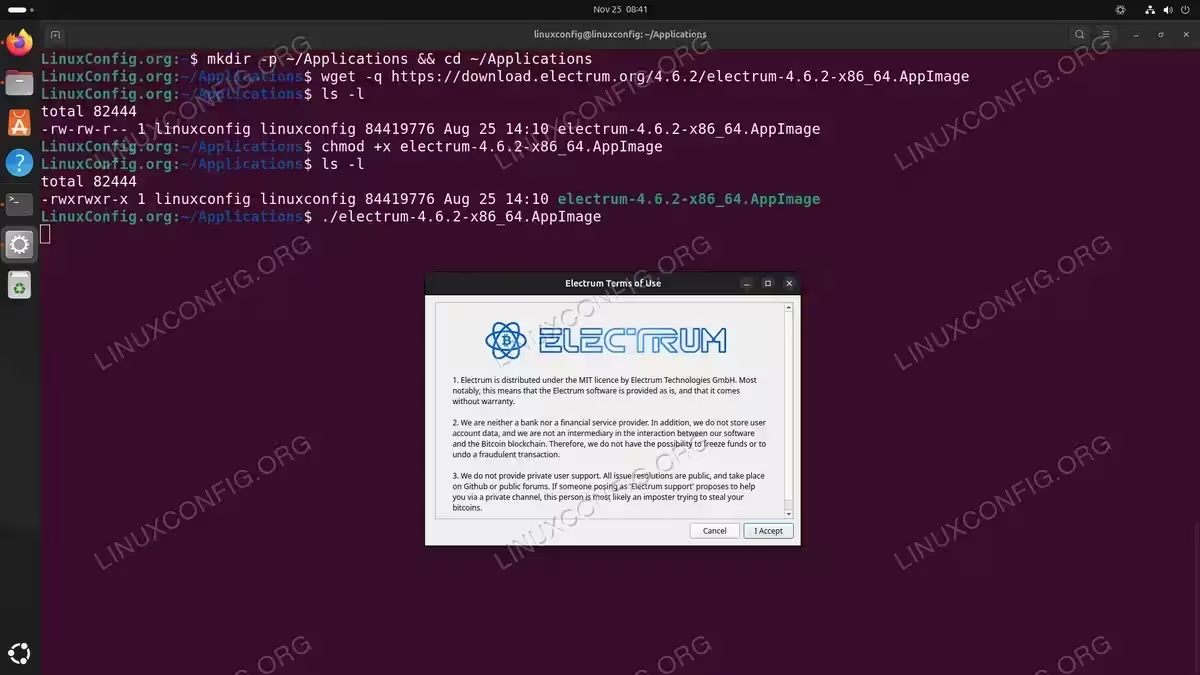
First, create a directory to store your AppImage files and navigate to it. While you can store AppImages anywhere, keeping them organized in a dedicated directory is recommended:
$ mkdir -p ~/Applications && cd ~/Applications
Download the AppImage using wget or curl. For this example, we’ll download the Electrum Bitcoin wallet:
$ wget https://download.electrum.org/4.6.2/electrum-4.6.2-x86_64.AppImage
Replace the URL with the download link for your desired AppImage application. The file will be downloaded to your current directory.
Make the AppImage Executable via Terminal
After downloading, grant execution permissions to the AppImage file using the chmod command:
$ chmod +x electrum-4.6.2-x86_64.AppImage
Replace electrum-4.6.2-x86_64.AppImage with the actual filename of your downloaded AppImage. This command makes the file executable without requiring root privileges.
Run the AppImage from Terminal
Execute the AppImage by running it directly from the terminal:
$ ./electrum-4.6.2-x86_64.AppImage
The application will launch and run in the foreground. If you want to run it in the background and continue using the terminal, append an ampersand to the command:
$ ./electrum-4.6.2-x86_64.AppImage &
Creating a Desktop Launcher (Optional)
If you plan to use an AppImage application regularly, you may want to integrate it into your system’s application menu for easier access. This involves creating a desktop entry file that tells your desktop environment how to launch the application.
To create a desktop launcher for your AppImage, you can manually create a .desktop file in the ~/.local/share/applications/ directory. For detailed instructions on creating desktop shortcuts and launchers on Ubuntu, refer to our comprehensive guide on creating desktop launchers.
Once created, the AppImage will appear in your application menu alongside other installed software, making it easy to launch without navigating to the file location each time.
Troubleshooting Common Issues
FUSE Library Missing Error
If you encounter the following error when trying to run an AppImage:
dlopen(): error loading libfuse.so.2

AppImages require FUSE to run.
You might still be able to extract the contents of this AppImage
if you run it with the --appimage-extract option.
See https://github.com/AppImage/AppImageKit/wiki/FUSE
for more information
This indicates that FUSE is not installed on your system. Install it using:
$ sudo apt install libfuse2
After installation completes, try running the AppImage again. The error should be resolved, and the application will launch normally.
Permission Denied Error
If you receive a “Permission denied” error when attempting to run an AppImage, it means the file is not marked as executable. Follow the steps in either the GUI or CLI method sections above to make the file executable before running it again.
Conclusion
AppImages provide a versatile and user-friendly way to run software on Ubuntu without traditional installation procedures. Whether you prefer the convenience of the graphical interface or the efficiency of the command line, both methods allow you to download, configure, and run AppImage applications with minimal effort. By following the steps outlined in this guide, you can expand your software options beyond the official Ubuntu repositories while maintaining system stability and organization. For more information about AppImage technology and advanced usage options, visit the official AppImage project website.
Frequently Asked Questions
- Do AppImages work on all Ubuntu versions? Yes, AppImages are designed to be distribution-agnostic and work across different Ubuntu versions, from older releases to the latest. As long as your system meets the basic requirements (typically having FUSE installed), AppImages will run regardless of whether you’re using Ubuntu 18.04, 20.04, 22.04, 24.04, or newer versions. This compatibility makes AppImages particularly useful when software developers don’t provide version-specific packages for your Ubuntu release.
- Where should I store AppImage files on my system? You can store AppImage files anywhere on your system, but it’s recommended to keep them organized in a dedicated directory. Common locations include
~/Applications,~/AppImages, or even your~/Downloadsfolder. Unlike traditional software installations, AppImages don’t install files throughout your system, so the location you choose is purely for organizational purposes. Choose a location that’s easy to remember and won’t be accidentally deleted during system cleanup. - How do I update an AppImage application? AppImages don’t have automatic update mechanisms built into the format itself. To update an AppImage, you need to download the newer version from the software’s official website or repository, then replace the old AppImage file with the new one. Some AppImage applications include built-in update checkers that will notify you when new versions are available and may even automate the download process, but this depends on how the application developer implemented updates.
- Can I run multiple AppImage applications simultaneously? Yes, you can run as many AppImage applications simultaneously as your system resources allow. Each AppImage runs independently in its own isolated environment, so running multiple AppImages is no different from running multiple traditional applications. However, keep in mind that each application consumes system resources (CPU, RAM, disk I/O), so performance depends on your hardware capabilities and the resource requirements of the applications you’re running.
- Why does my AppImage not appear in the application menu? By default, AppImages don’t automatically integrate into your system’s application menu because they’re designed to be portable and run without installation. To make an AppImage appear in your application menu, you need to create a desktop entry file manually. This involves creating a
.desktopfile in~/.local/share/applications/with information about the application, including its name, icon, and the path to the AppImage file. Refer to our guide on creating desktop launchers for detailed instructions on this process.