The purpose of this tutorial is to show how to burn an ISO file to a USB drive. USB drives have recently overtaken CDs and DVDs as the primary media of physically distributed software. It is now a common task for system administrators and normal users to install operating systems and software via USB.
When you download a Linux distro, chances are that it will come as an ISO file and you will need to burn it to USB in order to install Linux on a computer. This allows you to boot directly into the Linux installer. Similarly, we can also put other software on the USB drive, assuming that the installer is distributed as an ISO file.
In this tutorial, you will see the step by step instructions to burn an ISO file to a USB drive on a Linux system. We will cover the steps for both command line and GUI on major Linux distros.
In this tutorial you will learn:
- How to burn ISO to USB from Linux command line
- How to install Gnome Multi Writer
- How to burn ISO to USB from Linux GUI

| Category | Requirements, Conventions or Software Version Used |
|---|---|
| System | Any Linux distro |
| Software | dd, ddrescue, GNOME Multi Writer |
| Other | Privileged access to your Linux system as root or via the sudo command. |
| Conventions |
# – requires given linux commands to be executed with root privileges either directly as a root user or by use of sudo command$ – requires given linux commands to be executed as a regular non-privileged user |
sudo fdisk -l, then use the dd command to write the ISO file to the USB drive. Alternatively, use GNOME Multi Writer for a graphical interface approach.
| Step | Command/Action |
|---|---|
| 1. Identify USB device | sudo fdisk -l |
| 2. Burn ISO to USB | sudo dd bs=4M if=/path/to/file.iso of=/dev/sdX status=progress oflag=sync |
| 3. Wait for completion | Monitor progress until finished |
Burn ISO to USB from Linux command line
DATA LOSS WARNING
When you write ISO to USB on Linux using either dd or ddrescue, all existing data on the USB drive will be permanently erased. Make sure to backup any important files before proceeding with these commands.
The only two things you will need in order to get started are an ISO file and a USB stick. In case you are planning on installing Linux and do not already have a Linux ISO handy, see our Linux download page.
Method 1: Using dd
- Make sure your USB drive is plugged in. Then, open a terminal and use the following command to see what device name Linux has given to your USB stick:
$ sudo fdisk -l
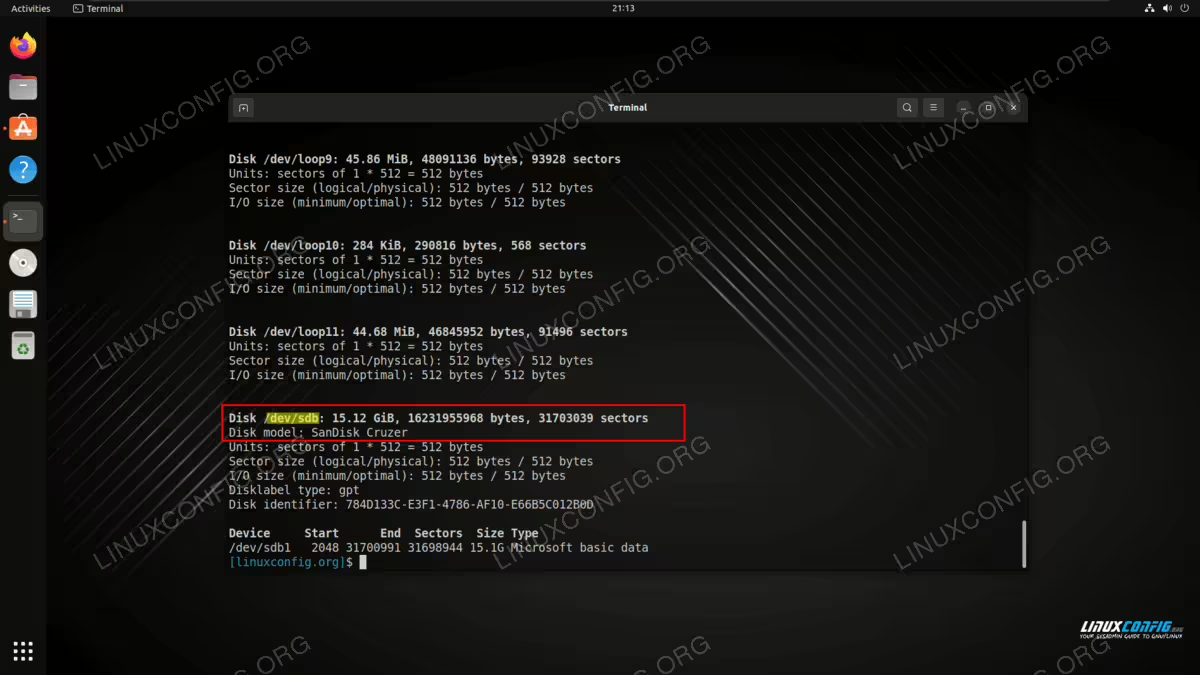
fdisk gives us the label of the USB stick In the screenshot above, you can see that our flash drive’s device is labelled
/dev/sdb. Take note of whatever yours is labelled (it should be very similar, but maybe contain a different letter); we’ll need this in a moment. - Now, we can use the following dd command to burn the ISO file to our USB stick:
$ sudo dd bs=4M if=/path/to/file.iso of=/dev/sdX status=progress oflag=sync
Of course, replace
/path/to/file.isowith the path to your ISO file, and replace/dev/sdXwith the name of your device. ddwill now copy the contents of the ISO file over to your USB stick. When it’s done, you’re ready to use the USB drive as Linux installation media or a software installer.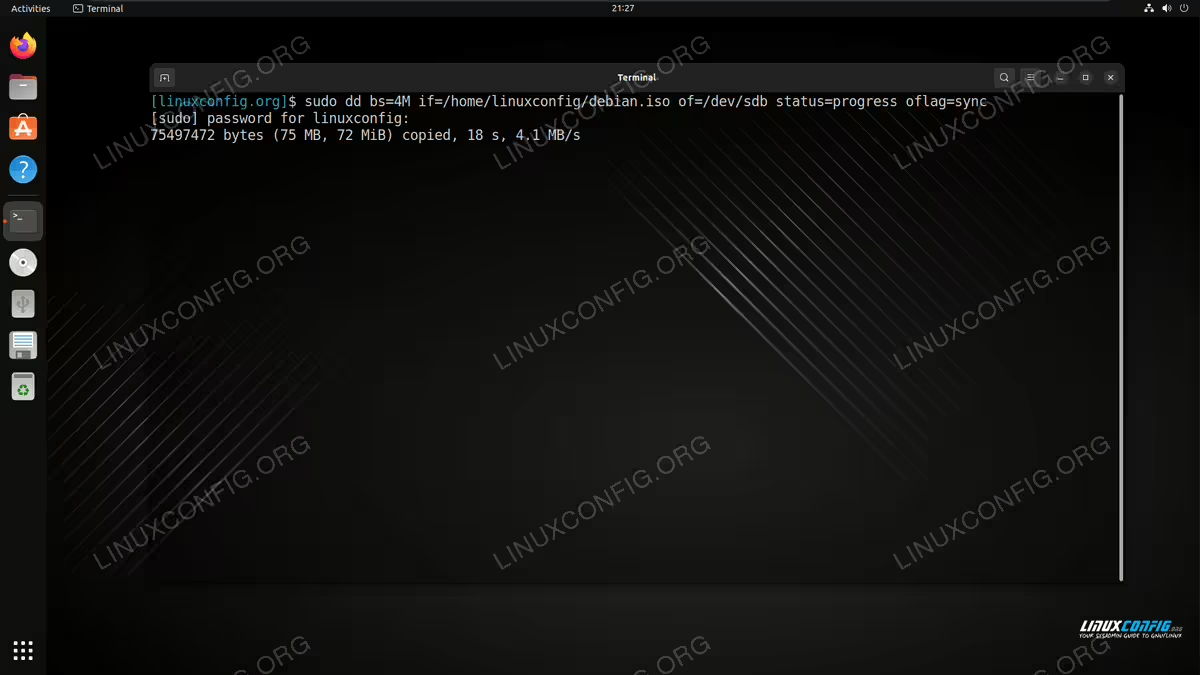
The dd command being used to copy ISO contents to USB stick
Method 2: Using ddrescue
The ddrescue command provides a more user-friendly alternative to dd, with better progress indication and simpler syntax.
- Make sure your USB drive is plugged in and identify it using the same
fdiskcommand as before:$ sudo fdisk -l
Take note of your USB device name (e.g.,
/dev/sdb). - Use the following ddrescue command to burn the ISO file to your USB stick:
$ sudo ddrescue image.iso /dev/sdX -D --force
Replace
image.isowith the path to your ISO file, and replace/dev/sdXwith your device name. The-Dflag enables direct disk access for better performance, and--forceallows overwriting the device without confirmation. ddrescuewill display real-time progress as it copies the ISO contents to your USB stick. When completed, your USB drive is ready to use as bootable installation media.
Burn ISO to USB from Linux GUI
To burn an ISO to USB via Linux’s graphical interface, there are a plethora of tools available in your operating system’s software manager which would be suitable for the job. The one we will be using is called GNOME Multi Writer and can be obtained on all major Linux distros.
You can use the appropriate command below to install rsync with your system’s package manager.
To install GNOME Multi Writer on Ubuntu, Debian, and Linux Mint:
$ sudo apt install gnome-multi-writer
To install GNOME Multi Writer on Fedora, CentOS, AlmaLinux, and Red Hat:
$ sudo dnf install gnome-multi-writer
To install GNOME Multi Writer on Arch Linux and Manjaro:
$ sudo pacman -S gnome-multi-writer
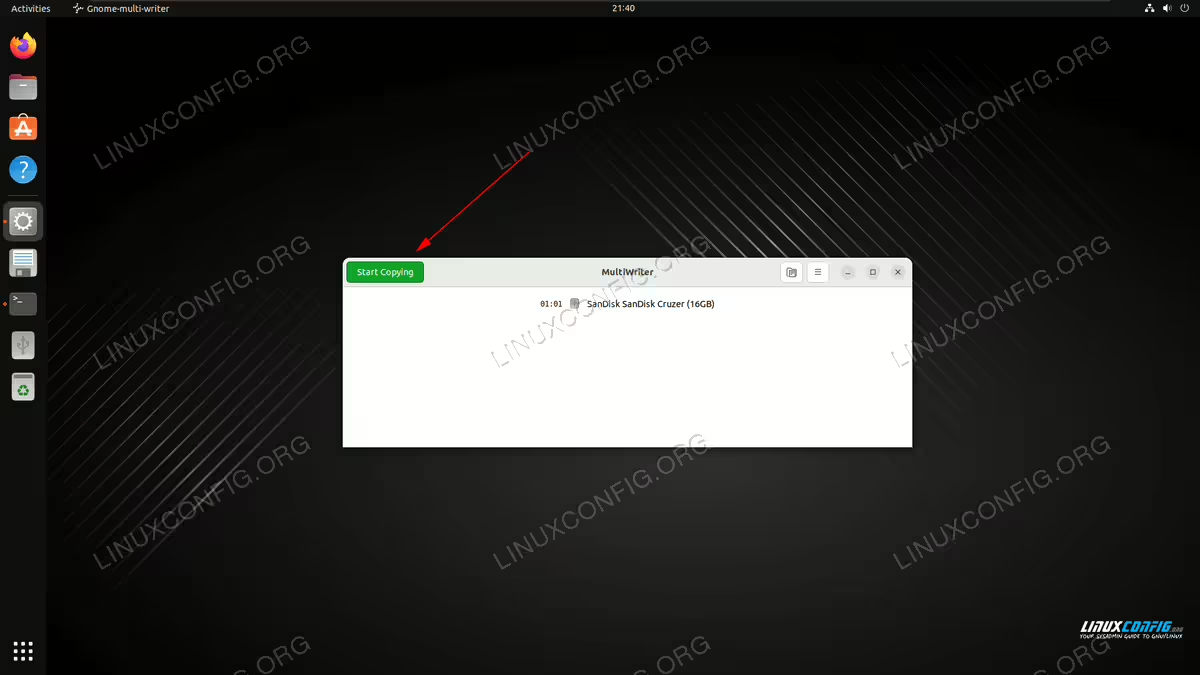
- Plug in your USB drive and open GNOME Multi Writer. Start by clicking on the “Start Copying” button.
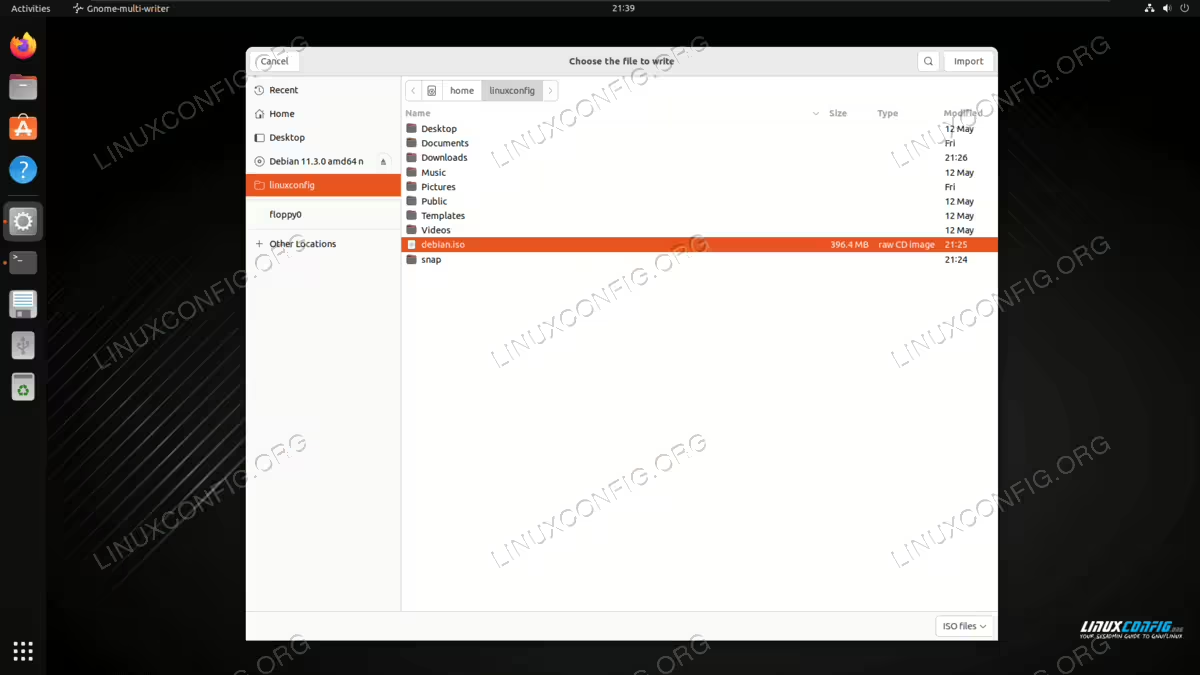
Click the button to get started - Next, locate your ISO file and import it.
Import the ISO file you wish to burn - Finally, let GNOME Multi Writer burn your ISO file to the USB.
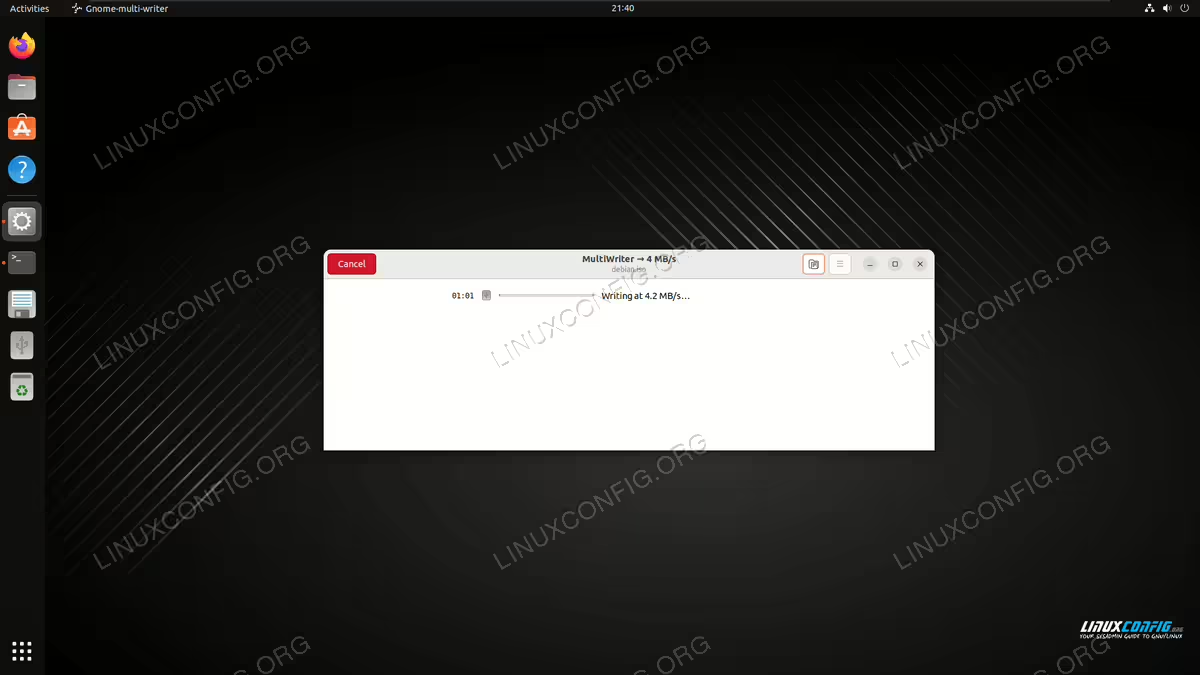
Gnome Multi Writer showing the progress of the burn process
Closing Thoughts
In this tutorial, we saw how to burn an ISO file to a USB drive on a Linux system. With most computers no longer coming with a disc drive, it is important that users learn how to use USB drives for installation of their ISO files. You now saw how to do this via command line and GUI and can choose whichever method is easiest for you. For more information about creating bootable USB drives, consult the official GNU dd documentation. Also feel free to use any USB burner GUI, as there are many options available.
Frequently Asked Questions
- Will burning an ISO to USB erase all data on the drive?Yes, the dd command will completely overwrite all existing data on the USB drive. Before proceeding, make sure to back up any important files from the USB drive. The process is irreversible, so double-check that you’ve specified the correct device name to avoid accidentally overwriting the wrong drive.
- Why does my USB drive show less capacity after burning an ISO?After burning an ISO file to a USB drive, the drive may appear to have reduced capacity because it now contains the ISO’s partition structure. To restore full capacity, you need to reformat the USB drive. On Linux, you can use tools like
gpartedor commands likefdiskandmkfsto delete existing partitions and create a new filesystem. - Can I use the same USB drive for multiple ISO files?Standard bootable USB drives created with dd can only hold one ISO file at a time. However, you can create multiboot USB drives using specialized tools like Ventoy or GRUB2, which allow you to store multiple ISO files on a single USB drive and select which one to boot at startup. This requires a different setup process than the dd method described in this tutorial.
- What should I do if dd command shows “Permission denied” error?The “Permission denied” error typically occurs when you don’t have sufficient privileges to write to the USB device. Make sure you’re using
sudobefore the dd command. Additionally, verify that the USB drive isn’t mounted. You can unmount it using:$ sudo umount /dev/sdX
Replace
/dev/sdXwith your actual device name. After unmounting, try the dd command again. - How long does it take to burn an ISO to USB?The time required depends on several factors: the size of your ISO file, the write speed of your USB drive, and your USB port version (USB 2.0, 3.0, or 3.1). A typical 4GB Linux distribution ISO on a USB 3.0 drive usually takes 5-10 minutes. Larger ISO files or slower USB 2.0 drives can take considerably longer. The
status=progressparameter in the dd command shows real-time progress so you can monitor the operation.