The command line remains the most powerful interface for Linux users, but traditional Unix tools like ls, cat, grep, and find are showing their age. A new generation of CLI tools offers significant improvements in speed, usability, and features. In this tutorial, we explore 10 modern alternatives that will transform your daily workflow and boost your productivity.
Table of Contents
In this tutorial you will learn:
- Modern alternatives to traditional Unix commands
- How to search faster with ripgrep and fd
- Enhanced file viewing with bat and eza
- Smart directory navigation with zoxide
- Interactive filtering with fzf
- Better system monitoring and disk analysis

Software Requirements
| Category | Requirements, Conventions or Software Version Used |
|---|---|
| System | Any modern Linux distribution |
| Software | ripgrep, fd, bat, eza, zoxide, fzf, btop, dust, tldr, delta |
| Other | Root privileges for system-wide installation |
| Conventions | # – requires given linux commands to be executed with root privileges either directly as a root user or by use of sudo command$ – requires given linux commands to be executed as a regular non-privileged user |
| Traditional Tool | Modern Alternative |
|---|---|
| grep | ripgrep (rg) |
| find | fd |
| cat | bat |
| ls | eza |
PRO TIP
Create aliases in your ~/.bashrc to replace traditional commands with modern alternatives: alias grep='rg', alias find='fdfind', alias cat='batcat', alias ls='eza'. This lets you use familiar command names while benefiting from the modern tools.
Search Text with ripgrep
ripgrep is a line-oriented search tool that recursively searches directories for a regex pattern. It’s significantly faster than grep and respects your .gitignore files by default, making it ideal for searching through code repositories.
ripgrep offers several advantages over traditional grep. It automatically skips hidden files, binary files, and files listed in .gitignore. The tool provides smart case sensitivity, searching case-insensitively when your pattern is all lowercase, and case-sensitively otherwise. Most importantly, it’s blazingly fast, often 10-100x faster than grep in real-world usage.
- Search for a pattern recursively: Search the current directory and all subdirectories for a text pattern.
$ cd /etc
$ rg config
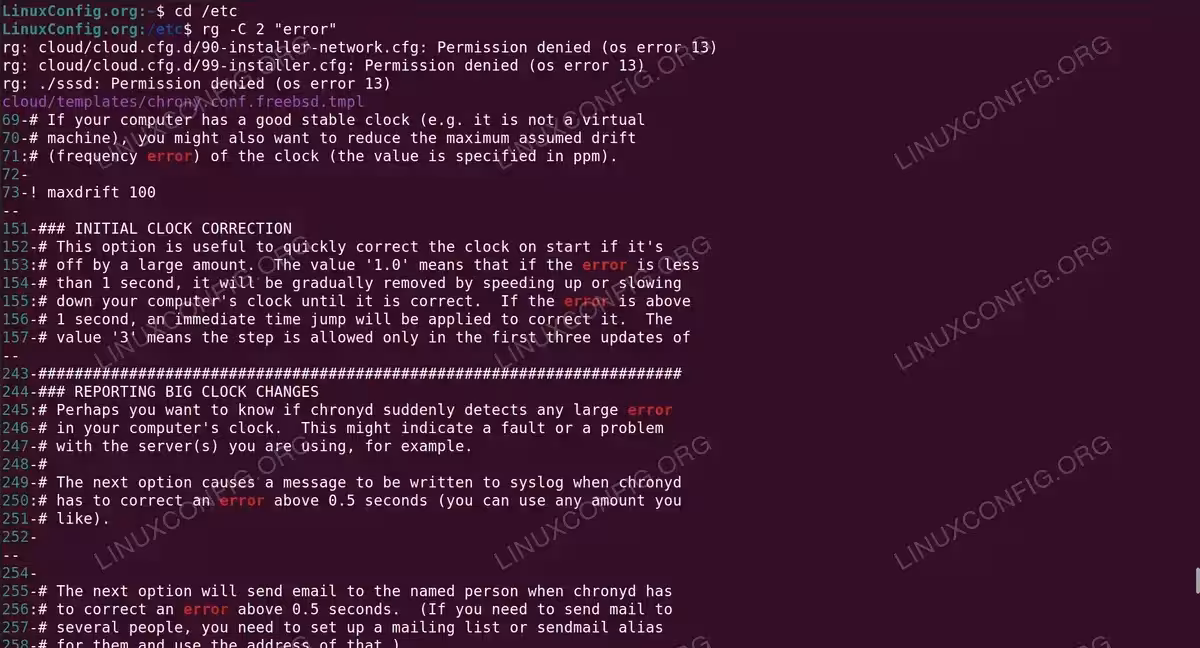
- Search with context lines: Show 2 lines before and after each match for better understanding of the results.
$ rg -C 2 "error"
- Search specific file types: Limit the search to only Python files using the type filter.
$ sudo rg --type py "import"
PRO TIP
Create an alias alias grep='rg' in your shell config to use ripgrep as your default search tool while maintaining muscle memory.
Find Files with fd
fd is a simple, fast, and user-friendly alternative to find. It features sensible defaults, colorized output, and an intuitive syntax that doesn’t require you to remember complex flag combinations.
fd uses smart case sensitivity by default, ignores hidden directories and files, and respects .gitignore. The syntax is straightforward, allowing you to just type what you’re looking for without needing flags for basic searches. Output is colorized for easy reading.
UBUNTU NOTE
On Ubuntu/Debian, the binary is named fdfind due to a naming conflict. Create an alias with alias fd='fdfind' for convenience.
- Find recently modified files: Locate all files that were modified within the last hour.
$ fdfind --changed-within 1h
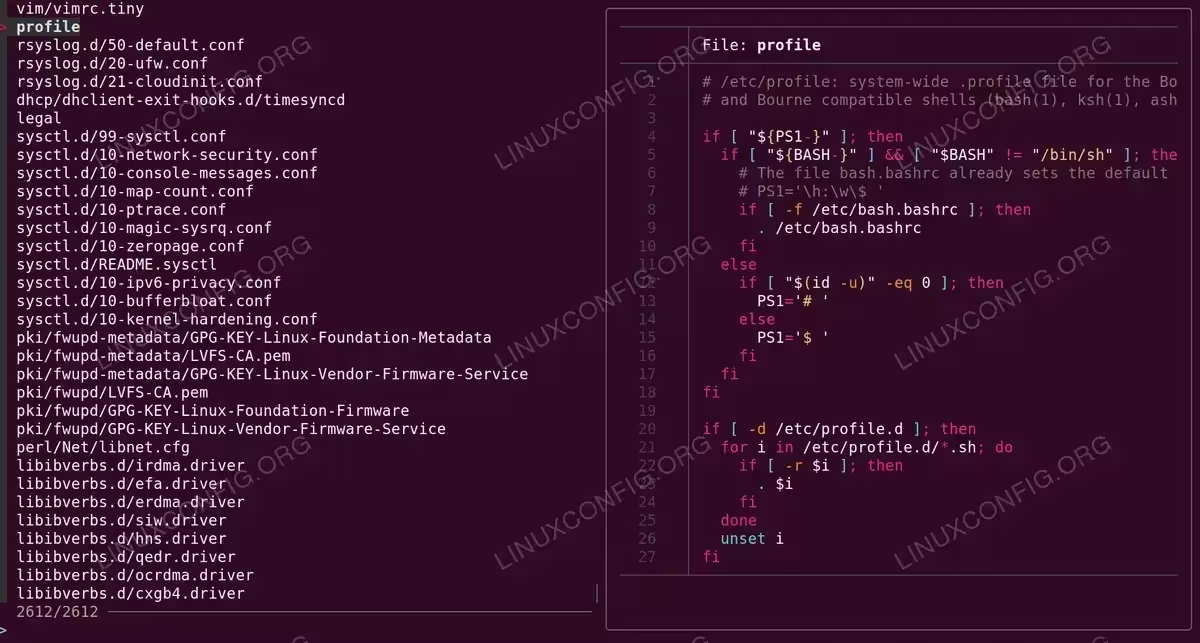
- Find files by extension: Search for all configuration files with the .conf extension.
$ fdfind -e conf . /etc
- Find files by name pattern: Locate files containing “config” in their name.
$ fdfind config /etc

Using fd to find recently modified files and .conf configuration files in /etc
View Files with bat
bat is a cat clone with syntax highlighting, Git integration, and automatic paging. It makes reading files in the terminal a much more pleasant experience, especially for configuration files and source code.
bat provides automatic syntax highlighting for over 200 programming and markup languages. It shows Git modifications in the margin, displays line numbers by default, and automatically pipes long output through a pager. The tool also shows non-printable characters when needed.
UBUNTU NOTE
On Ubuntu/Debian, the binary is named batcat. Create an alias with alias bat='batcat' for convenience.
- View a file with syntax highlighting: Display a file with automatic syntax detection, line numbers, and formatting.
$ batcat /etc/hosts
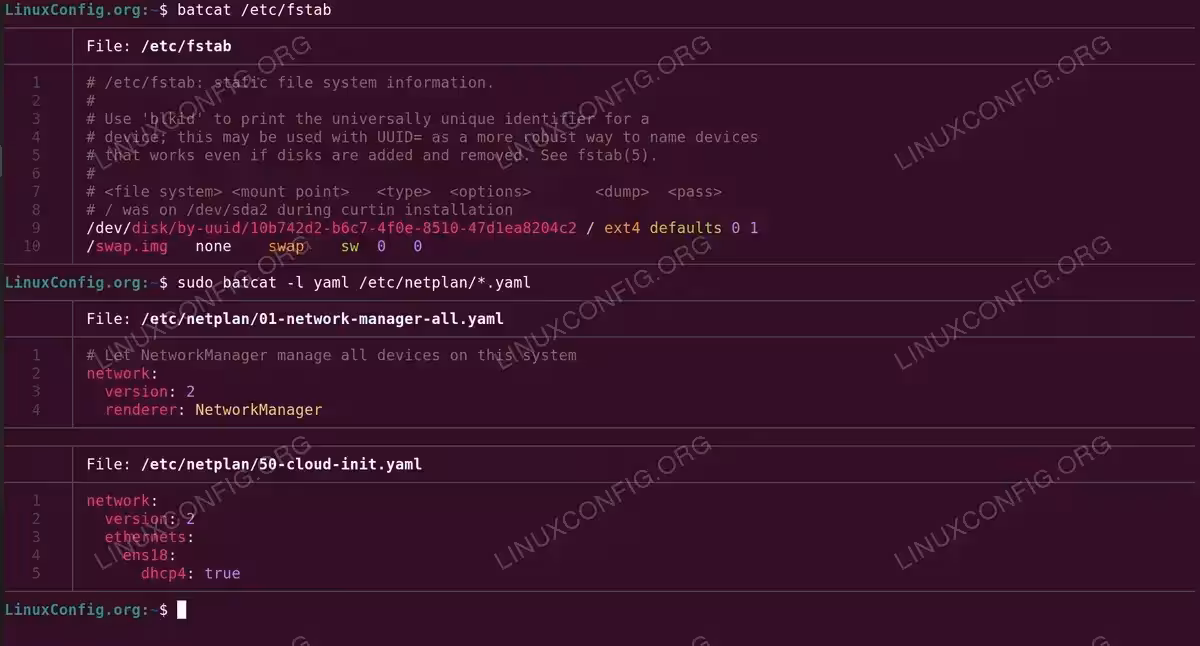
- Specify language for highlighting: Force a specific language syntax when viewing files.
$ sudo batcat -l yaml /etc/netplan/*.yaml
- Pipe diff output through bat: Enhance diff output with syntax highlighting and line numbers.
$ diff /tmp/file1 /tmp/file2 | batcat
NOTE
The --diff flag in bat is for highlighting Git diff context, not for comparing two arbitrary files. Use diff file1 file2 | bat to compare files.
List Directories with eza
eza (fork of the now-unmaintained exa) is a modern replacement for ls with more features and better defaults. It provides colors, icons, Git status integration, and tree views out of the box.
eza colorizes output by file type and permissions, can display file icons (with appropriate font support), shows Git status for files in repositories, and supports tree view for visualizing directory structures. The human-readable file sizes are displayed by default.
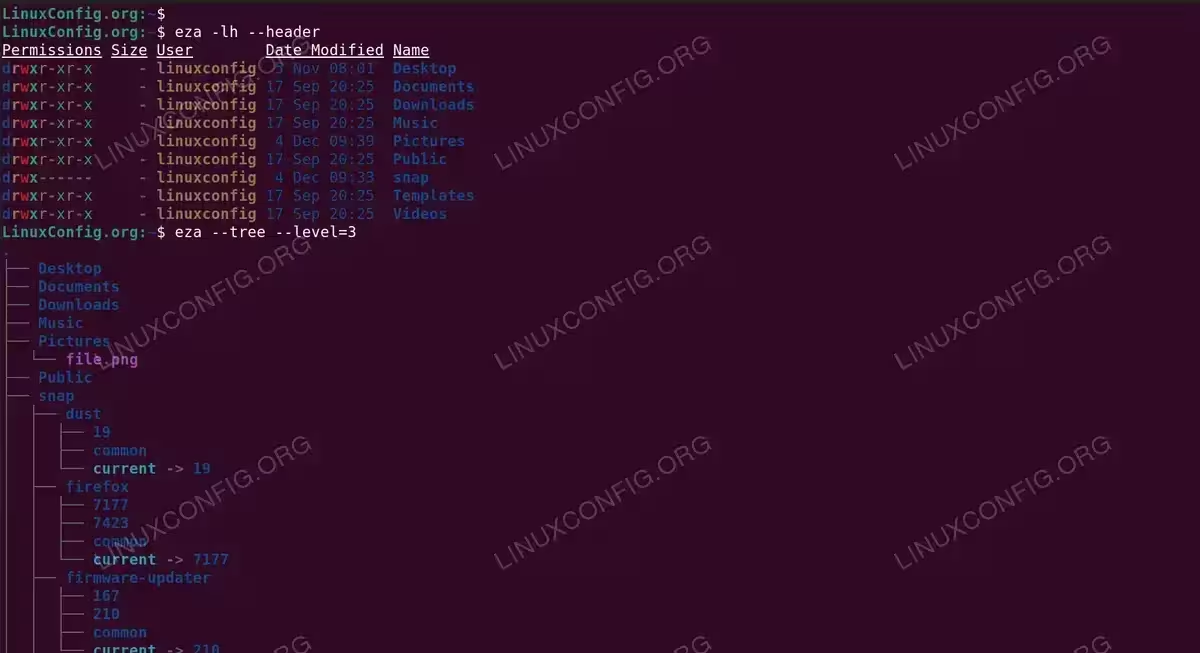
- Long format with headers: Display detailed file information with column headers and human-readable sizes.
$ eza -lh --header
- Tree view with depth limit: Show directory structure as a tree, limited to 3 levels deep.
$ eza --tree --level=3 | head
- Show Git status: Display file listings with Git status indicators for each file.
$ eza --git -l
The Git status column shows two characters: the first for staged changes, the second for unstaged changes. Common indicators include N (new), M (modified), and – (unchanged).
Navigate Directories with zoxide
zoxide is a smart directory jumper that learns your habits and lets you navigate to frequently-used directories with minimal keystrokes. It tracks which directories you visit and how often, allowing you to jump to them using partial names.
zoxide uses a “frecency” algorithm that considers both frequency and recency of directory visits. You can jump to directories using just partial names, and it integrates seamlessly with your shell. The tool also supports interactive selection when combined with fzf.
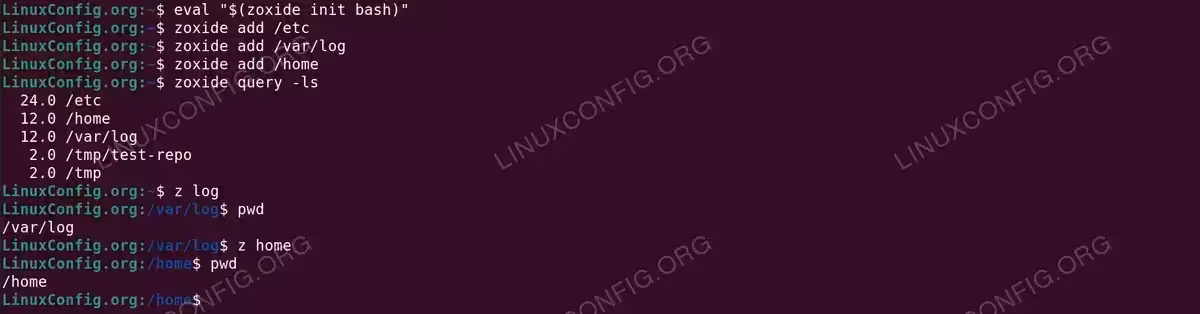
- Initialize zoxide in your shell: Add zoxide to your current shell session. Add this line to
~/.bashrcfor permanent setup.$ eval "$(zoxide init bash)"
- Seed the database: Manually add directories to the zoxide database for immediate use.
$ zoxide add /etc
$ zoxide add /var/log
$ zoxide add /home
- Jump using partial names: Navigate to directories by typing just part of the path.
$ z home
$ z log
- View learned directories: Display all tracked directories and their frecency scores.
$ zoxide query -ls
TIP
For interactive directory selection, install fzf and use zi instead of z. This opens a fuzzy finder with all your tracked directories.
Filter Anything with fzf
fzf is a general-purpose command-line fuzzy finder. It can filter any list including files, command history, processes, hostnames, git commits, and more. It’s incredibly versatile and integrates well with other tools.
fzf provides instant fuzzy matching as you type, works with any text input via pipes, supports preview windows for file contents, and integrates with shell history for enhanced Ctrl+R functionality. The interface is fast and responsive even with large datasets.
- Basic fuzzy file finding: Pipe a file list to fzf for interactive filtering.
$ ls /etc | fzf
- Fuzzy find with file preview: Show file contents in a preview window as you navigate through the list.
$ fzf --preview 'batcat --color=always {}'
The preview window shows the contents of the currently selected file, updating in real-time as you move through the list. This is particularly useful when searching through configuration files or code.
SHELL INTEGRATION
After installing fzf, enable shell integration with source /usr/share/doc/fzf/examples/key-bindings.bash. This gives you enhanced Ctrl+R for history search and Ctrl+T for file search.
Monitor System with btop
btop is a resource monitor that shows CPU, memory, disks, network, and processes. It’s the modern successor to htop with a beautiful TUI interface and mouse support.
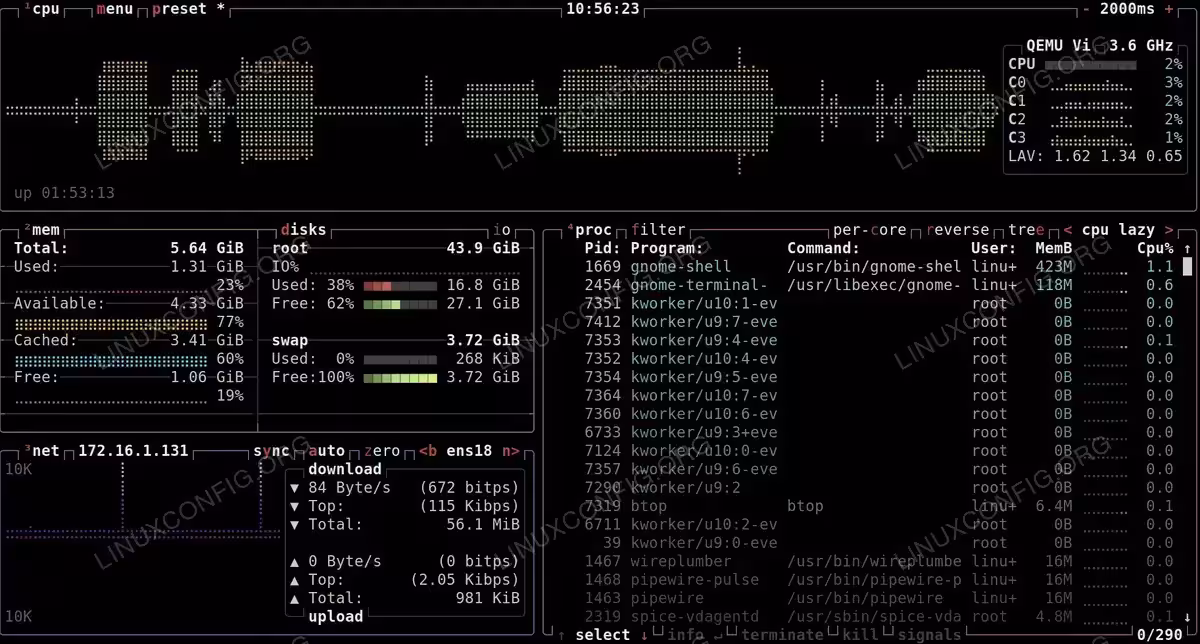
btop provides per-core CPU usage graphs, memory and swap visualization with usage bars, network transfer speeds with graphs, disk I/O monitoring, process tree view with sorting options, and full mouse support for interactive navigation.
- Start the system monitor: Launch the interactive system monitor interface.
$ btop
The interface is divided into sections: CPU usage with per-core breakdown (top), memory and disk usage (left), network statistics (bottom left), and a detailed process list (right). Use arrow keys or mouse to navigate, and press ‘q’ to quit.
Analyze Disk Usage with dust
dust is a more intuitive version of du (disk usage). It provides a visualization of which directories are using disk space, making it easy to identify space hogs at a glance.
dust displays a tree structure with proportional bars showing relative sizes, uses colors to highlight the largest items, and automatically sorts by size. The output is much more readable than traditional du output.
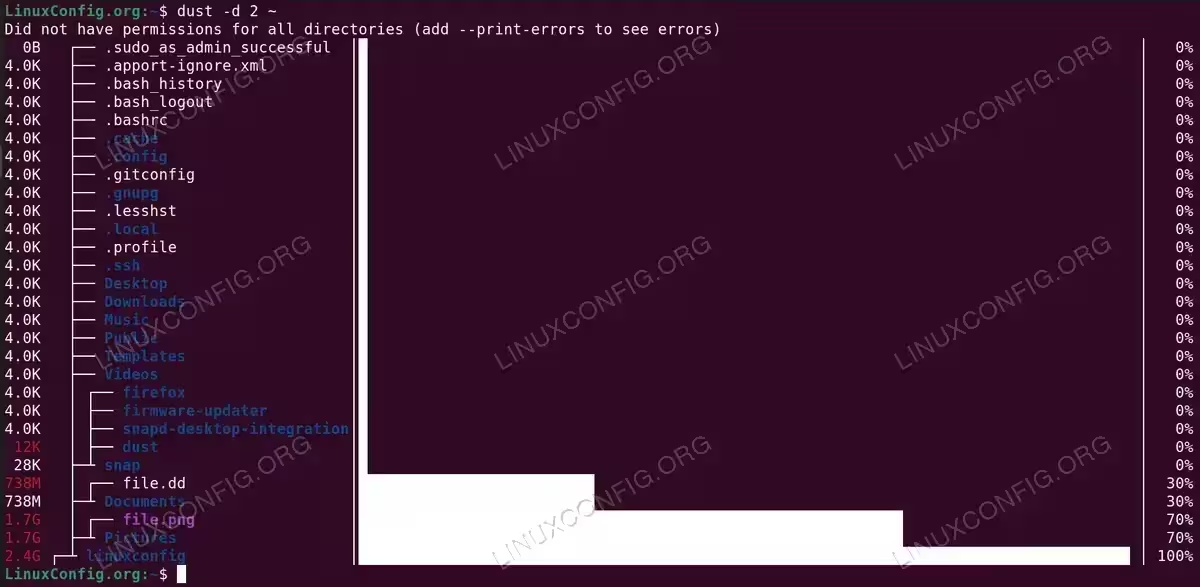
- Analyze directory with depth limit: Show disk usage for a directory, limiting the tree depth to 2 levels.
$ dust -d 2 ~
The visualization shows each directory with a proportional bar indicating its relative size. Larger items are highlighted in different colors, making it easy to spot which directories are consuming the most space.
Quick Command Help with tldr
tldr provides simplified and community-driven man pages focused on practical examples. Instead of reading through lengthy man pages, you get concise, example-driven documentation for common use cases.
tldr pages are maintained by the community and focus on the most common use cases. Each command shows practical examples with clear explanations, making it perfect for quick reference. The pages are available offline after the initial download.
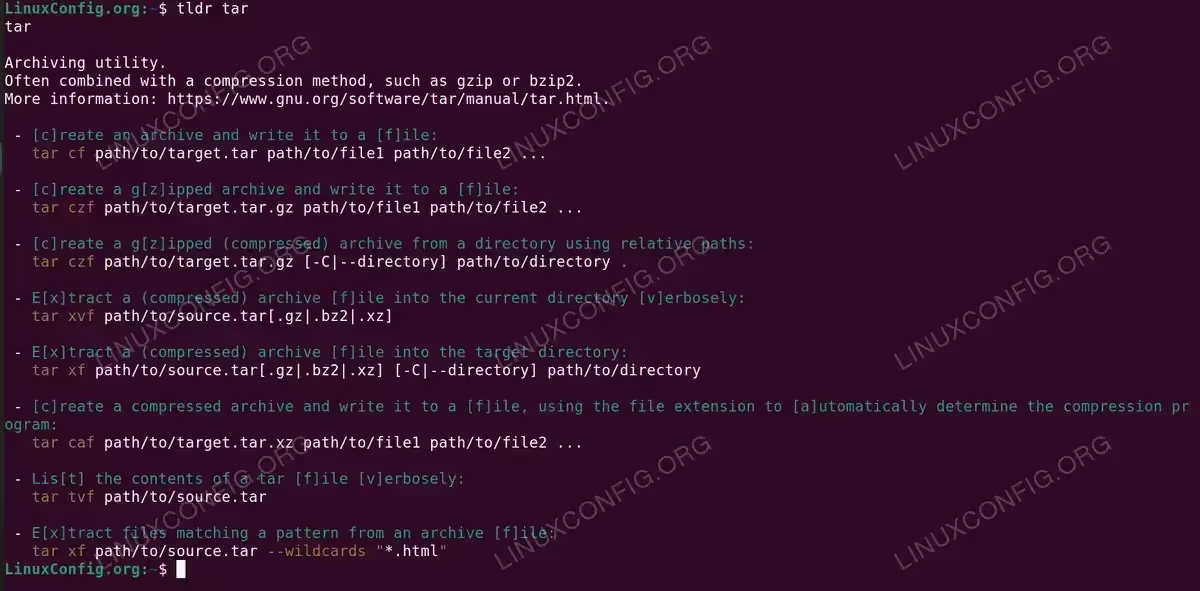
- Get simplified help for a command: Display practical examples for the tar command.
$ tldr tar
- Update the local cache: Download the latest community-contributed pages.
$ tldr --update
TIP
Run tldr --update periodically to get the latest community-contributed pages.
View Git Diffs with delta
delta is a syntax-highlighting pager for git, diff, and grep output. It makes code reviews in the terminal much more readable with proper syntax highlighting and improved diff formatting.
delta provides syntax highlighting for diffs in any language, side-by-side view option, line numbers in diffs, word-level diff highlighting, and support for various themes. It integrates seamlessly with Git as a pager.
- Configure delta as Git pager: Set delta as the default pager for all Git output.
$ git config --global core.pager delta
- View Git diff with delta: Display syntax-highlighted diff output.
$ git diff
- Pipe diff output through delta: Manually pipe any diff output through delta.
$ git diff | delta
- Enable side-by-side view: Add this configuration to your
~/.gitconfigfor split diff view.[delta] side-by-side = true
Using delta as Git pager to display syntax-highlighted diff output
Conclusion
These modern CLI tools represent a significant evolution in command-line productivity. They’re faster, more intuitive, and provide better visual feedback than their traditional counterparts. While the classic Unix tools will always have their place, incorporating these modern alternatives into your workflow can dramatically improve your daily experience on the command line.
Start by trying one or two tools that address your biggest pain points. ripgrep and fd are excellent starting points for anyone who does a lot of searching. bat and eza are easy wins that immediately improve file viewing. As you get comfortable, explore the others. You might find that zoxide’s smart navigation or fzf’s fuzzy finding become indispensable parts of your workflow.
For more information on each tool, visit their respective GitHub repositories or use tldr for quick reference on common usage patterns.
Frequently Asked Questions
- Will these tools work on all Linux distributions? Yes, all these tools are available for major Linux distributions. Package names may vary slightly. For example, Ubuntu uses
fd-findandbatpackages which install asfdfindandbatcatbinaries. You can create aliases to use the standard names. - Can I use these tools alongside the traditional commands? Absolutely. These tools don’t replace the original commands. They install as separate binaries. You can use both interchangeably and create aliases only for the tools you prefer. Many users keep the originals available for scripts that depend on specific output formats.
- Are these modern tools compatible with shell scripts? While these tools work great interactively, you should be cautious about using them in scripts that may run on systems without them installed. For maximum portability, stick with traditional tools in scripts, or ensure the modern alternatives are available in your target environment.
- How do I install all these tools at once? On Ubuntu/Debian, you can install most with:
sudo apt install ripgrep fd-find bat eza fzf btop tldr git-delta. For dust and zoxide, use cargo (Rust package manager) or download from their GitHub releases. - Why does zoxide show “no match found” when I first use it? zoxide needs to learn your directory habits before it can suggest destinations. Use
zoxide add /path/to/directoryto seed the database, or simply navigate normally. zoxide will learn as you usecd(after shell integration is enabled).