If you need to search for one or more particular files, Linux systems have a few powerful methods for locating them, such as the find and locate commands. Both of these commands have the same purpose, but they use a different methodology to find files. Searching for a file with a specific name can be done, but you can also search for files that follow certain naming patterns.
This can be broadened all the way to finding files based on file size, file extension, or a lot of other options. In this tutorial, you will learn the difference between the find and locate commands, and examples of how to use each one. By the end of our tutorial, you will know in which situations one command is more approrpiate than the other.
In this tutorial you will learn:
- What is the difference between
findandlocatecommands findandlocatepros and cons- How to install
locateon Linux - How to use
findandlocateLinux commands with examples
| Category | Requirements, Conventions or Software Version Used |
|---|---|
| System | Any Linux distro |
| Software | find, locate |
| Other | Privileged access to your Linux system as root or via the sudo command. |
| Conventions |
# – requires given linux commands to be executed with root privileges either directly as a root user or by use of sudo command$ – requires given linux commands to be executed as a regular non-privileged user |
Locate vs find: What is the difference?
The
find Linux command is a staple on all Linux distros and always included by default. It searches for files based on a large number of parameters, allowing you to perform a very granular search. You can find files based on their name, size, owner, modified date, and other options.
find searches for files in real time, meaning that it will crawl the specified directory for your search query when you execute it. On large file systems with deep subdirectories, these searches can take some time, especially on a slow computer or old style hard drive disk. A solid state drive and shallower directory depth will yield faster results.
find proves useful in a multitude of situations, and can even execute commands on the files that it returns in its search results. It also accepts regex syntax and can pipe to xargs to do some slick and fast file manipulation across tons of directories scattered on your file system.
The locate command is not as well known as find and is often not included as a default command on Linux distros, although it can easily be installed via package manager. It can’t perform as granular of a search, as it simply matches files based on their name, although it does accept complicated syntax such as regex.
locate creates a database of files on your system, along with their locations, and then searches that database for a match, rather than actually scanning your hard drive for matching files in real time. This allows locate to produce very fast results, so it can effectively search the entire file system for a matching file in just a few seconds.
Since
locate uses a database, and this database is not updated all the time, the command can’t find files that were recently created. The user can run updatedb to manually update the locate database, or wait about a day for the database to be updated automatically in the background.
Pros and Cons
In most situations, it will be pretty clear whether the locate or find command will be a superior choice. Take a look at the table of pros and cons below to get some quick information about which tool is better across certain categories.
| Category | find | locate |
|---|---|---|
| Speed | Fast for shallow directory structures, but can be slow for deeper ones | Lightning fast at searching the entire hard drive |
| Granularity | Accepts many parameters like name, size, owner, modified time, etc. | Only searches based on the file name |
| Simplicity | More complicated syntax and requires more arguments | Dead simple syntax, just specify the name or part of the name of the file |
| Purpose | Best suited for granular searches that require multiple parameters | Best suited for quickly finding a file or directory based on the name |
| Extended Use | Can delete files, execute commands on files, pipe to xargs, etc. |
Simply returns the location of a file or directory |
| Availability | Installed by default on Linux, nothing to download | Usually needs to be installed via system package manager |
| Usability | Searches any specified directory and subdirectories in real time | Must log the file in its database in order to search for it |
Install locate on Linux
You can use the appropriate command below to install locate with your system’s package manager.
To install locate on Ubuntu, Debian, and Linux Mint:
$ sudo apt install locate
To install locate on Fedora, CentOS, AlmaLinux, and Red Hat:
$ sudo dnf install locate
To install locate on Arch Linux and Manjaro:
$ sudo pacman -S locate
find and locate Command Examples
Now that you understand the difference between find and locate, all that is left to do is to learn how to use the commands. See our examples below to get an idea.
find Command Examples
- Search your present working directory and its subdirectories for a particular file:
$ find . -name "example.txt"
- Find all
.pngimage files in the/homedirectory and its subdirectories:$ find /home -name "*.avif"
- Consider using the
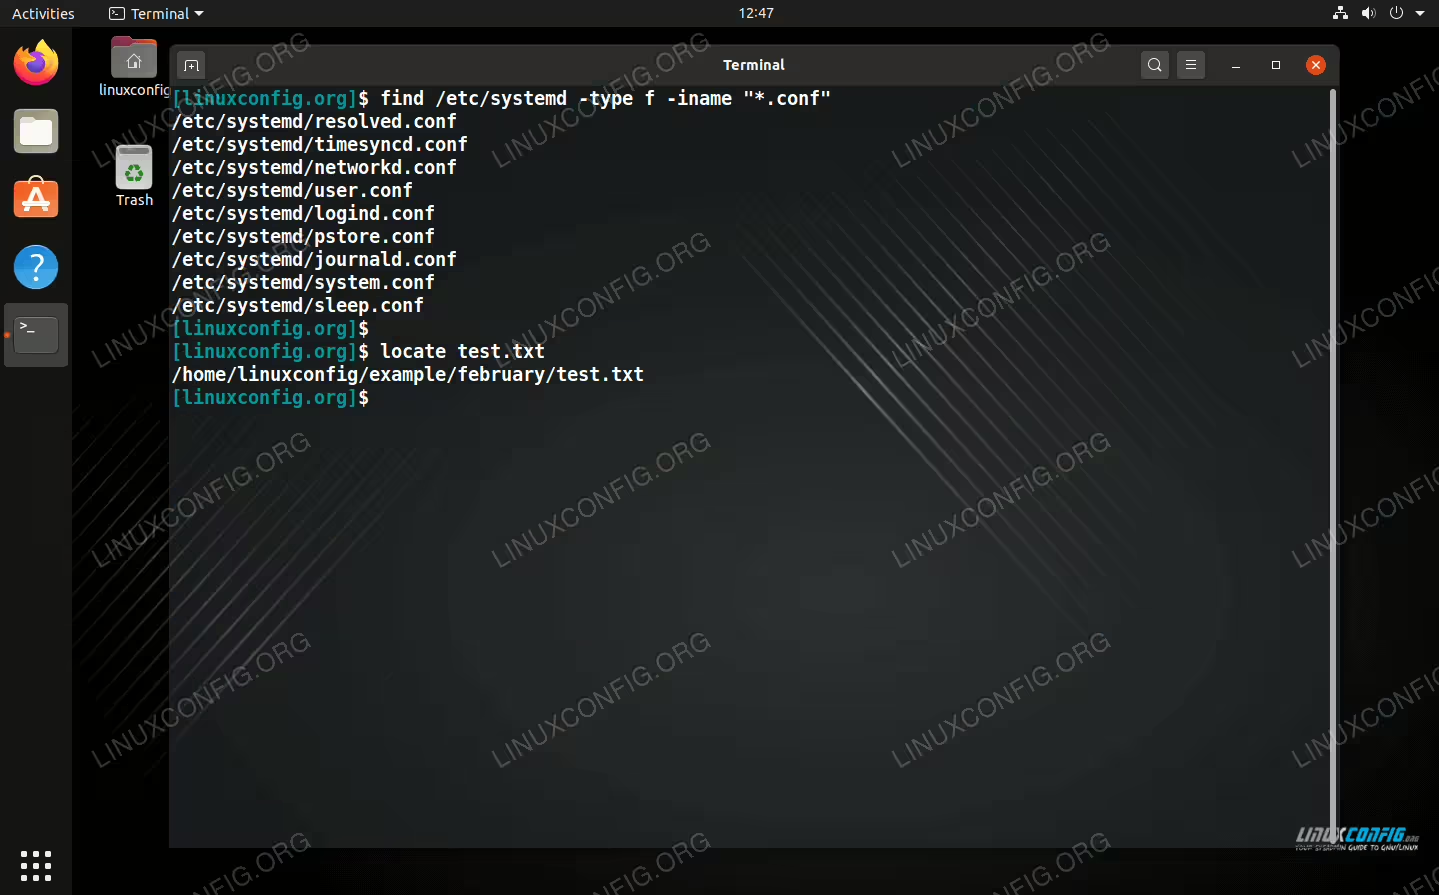
type -foption withfindto only search for files (ignore directories), and the-inameoption to make your search case insensitive:$ find /home -type f -iname "example.txt"
- Find all
.conffiles that have been modified in the last seven days, are owned by userlinuxconfig, and exist in that user’s home directory:$ find /home/linuxconfig -type f -user linuxconfig -mtime -7 -name "*.conf"
- If you don’t want the
findcommand to traverse too deeply into subdirectories, you can specify a limit with the-maxdepthoption. For example, this command will limitfindto a depth of two subdirectories:$ find . -type f -maxdepth 2 -name "example.txt"
- The
findcommand can automatically delete files it finds if you specify the-deleteoption. Be very careful with this option, and be sure to first run the find command without it so you know exactly what it plans to delete.$ find . -type f -name "*.tmp" -delete
- The
findcommand’s functionality can be further extended with the-execoption. Using this option allows you to execute a command on every file that find finds. For example, let’s change the file permissions to750for every file found:$ find . -type f -name "*.conf" -exec chmod 750 '{}' \; -printIn the above command,
'{}'is a placeholder for the files that are found with find. The-execoption is terminated with a semicolon, which must be escaped, hence the\;. The-printoption will output all the file names and paths to your terminal.
locate Command Examples
- The command syntax is very simple. Just specify the file or directory that you would like to search for.
$ locate example.txt
- To update the cache for
locate, you can run:$ sudo updatedb
Closing Thoughts
In this tutorial, you learned about the difference between the
find and locate commands on a Linux system. We went over the pros and cons of each command, as well as the usage examples so you know exactly when and how to use the commands in any given scenario. The key takeaway here is that locate is very fast but uses a cached list to provide results, whereas find works in real time and can handle a plethora of search parameters.