Pi-hole is a powerful network-level advertisement and Internet tracker blocking application that acts as a DNS sinkhole. It is lightweight and can run on most Linux-based systems, offering an efficient way to block ads across all devices on your network. This guide walks you through the step-by-step process of installing Pi-hole on your Linux server.
In this tutorial, you will learn:
- How to prepare your Linux server for Pi-hole installation
- How to install and configure Pi-hole
- How to set up and use the Pi-hole dashboard

| Category | Requirements, Conventions or Software Version Used |
|---|---|
| System | Linux server with a static IP address |
| Software | Pi-hole, Git |
| Other | Root or sudo privileges |
| Conventions | # – requires given linux commands to be executed with root privileges either directly as a root user or by use of sudo command$ – requires given linux commands to be executed as a regular non-privileged user |
Step-by-Step Guide to Installing Pi-hole on Linux
Video Tutorial
Follow the steps below to set up and use Pi-hole on your Linux server.
- Ensure Your Server Has a Static IP Address:
Pi-hole requires a static IP address to function correctly. Configure your Linux server with a static IP address by editing your network configuration files. For example, to set an IP address of172.16.1.74with a subnet mask of/24, you can use the following configuration:# Example configuration in /etc/network/interfaces iface eth0 inet static address 172.16.1.74 netmask 255.255.255.0 gateway 172.16.1.1Alternatively, if you manage your network via a router, you can use a DHCP static map to assign the server a static IP address. This approach links the server’s MAC address to a specific IP address, ensuring consistency without manually configuring the server.
Setting a static IP ensures that your Pi-hole DNS server remains accessible to your network devices. - Install Prerequisites:
Before installing Pi-hole, ensure you have Git installed on your Linux server.$ sudo apt update $ sudo apt install git
This installs the Git package, which is required to download the Pi-hole installation scripts.
- Install Pi-hole:
Clone the Pi-hole repository and run the installer.$ git clone --depth 1 https://github.com/pi-hole/pi-hole.git Pi-hole $ cd "Pi-hole/automated install/" $ sudo bash basic-install.sh
This command downloads the Pi-hole setup scripts and initiates the installation wizard.
- Follow the Installation Wizard:
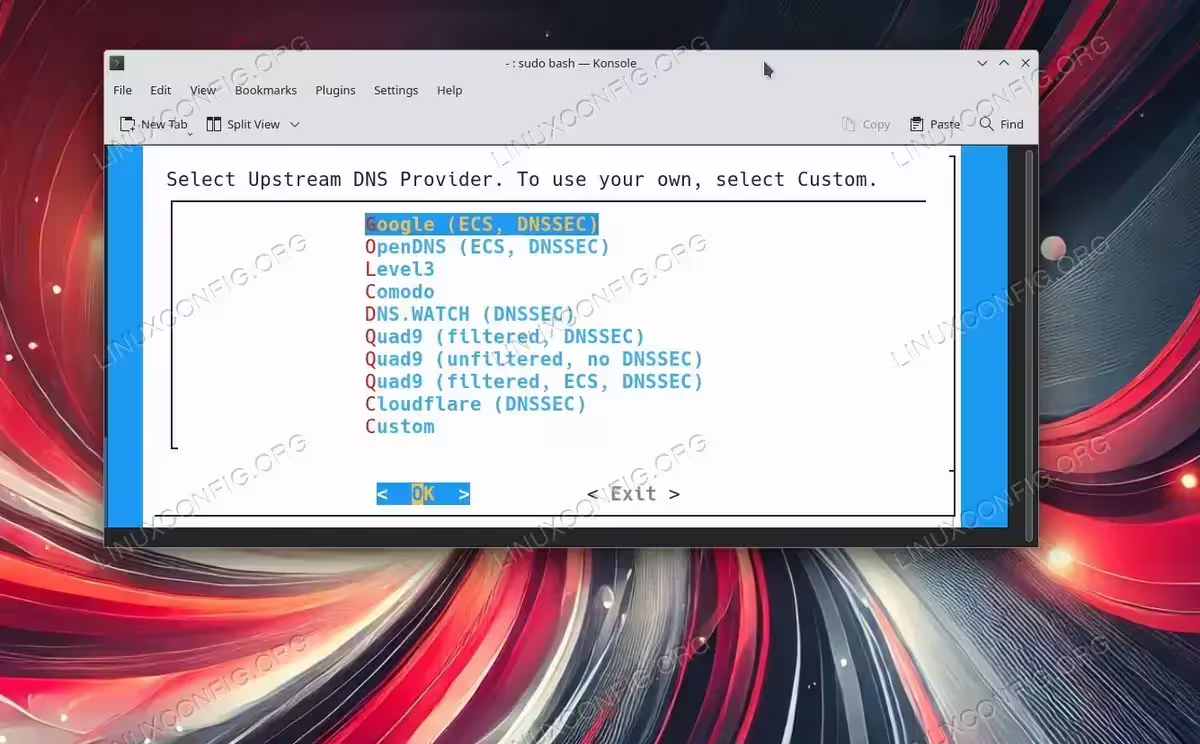
The wizard will guide you through the configuration of Pi-hole. During this process, you will:- Choose the DNS provider (e.g., Google, OpenDNS, Cloudflare) (ANY WILL DO)
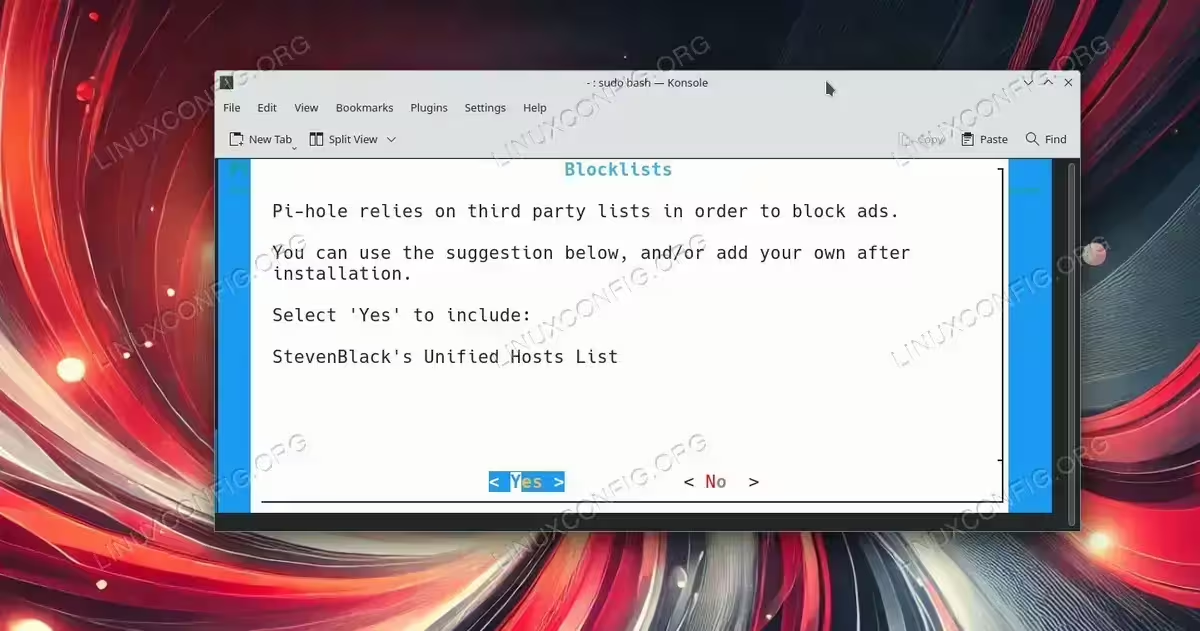
Choose the DNS provider - Set default list (YES)
Default list selection - Set up the web interface and logging (YES)
- Note the generated admin password
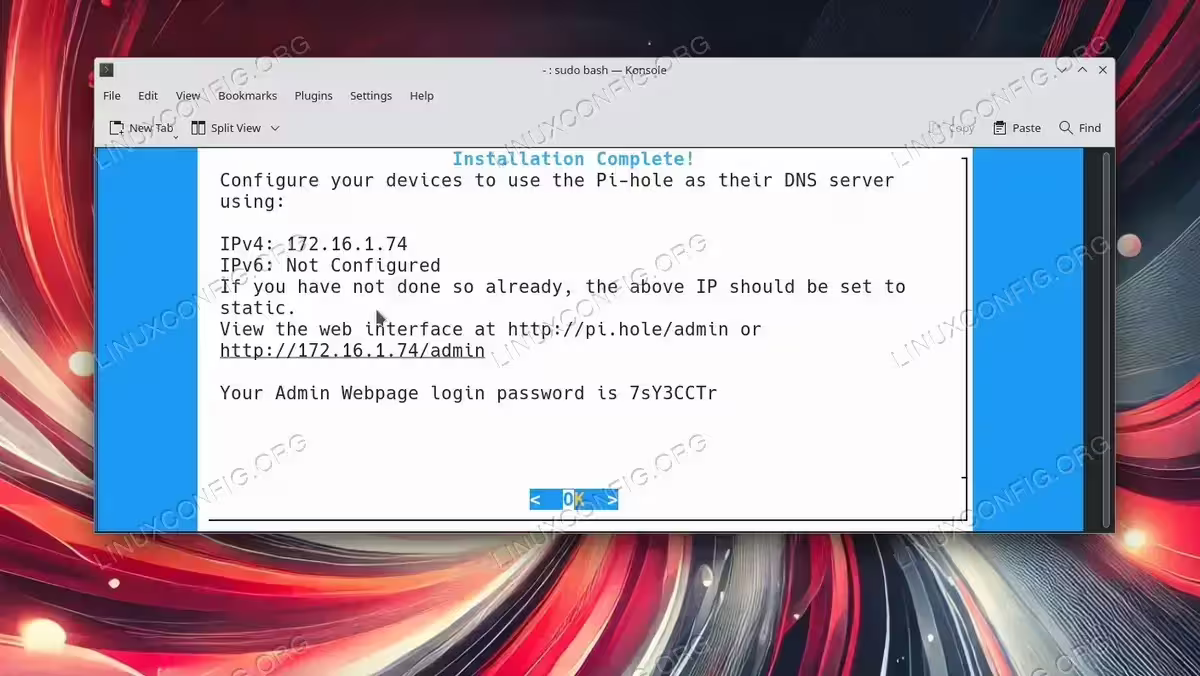
Pi-hole installation is now completed.
- Choose the DNS provider (e.g., Google, OpenDNS, Cloudflare) (ANY WILL DO)
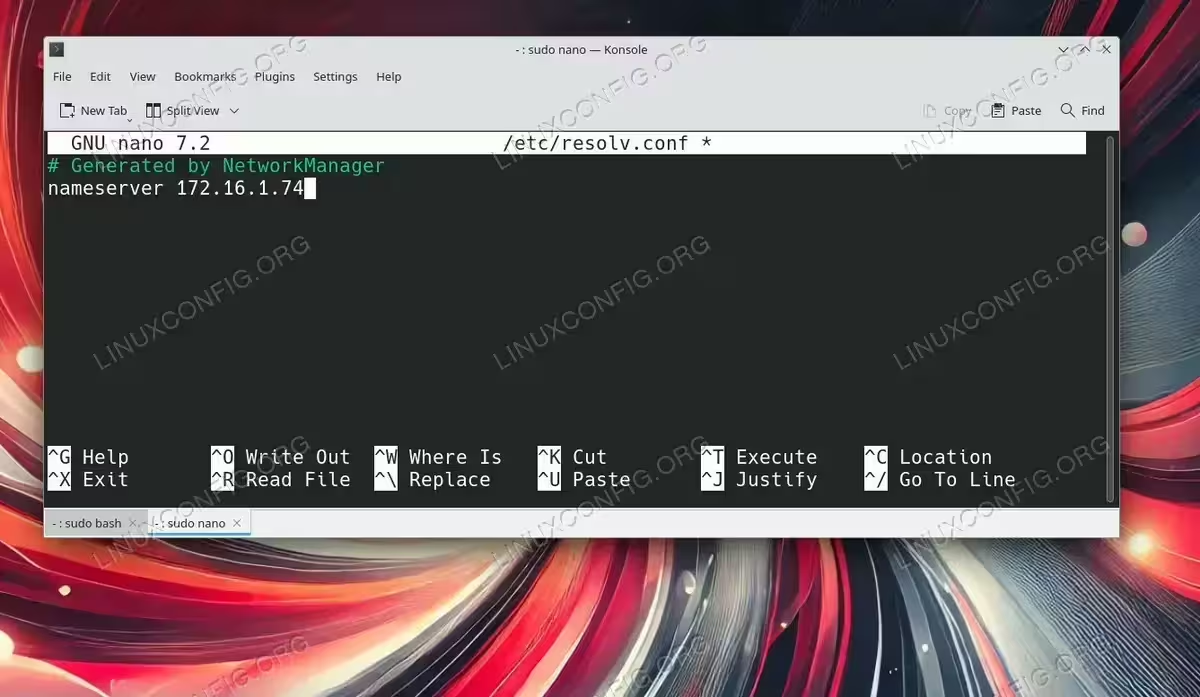
- Set Your DNS to Point to Pi-hole:
Configure your devices or DHCP server to use the Pi-hole server as the DNS resolver. For individual devices, update the/etc/resolv.conffile:# Example to set DNS server nameserver 172.16.1.74
Configure DNS service for your system
Alternatively, configure your router’s DHCP settings to assign Pi-hole’s IP address as the default DNS server for all devices on the network. - Access the Pi-hole Web Dashboard:
Open your browser and navigate to the Pi-hole web interface:http://pi.hole/admin
Log in using the password provided by the installation wizard. This dashboard allows you to monitor blocked requests, customize blocklists, and configure additional settings.
- Test and Verify:
Browse some websites and check the Pi-hole dashboard for blocked requests. You should notice a significant reduction in ads. If the dashboard shows blocked requests, your Pi-hole setup is successful.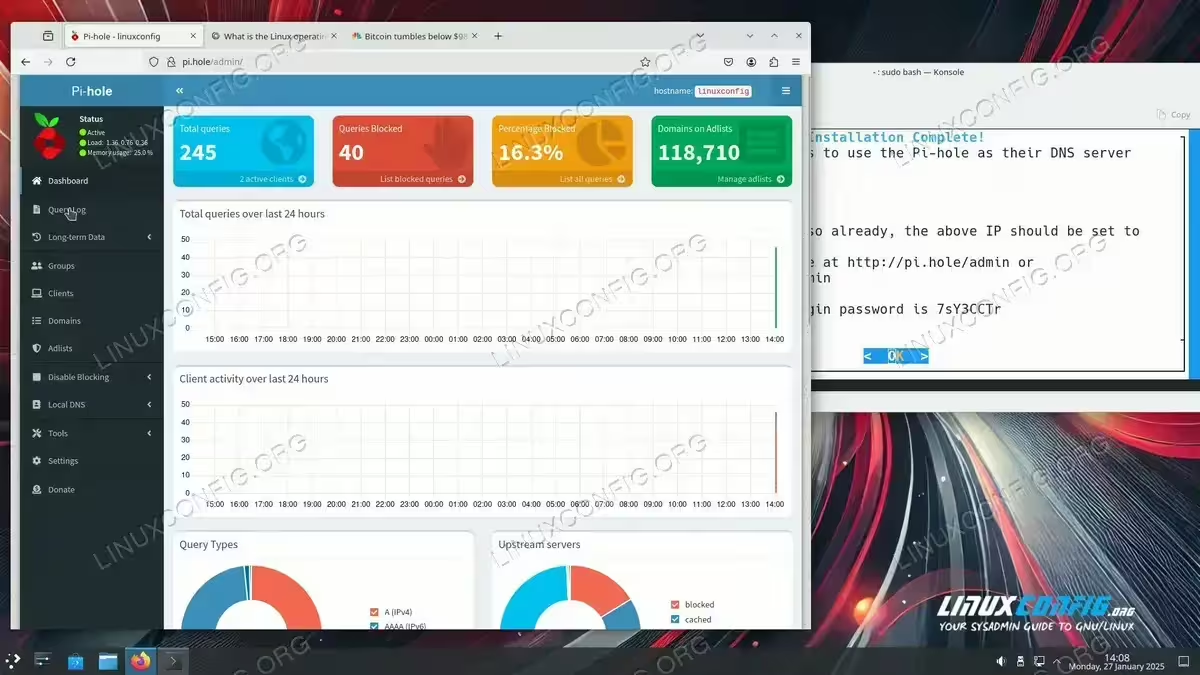
pi-hole is blocking ad requests
Conclusion
Installing Pi-hole on a Linux server is a straightforward process that can significantly enhance your browsing experience by blocking ads and trackers at the network level. With its powerful web interface and customization options, Pi-hole is an excellent choice for maintaining a clean and efficient online environment.