In this tutorial, we’ll show you how to create a desktop shortcut for the terminal on Linux Mint. This handy shortcut provides quick access to the terminal, saving time and making your workflow more efficient.
In this tutorial you will learn:
- How to create a launcher on the Linux Mint desktop
- How to customize the launcher with an icon, name, and command
| Category | Requirements, Conventions or Software Version Used |
|---|---|
| System | Linux Mint 20 or later |
| Software | gnome-terminal |
| Other | Desktop environment with launcher creation support |
| Conventions | # – requires given linux commands to be executed with root privileges either directly as a root user or by use of sudo command$ – requires given linux commands to be executed as a regular non-privileged user |
Create a Desktop Shortcut for Terminal
Video
Follow the steps below to create a desktop shortcut for the terminal on Linux Mint:
- Open the context menu: Right-click on your desktop and select Create Launcher. This will open the launcher creation window where you can define your shortcut.
- Customize the icon: Click on the icon field to select an icon for your shortcut. Search for “Terminal” in the icon search box, and choose an appropriate terminal icon.
- Set the name: Enter a descriptive name for your shortcut, such as Terminal, to make it easily identifiable.
- Define the command: In the command field, navigate to
/usr/binand selectgnome-terminal. This ensures the shortcut launches the terminal application when clicked. - Add an optional comment: If desired, enter a comment to describe the shortcut’s purpose, such as “Opens the terminal for quick commands.”
- Finalize the launcher: Click OK to create the shortcut. You can also choose to add this shortcut to the application menu for easier access.
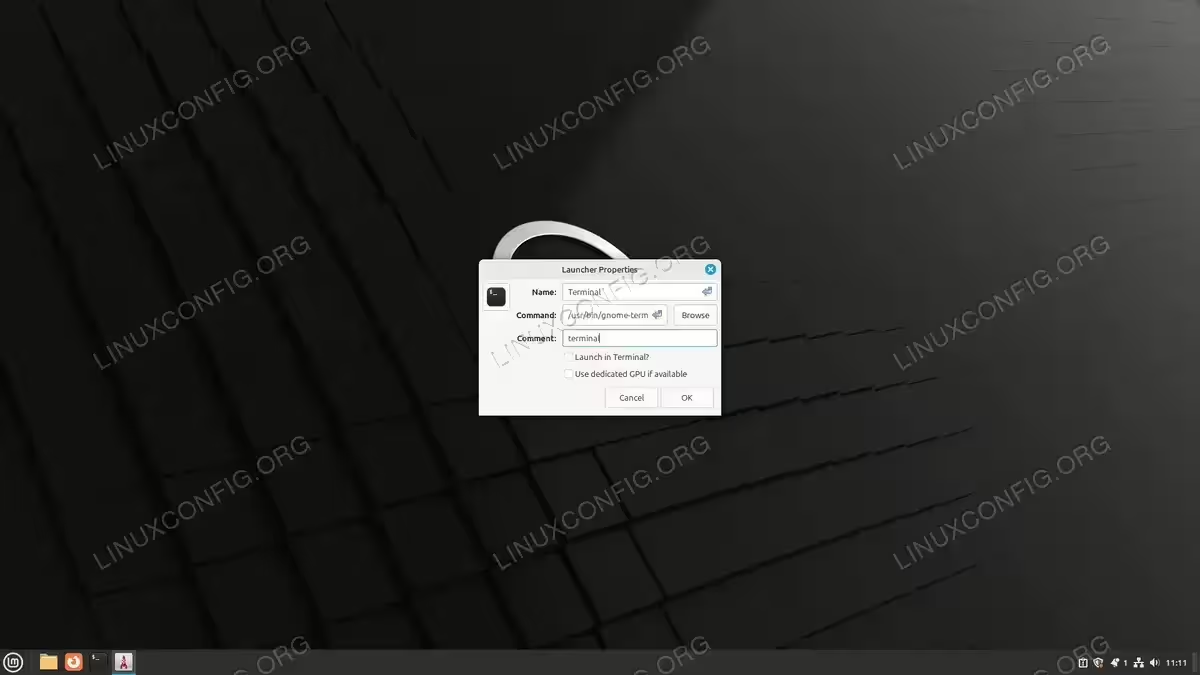
Terminal Shortcut Creation – Linux Mint
Conclusion
You’ve successfully created a desktop shortcut for the terminal on Linux Mint! This shortcut provides quick access to the terminal, making it easy to run commands without navigating through menus. If you found this tutorial helpful, share it with others and explore more ways to optimize your Linux Mint experience!