Knowing how to install and configure Apache on Ubuntu 26.04 is essential for anyone looking to host websites or web applications on a Linux server. Apache HTTP Server remains one of the most widely deployed web servers in the world, and Ubuntu 26.04 Resolute Raccoon provides a stable foundation for running it. In this tutorial, you will learn how to install Apache, set up virtual hosts, enable URL rewriting with mod_rewrite, configure SSL encryption, and apply basic security hardening to your server.
Table of Contents
In this tutorial you will learn:
- How to install Apache HTTP Server on Ubuntu 26.04
- How to create and enable Apache virtual hosts
- How to enable mod_rewrite for URL rewriting
- How to set up SSL encryption with a self-signed certificate
- How to apply basic security hardening to Apache
- How to manage the Apache service with systemctl

Software Requirements
| Category | Requirements, Conventions or Software Version Used |
|---|---|
| System | Ubuntu 26.04 Resolute Raccoon |
| Software | Apache HTTP Server (apache2) |
| Other | Privileged access to your Linux system as root or via the sudo command. |
| Conventions | # – requires given linux commands to be executed with root privileges either directly as a root user or by use of sudo command$ – requires given linux commands to be executed as a regular non-privileged user |
apt, then configure virtual hosts and enable SSL.
| Step | Command/Action |
|---|---|
| 1. Install Apache | $ sudo apt install apache2 |
| 2. Create virtual host config | $ sudo nano /etc/apache2/sites-available/linuxconfig.conf |
| 3. Enable site and mod_rewrite | $ sudo a2ensite linuxconfig.conf && sudo a2enmod rewrite |
| 4. Enable SSL | $ sudo a2enmod ssl && sudo systemctl restart apache2 |
Install Apache on Ubuntu 26.04
The Apache HTTP Server is available directly from the Ubuntu 26.04 default repositories. Therefore, installation is straightforward using the apt package manager. Begin by updating your package index and installing the apache2 package.
- Update the package index and install Apache:
$ sudo apt update
$ sudo apt install apache2
This installs the Apache web server along with all required dependencies.
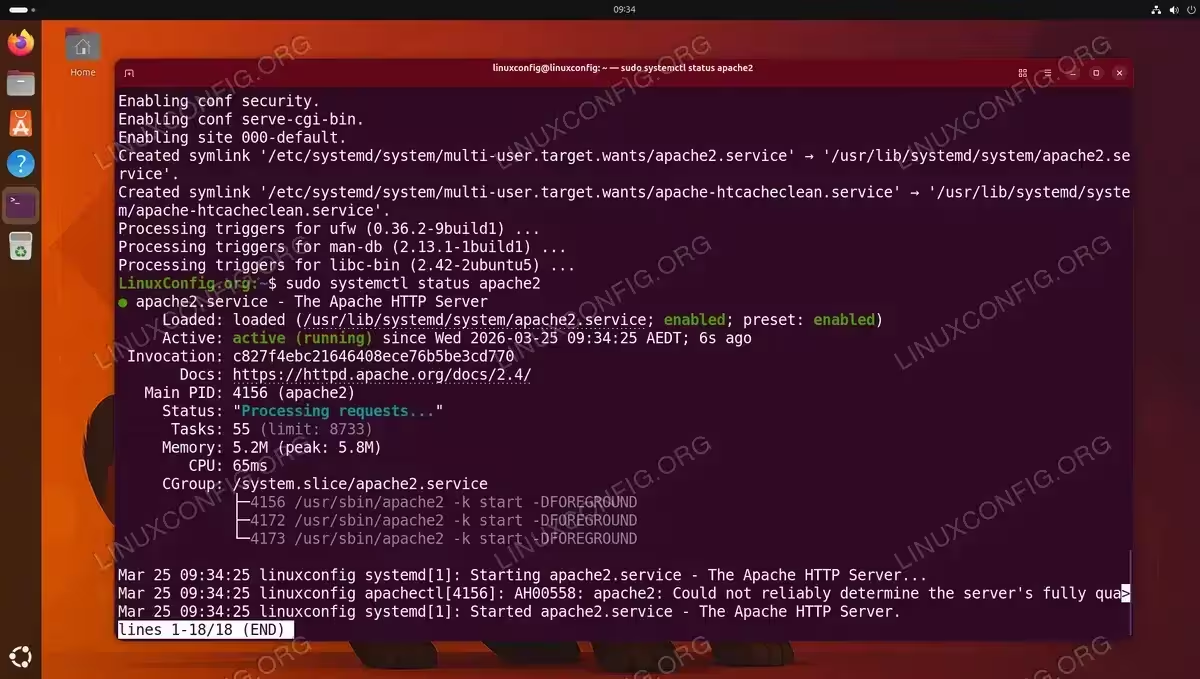
- Verify that the Apache service is running:
$ sudo systemctl status apache2
You should see
active (running)in the output. Apache starts automatically after installation on Ubuntu 26.04. - Allow HTTP traffic through the firewall: If you have UFW enabled, you need to allow port 80 with UFW for Apache to serve web pages:
$ sudo ufw allow 'Apache'
This opens port 80 (HTTP). To additionally allow HTTPS traffic on port 443:
$ sudo ufw allow 'Apache Full'
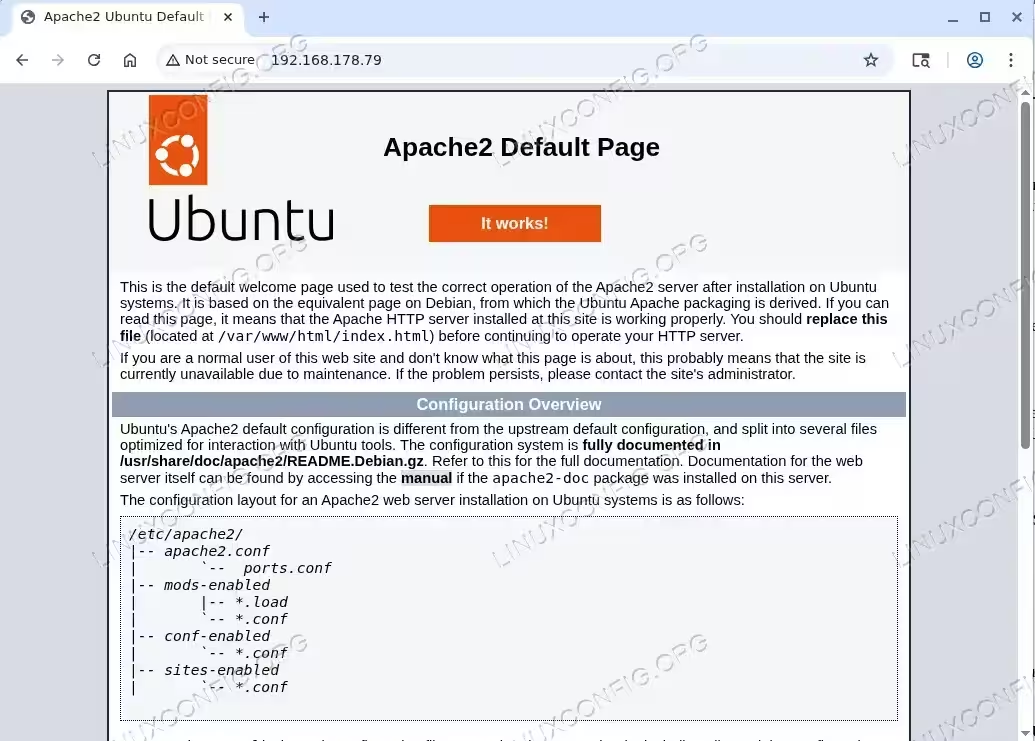
- Test the default Apache page: Open a web browser and navigate to your server’s IP address. You can find your server’s IP with:
$ hostname -I
Enter
http://your_server_ipin the browser. You should see the Apache2 Ubuntu Default Page confirming that the web server is working correctly.
Configure Apache Virtual Hosts
Virtual hosts allow you to host multiple websites on a single Apache server. Each virtual host has its own configuration file that defines the domain name, document root, and other settings. Consequently, this is one of the most important aspects of Apache configuration on Ubuntu 26.04.
- Create a document root directory for your website:
$ sudo mkdir -p /var/www/linuxconfig.org/html
- Set appropriate ownership so that the regular user can manage files:
$ sudo chown -R $USER:$USER /var/www/linuxconfig.org/html
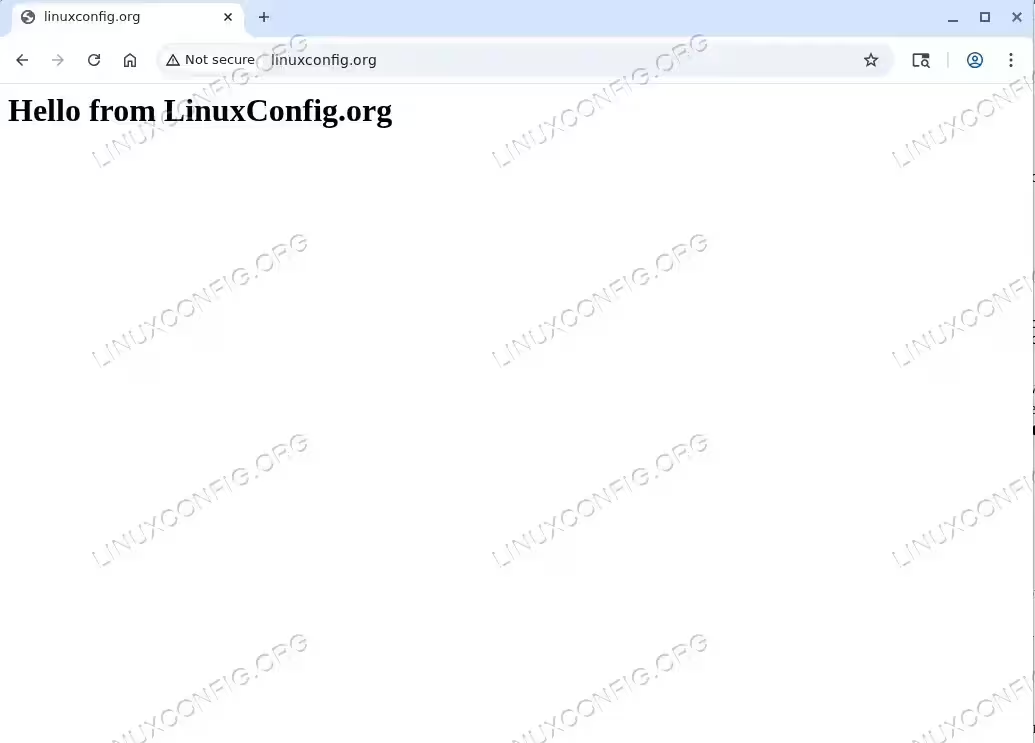
- Create a sample index page to test the virtual host:
$ echo '<h1>Hello from LinuxConfig.org</h1>' > /var/www/linuxconfig.org/html/index.html
- Create the virtual host configuration file:
$ sudo nano /etc/apache2/sites-available/linuxconfig.conf
Add the following configuration:
<VirtualHost *:80>
    ServerAdmin webmaster@linuxconfig.org
    ServerName linuxconfig.org
    ServerAlias www.linuxconfig.org
    DocumentRoot /var/www/linuxconfig.org/html
    ErrorLog ${APACHE_LOG_DIR}/linuxconfig_error.log
    CustomLog ${APACHE_LOG_DIR}/linuxconfig_access.log combined
</VirtualHost>
The
ServerNamedirective defines the primary domain, whileServerAliashandles alternative domain names. TheDocumentRootpoints to the directory containing your website files. - Enable the new virtual host and disable the default site:
$ sudo a2ensite linuxconfig.conf
$ sudo a2dissite 000-default.conf
- Test the configuration and reload Apache:
$ sudo apache2ctl configtest
$ sudo systemctl reload apache2
The
configtestcommand checks for syntax errors before applying changes. You should seeSyntax OKin the output.
TROUBLESHOOTING
If you see the warning AH00558: apache2: Could not reliably determine the server's fully qualified domain name when running configtest or restarting Apache, set the ServerName directive globally:
$ echo 'ServerName localhost' | sudo tee /etc/apache2/conf-available/servername.conf
$ sudo a2enconf servername
$ sudo systemctl reload apache2
This is a harmless warning and does not prevent Apache from running, but setting the directive eliminates it and is considered good practice.
Enable mod_rewrite
The mod_rewrite module allows you to create clean, SEO-friendly URLs by rewriting requests on the server side. Many web applications, including WordPress and Laravel, require this module. To enable mod_rewrite on Ubuntu 26.04, follow these steps.
- Enable the rewrite module:
$ sudo a2enmod rewrite
- Update your virtual host to allow .htaccess overrides: Edit the virtual host configuration file:
$ sudo nano /etc/apache2/sites-available/linuxconfig.conf
Add a
Directoryblock inside theVirtualHostsection:<VirtualHost *:80> ServerAdmin webmaster@linuxconfig.org ServerName linuxconfig.org ServerAlias www.linuxconfig.org DocumentRoot /var/www/linuxconfig.org/html <Directory /var/www/linuxconfig.org/html> Options -Indexes +FollowSymLinks AllowOverride All </Directory> ErrorLog ${APACHE_LOG_DIR}/linuxconfig_error.log CustomLog ${APACHE_LOG_DIR}/linuxconfig_access.log combined </VirtualHost>The
AllowOverride Alldirective permits.htaccessfiles to override server configuration within that directory. Additionally,Options -Indexesdisables directory listing while+FollowSymLinksallows symbolic links. - Restart Apache to apply changes:
$ sudo systemctl restart apache2
- Verify that mod_rewrite is active:
$ sudo apache2ctl -M | grep rewrite
You should see
rewrite_module (shared)in the output, confirming the module is loaded.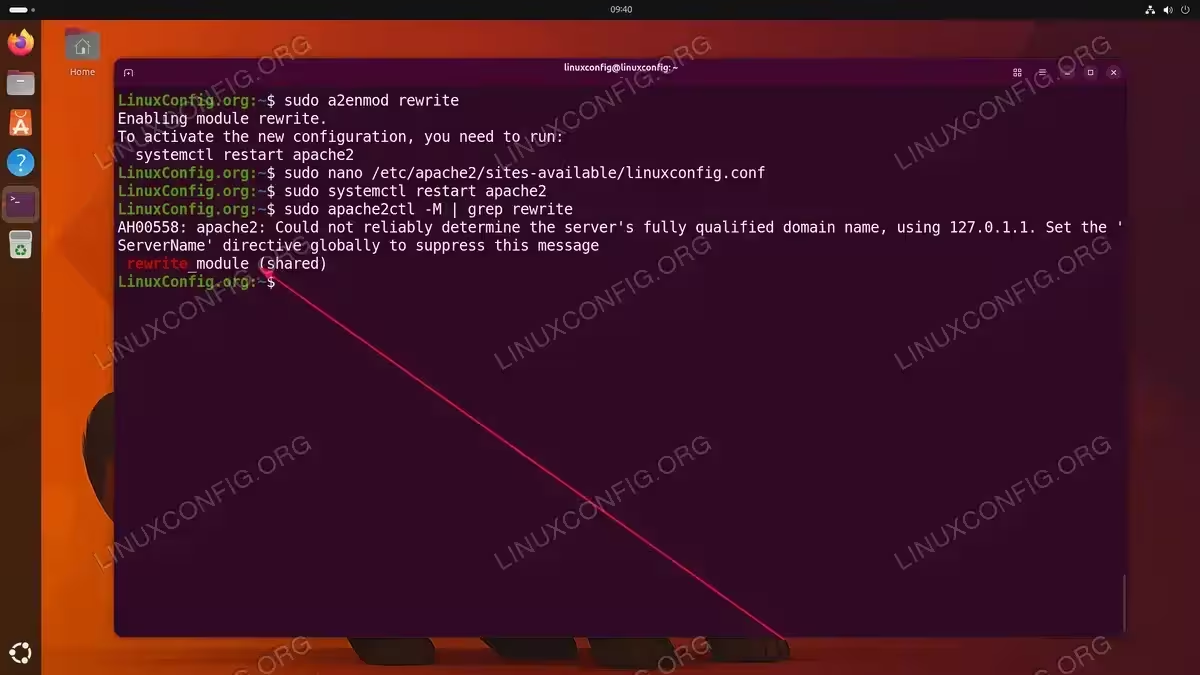
Enabling and verifying the mod_rewrite module on Apache
Set Up SSL with Self-Signed Certificate on Apache
Enabling SSL encryption protects data transmitted between your server and visitors. While production environments should use certificates from a trusted Certificate Authority such as Let’s Encrypt, a self-signed certificate is useful for testing and internal environments. Here is how to configure SSL on Apache with Ubuntu 26.04.
- Enable the SSL module:
$ sudo a2enmod ssl
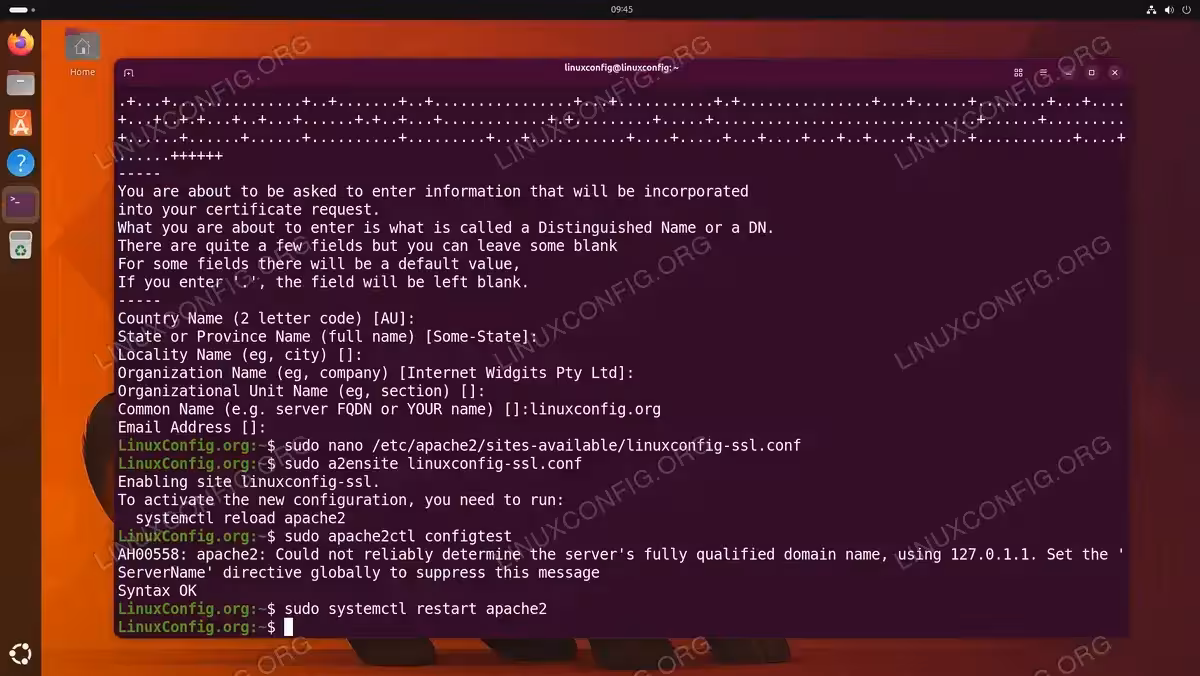
- Generate a self-signed SSL certificate:
$ sudo openssl req -x509 -nodes -days 365 -newkey rsa:2048 \
  -keyout /etc/ssl/private/linuxconfig-selfsigned.key \
  -out /etc/ssl/certs/linuxconfig-selfsigned.crt
You will be prompted to enter certificate information. The most important field is
Common Name, which should match your domain name or server IP address. - Create an SSL virtual host configuration:
$ sudo nano /etc/apache2/sites-available/linuxconfig-ssl.conf
Add the following configuration:
<VirtualHost *:443> ServerAdmin webmaster@linuxconfig.org ServerName linuxconfig.org DocumentRoot /var/www/linuxconfig.org/html SSLEngine on SSLCertificateFile /etc/ssl/certs/linuxconfig-selfsigned.crt SSLCertificateKeyFile /etc/ssl/private/linuxconfig-selfsigned.key <Directory /var/www/linuxconfig.org/html> Options -Indexes +FollowSymLinks AllowOverride All </Directory> ErrorLog ${APACHE_LOG_DIR}/linuxconfig_ssl_error.log CustomLog ${APACHE_LOG_DIR}/linuxconfig_ssl_access.log combined </VirtualHost> - Enable the SSL virtual host:
$ sudo a2ensite linuxconfig-ssl.conf
- Configure HTTP to HTTPS redirection: Edit the original virtual host file to redirect all HTTP traffic to HTTPS:
$ sudo nano /etc/apache2/sites-available/linuxconfig.conf
Replace the contents with:
<VirtualHost *:80> ServerName linuxconfig.org ServerAlias www.linuxconfig.org Redirect permanent / https://linuxconfig.org/ </VirtualHost> - Test and restart Apache:
$ sudo apache2ctl configtest
$ sudo systemctl restart apache2
IMPORTANT
A self-signed certificate will trigger a browser security warning because it is not issued by a trusted Certificate Authority. For production websites, use a free certificate from Let’s Encrypt or a commercial CA instead.
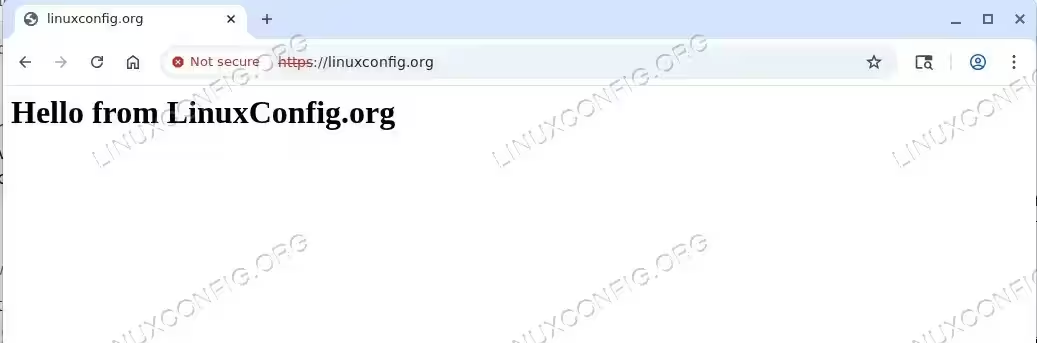
IMPORTANT
The browser displays “Not secure” because the self-signed certificate is not issued by a trusted Certificate Authority. This is expected behavior and does not mean your SSL encryption is broken. The connection is still encrypted, but the browser cannot verify the server’s identity. For production websites, replace the self-signed certificate with one from a trusted CA such as Let’s Encrypt.
Basic Apache Security Hardening
After installing Apache on Ubuntu 26.04, it is important to apply some basic security measures. By default, Apache exposes version information and other details that attackers can exploit. The following steps help reduce your server’s attack surface.
- Hide Apache version and OS information: Edit the security configuration file:
$ sudo nano /etc/apache2/conf-available/security.conf
Find and set the following directives:
ServerTokens Prod
ServerSignature Off
ServerTokens Prodmakes Apache report only “Apache” in the Server header without version numbers.ServerSignature Offremoves the server information from error pages. - Disable directory listing globally: In the same file, ensure the following option is set:
<Directory /var/www/>
    Options -Indexes
</Directory>
This prevents visitors from browsing the contents of directories that lack an index file.
- Add security headers: Create a custom configuration file for security headers:
$ sudo nano /etc/apache2/conf-available/security-headers.conf
Add the following content:
Header always set X-Content-Type-Options "nosniff"
Header always set X-Frame-Options "SAMEORIGIN"
Header always set Referrer-Policy "strict-origin-when-cross-origin"
Enable the headers module and the new configuration:
$ sudo a2enmod headers
$ sudo a2enconf security-headers
- Apply all changes:
$ sudo systemctl restart apache2
SECURITY TIP
These are baseline security measures. For production servers, consider additional hardening such as configuring mod_security as a web application firewall, disabling unnecessary modules, and implementing rate limiting. Refer to the official Apache security tips for comprehensive guidance.
Manage Apache Service
Ubuntu 26.04 uses systemctl to manage the Apache service. Understanding these commands is essential for day-to-day server administration. Moreover, knowing where to find logs helps you troubleshoot issues quickly.
- Start, stop, and restart Apache:
$ sudo systemctl start apache2
$ sudo systemctl stop apache2
$ sudo systemctl restart apache2
Use
restartwhen making changes that require a full service restart. For configuration changes that do not require dropping active connections, usereloadinstead:$ sudo systemctl reload apache2
IMPORTANT
If you see a warning such asThe unit file, source configuration file or drop-ins of apache2.service changed on disk, runsudo systemctl daemon-reloadfirst, then retry the reload:$ sudo systemctl daemon-reload $ sudo systemctl reload apache2
- Enable or disable Apache at boot: Apache is enabled by default after installation. To manage this behavior:
$ sudo systemctl enable apache2
$ sudo systemctl disable apache2
- Check Apache logs: Apache stores logs in
/var/log/apache2/. The two main log files are:$ sudo tail -f /var/log/apache2/access.log $ sudo tail -f /var/log/apache2/error.log
If you configured custom log paths in your virtual host, check those locations instead. For example, the virtual host created earlier logs to
linuxconfig_error.logandlinuxconfig_access.login the same directory. - List enabled modules and sites: To see which modules and virtual hosts are currently active:
$ sudo apache2ctl -M
$ ls /etc/apache2/sites-enabled/
If you need to open additional firewall ports for other services running alongside Apache, make sure to configure UFW accordingly.
Conclusion
In this tutorial, you learned how to install and configure Apache on Ubuntu 26.04 from start to finish. You set up the web server, created virtual hosts to serve multiple websites, enabled mod_rewrite for clean URLs, configured SSL encryption with a self-signed certificate, and applied basic security hardening. Apache is now ready to serve your websites and web applications on Ubuntu 26.04 Resolute Raccoon.
Frequently Asked Questions
- How do I check which version of Apache is installed on Ubuntu 26.04? Run
apache2 -vin the terminal. This displays the Apache version number and the build date. You can also usesudo apt show apache2for more detailed package information. - What is the difference between restart and reload in Apache? The
restartcommand completely stops and starts the Apache service, dropping all active connections. Thereloadcommand gracefully applies configuration changes without interrupting existing connections. Usereloadwhenever possible to avoid downtime. - Can I host multiple websites on a single Apache server? Yes, Apache virtual hosts allow you to serve multiple websites from one server. Each site gets its own configuration file in
/etc/apache2/sites-available/with a uniqueServerName. Enable each site witha2ensiteand ensure DNS records point to your server’s IP address. - How do I get a free SSL certificate for Apache instead of a self-signed one? Use Let’s Encrypt with the Certbot tool. Install Certbot with
sudo apt install certbot python3-certbot-apache, then runsudo certbot --apacheto automatically obtain and configure a trusted certificate at no cost.