In this tutorial we will perform the Ubuntu 20.04 server installation. The Ubuntu 20.04 Focal Fossa LTS is a long term support release which guarantees updates for up to 10 years since its initial release. In terms of the actual Ubuntu 20.04 server this means security updates until 2032. This article will guide you through the minimal Ubuntu 20.04 server installation.
In this tutorial you will learn:
- How to download Ubuntu 20.04 server ISO image
- How to create bootable installation media
- How to boot to Ubuntu 20.04 Server installation wizard
- How to install minimal Ubuntu 20.04 server
Software Requirements and Conventions Used
| Category | Requirements, Conventions or Software Version Used |
|---|---|
| System | Installed Ubuntu 20.04 or upgraded Ubuntu 20.04 Focal Fossa |
| Software | Ubuntu 20.04 Server |
| Other | Privileged access to your Linux system as root or via the sudo command. |
| Conventions |
# – requires given linux commands to be executed with root privileges either directly as a root user or by use of sudo command$ – requires given linux commands to be executed as a regular non-privileged user |
Ubuntu 20.04 Server Installation step by step instructions
- First step is to download Ubuntu 20.04 server ISO image. Ubuntu 20.04 Server ISO image is the only image release for various other architectures such as 64-bit PC (AMD64), 64-bit ARM, PowerPC64 and IBM System z. Select an appropriate architecture and download the
*.isofile. - Next, choose from which medium you wish to perform the Ubuntu installation. In case your intention is to install the Ubuntu 20.04 Server virtually using a hypervisor simply proceed to the next step.
Most beginners will find using DVD as bootable medium a simpler method. If this is your case use your current operating system to burn the previously downloaded ISO image to blank DVD medium. There are no specific settings you need to choose while burning the ISO image just look for “Burn ISO image” image feature when using your burning software. Alternatively, you can install the Ubuntu Server using a bootbale USB flash drive.
- Next step is to insert the bootable media into your PC and change bios settings to boot from your selected boot media.
The following tables should provide you with some hints on how to access your computer Boot Menu. You will need to hit different keys (or combination of keys) depending on your computer type. Here is the list of possible keys you may have to press depending on your system:
Access Hypervisor boot menu
Key combinations for accessing Boot Menu on Hypervisors Device Key Combination Comment Oracle Virtual Box F12Automatically boots from ISO when attached via virtual machine settings VMware Workstation Escboot menu,F12BIOSAutomatically boots from ISO when attached via virtual machine settings Access BIOS legacy
Key combinations for accessing Legacy Boot Menu Device Key Combination Comment Acer Esc,F12orF9F12key most likelyAsus F8orEscCompaq EscorF9Dell F12eMachines F12Fujitsu F12HP EscorF9Lenovo F8,F10orF12Other possibilities: Novobutton orFn + F11Samsung EscorF2orF12For ultrabooks from Samsung disable the fast boot option in BIOS/UEFI. See next section. VAIO Esc,F10orF11Other possibilities: AssistbuttonToshiba F12Access BIOS/UEFI
To access BIOS/UEFI on your computer you will also need to hit different keys (or combination of keys) depending on your computer type. Here is the list of possible keys you may have to press depending on your PC:
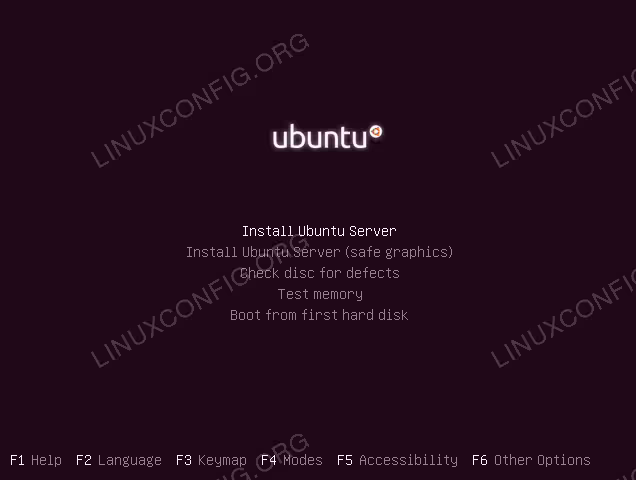
Key combinations for accessing BIOS/UEFI Device Key Combination Comment Acer DelorF2F2key most likelyAsus DeleteorDelCompaq F10Dell F2eMachines TaborDelFujitsu F2HP Esc,F10,F11Other possibilities: on Pavilion – F1Lenovo F1orF2Other possibilities: small button next to the Power button (if laptop) Samsung F2For ultrabooks from Samsung it might be F10VAIO F1,F2,F3Other possibilities: AssistbuttonToshiba F1,F2,F12orEsc - Let’s proceed with the installation. Simply use the keyboard’s navigational arrows and TAB key to navigate the Ubuntu 20.04 Server installation wizard.
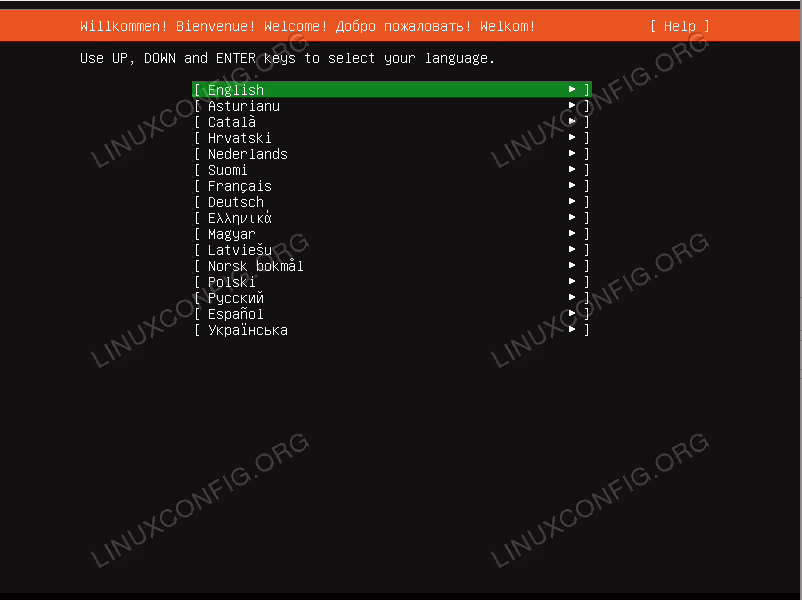 Select the Ubuntu server installation Language
 -
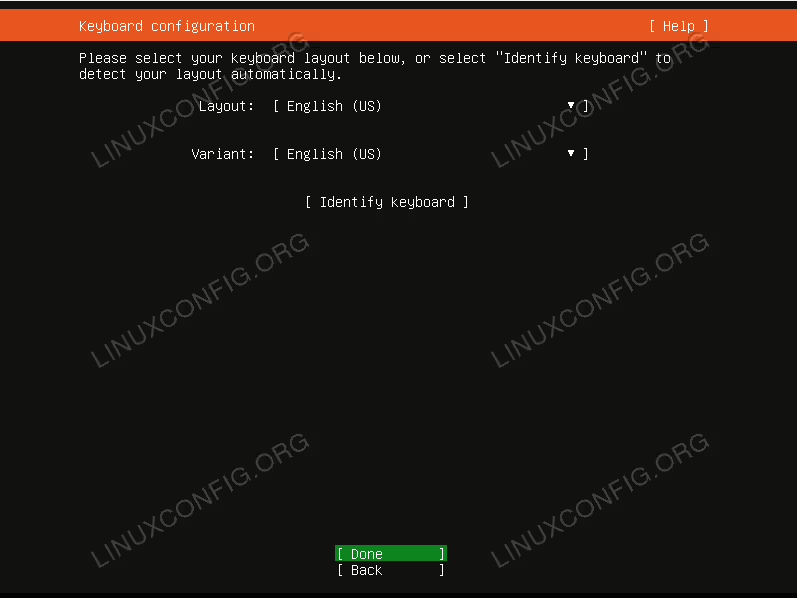 Choose keyboard layout. If unsure select the
Identify Keyboardand the system will help you to discover your keyboard layout. -
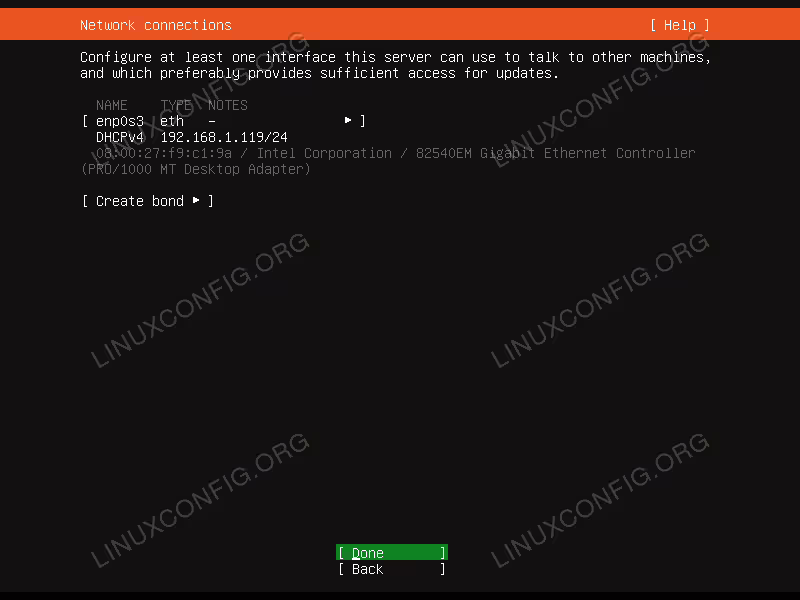 Network connections screen should present you with all system’s available network interfaces. Please note that any additional network configuration can be changed later as well as the configuration of the static IP address. Select the network interface you wish to use and hit
Done -
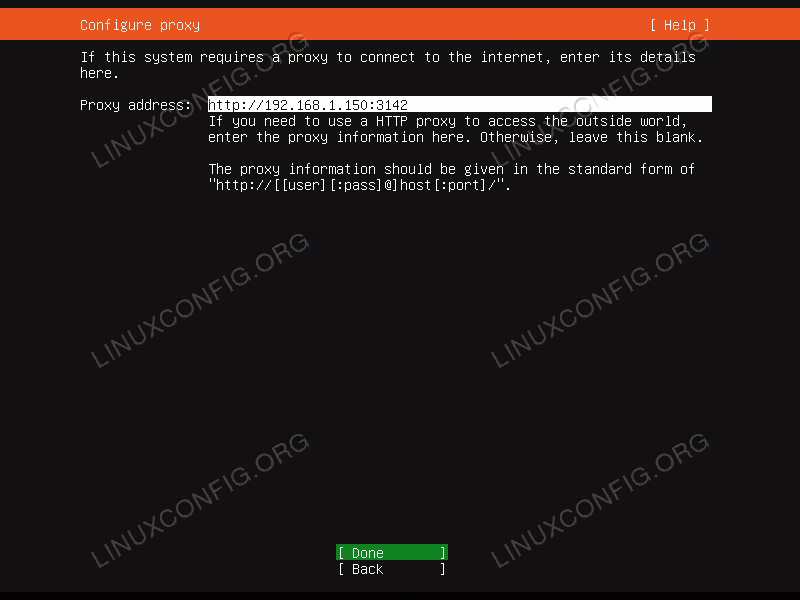 The proxy configuration is optional. If you are behind the proxy or using apt proxy cache server enter its URL and port number into the box. Otherwise leave blank and hit
Done. -
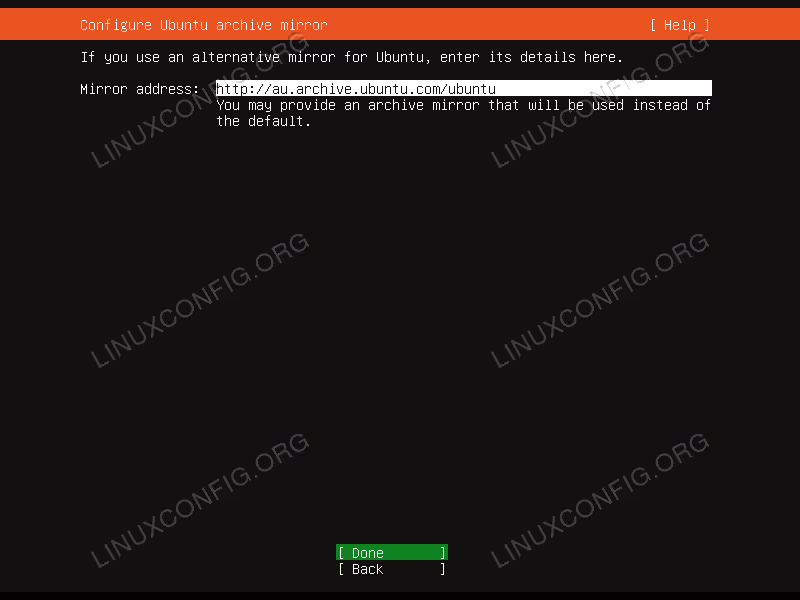 The closest archive mirror will be automatically pre-selected for you. Feel free to overwrite this settings if required.
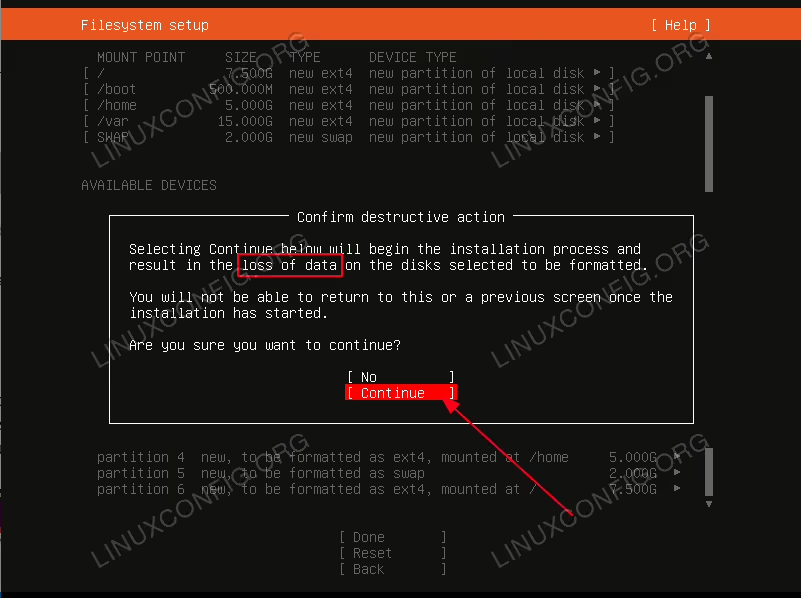
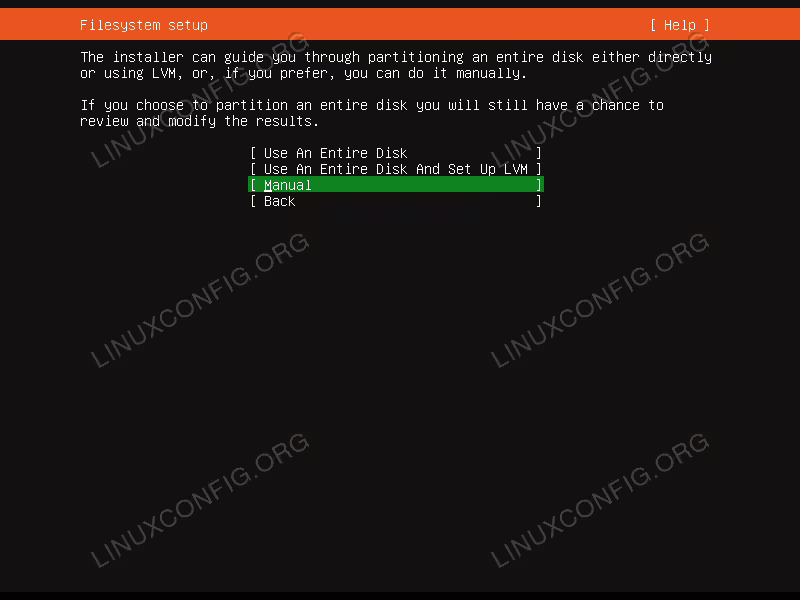
 - Filesystem setup allows your server to be configured across multiple storage devices and partitions. Ubuntu 20.04 Server wizard offers the following filesystem setup options:
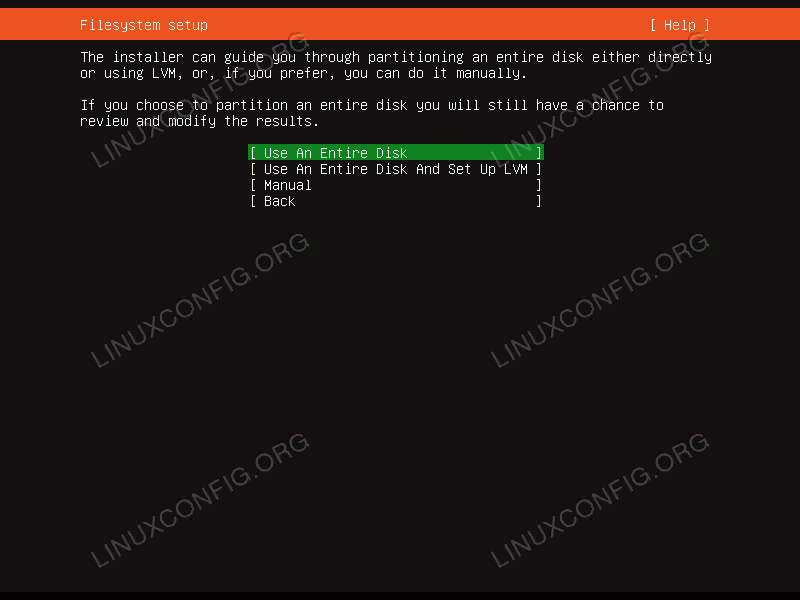 Select Filesystem setup to be used for the Ubuntu 20.04 Server installation
 - Use An Entire Disk
- This is the simplest filesystem configuration where all installation files as well as user home directories are a part of single (/) partitions.
- Use An Entire Disk And Set Up LVM
- Same as the above option however it uses LVM (Logical Volume Manager) to partition the disk.
- Manual
- This option provides the most flexibility and lets the user decide on the appropriate filesystem layout.
-
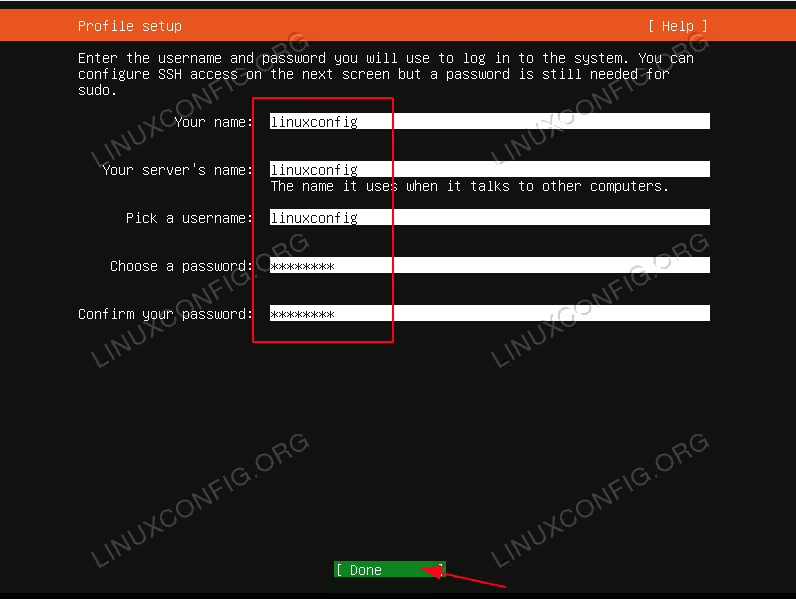 Type main username and system’s hostname along with user’s password.
 -
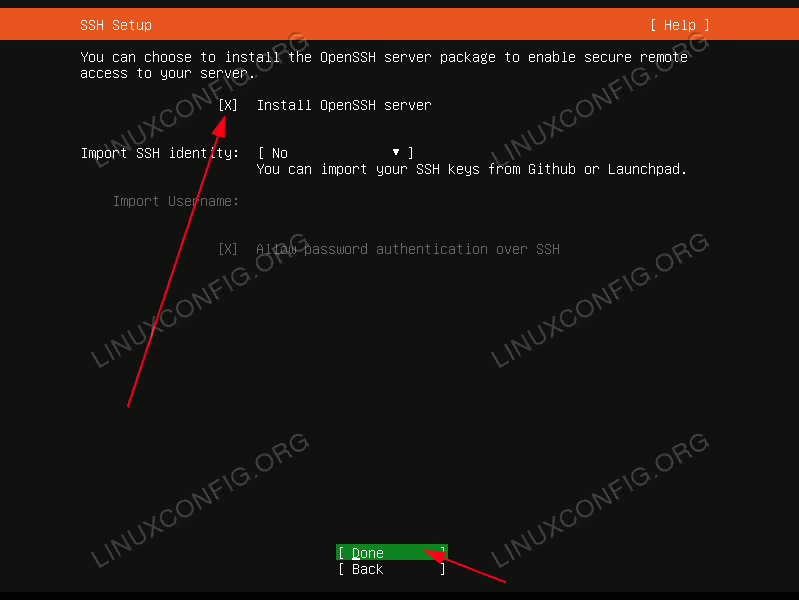 Although optional, SSH server installation is recommended for most of the Ubuntu server installation. SSH allows easy remote server access.
 -
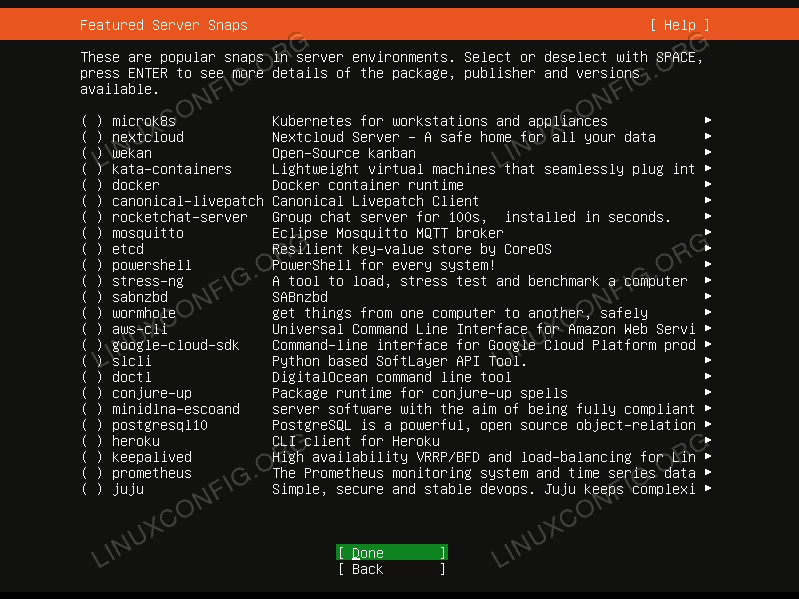 Unless you have anything specific already in mind select the appropriate box to install the service. Recommendation is to keep things simple and perform the installation of any required services once the Ubuntu 20.04 Server is installed and up and running
 -
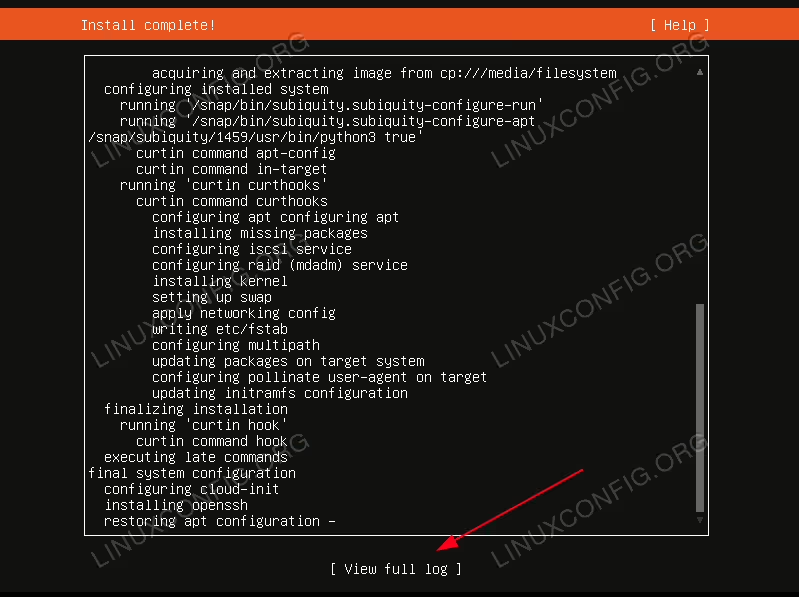 Wait for the Ubuntu 20.04 Server to finish. If you like to see what is happening in the background during the installation select
View full log. -
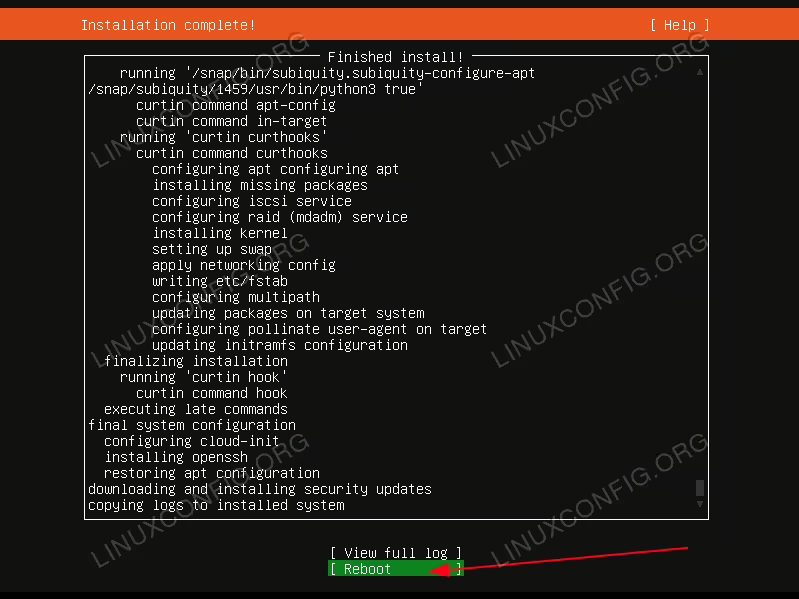 If all went well reboot your Ubuntu server. When prompted remove the installation DVD disk or USB flash drive.
 -
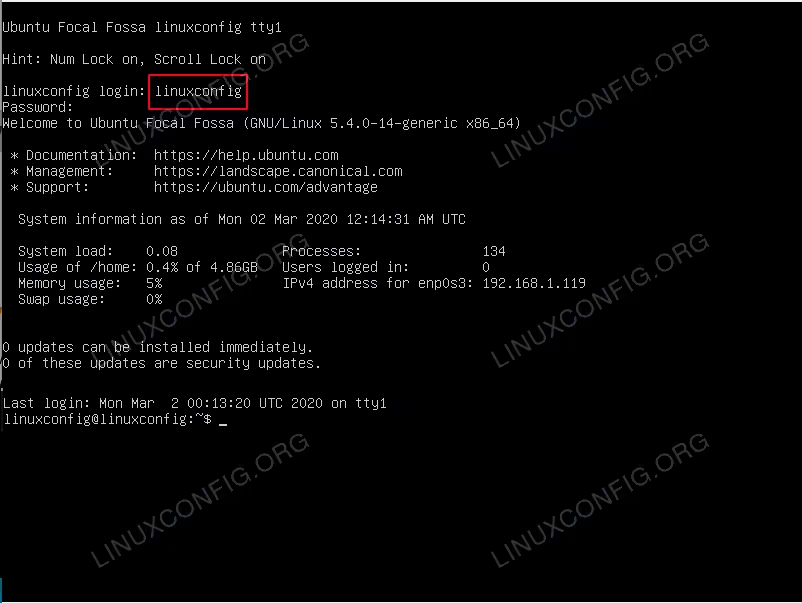 You should now be able to login with the username and password created during the Ubuntu 20.04 Server Installation.
If you have selected the Use An Entire Disk option to let the installation wizard partition your filesystem automatically, simply proceed to
For those interested in a simple Manual filesystem partitioning keep reading below.
For servers it is a good practice to set at least
/var and /home directories on a different partitions. The reason is that servers are most likely to be used as multi-user systems or will provide number of services which if not set correctly, may from time to time go out of control. Detaching the /var and /home directories from the main system will provide more stability since the user or service disk usage will not affect any core system functions and performance.
In the next few configuration steps we will manually partition our 30GB storage disk to consist of the following partitions:
/boot - 500 MB
/home - 5 GB
/var - 15 GB
SWAP - 2 GB
/ - 7.5 GB
Manual partitioningTo install any GNU/Linux system you need at minimum two partitions. First partition is the root partition
/ which contains the entire system and SWAP for the virtual memory.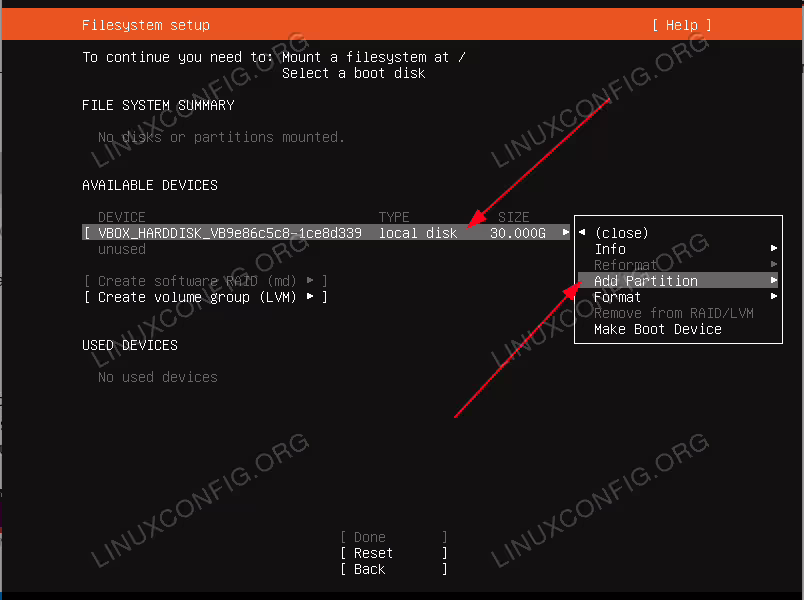
Add Partition. Repeat this step for all required below partitions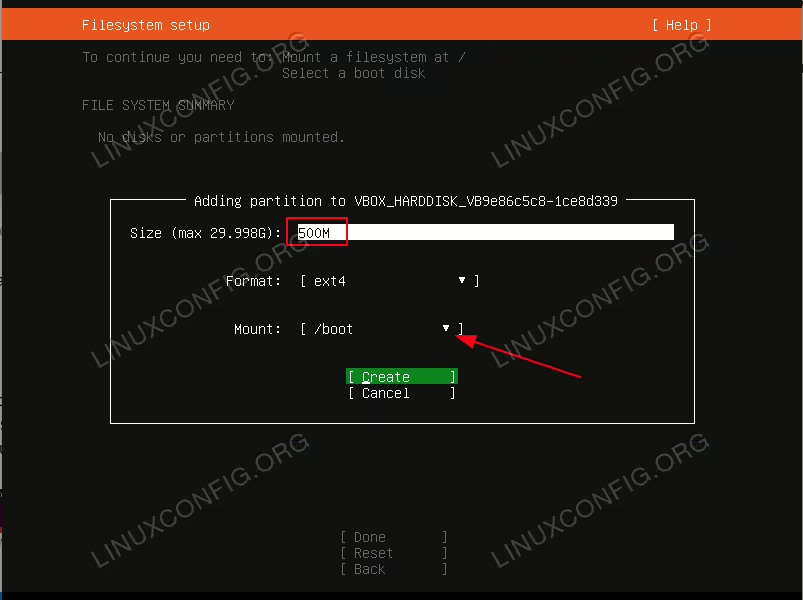
/boot partition. 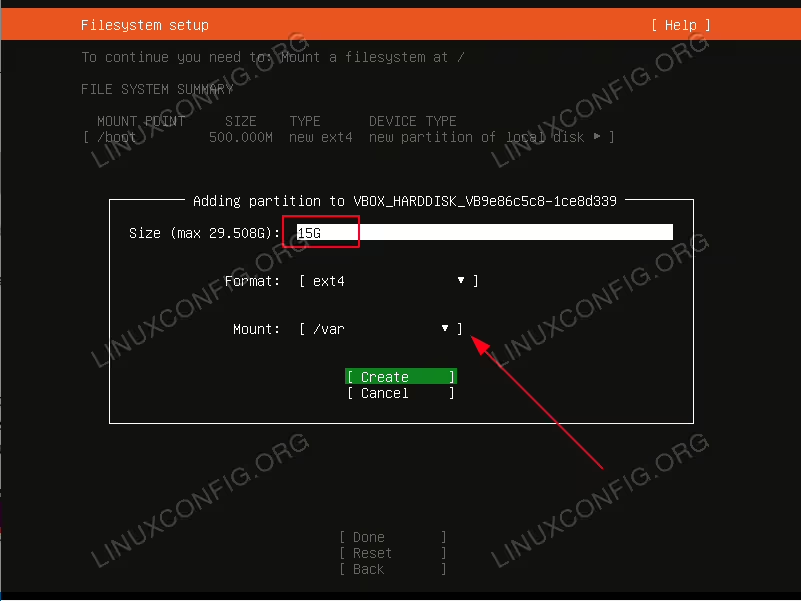
/var partition may require the most disk space.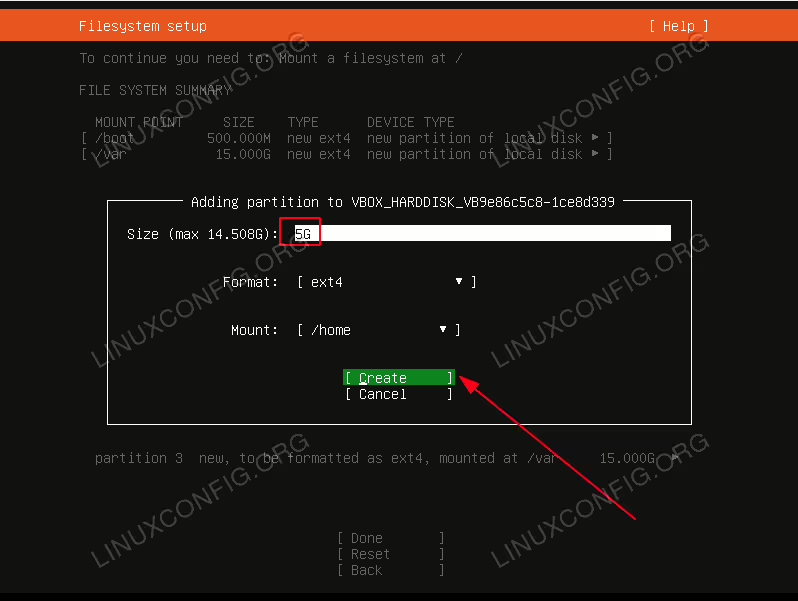
/home partition will be used to store home directory of every user (except root user). If your intention is to install eg. Samba server to share user’s home directories you may want to make this partition largest.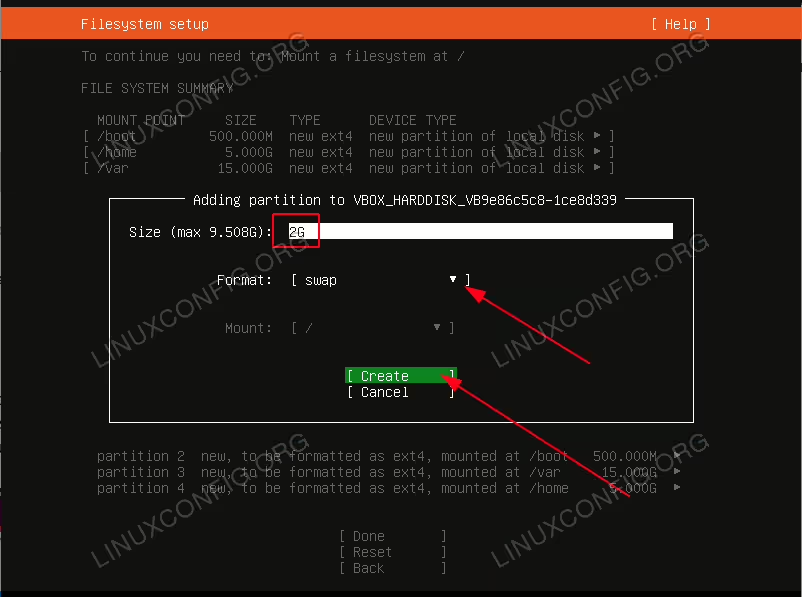
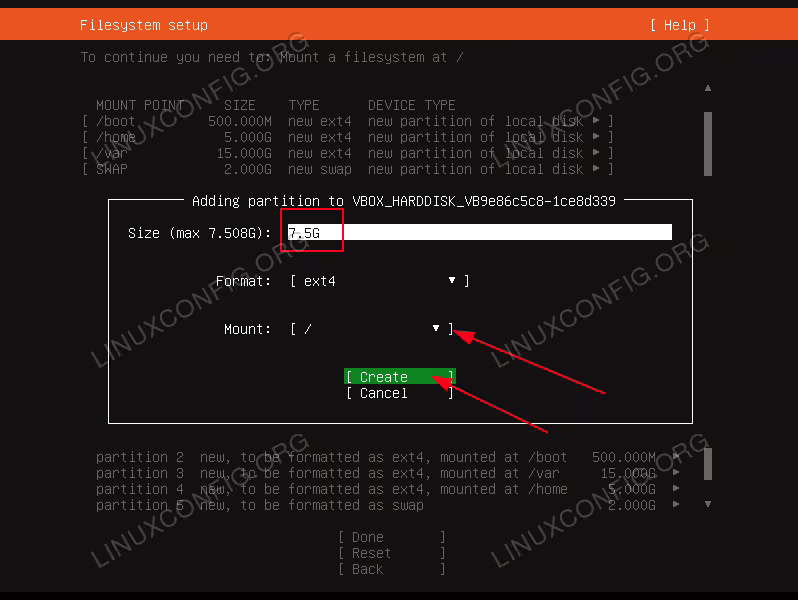
/ partition is used to contain the core system files and configuration. 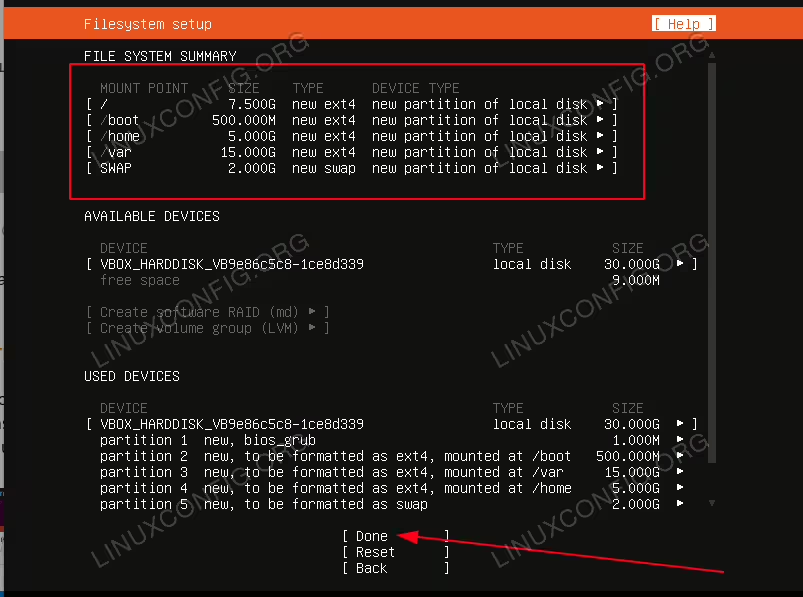
Done.