The ps command is a default command line utility that can give us insight into the processes that are currently running on a Linux system. It can give us a lot of helpful information about these processes, including their PID (process ID), TTY, the user running a command or application, and more.
While this sounds pretty simple, make no mistake, the ps command can get quite complicated. It accepts a lot of different options, and can be useful in an incredible number of situations, even as part of a bash script.
In this tutorial, we’ll introduce you to the ps command, and go over all of its most helpful options, including a lot of examples. By the end of reading this guide, you’ll be armed with all the information you need in order to get the most out of this helpful command line tool.
In this tutorial you will learn:
- How to list all the processes running on a system
- How to use
pscommand through examples
| Category | Requirements, Conventions or Software Version Used |
|---|---|
| System | Any Linux distro |
| Software | ps |
| Other | Privileged access to your Linux system as root or via the sudo command. |
| Conventions |
# – requires given linux commands to be executed with root privileges either directly as a root user or by use of sudo command$ – requires given linux commands to be executed as a regular non-privileged user |
How to list all the processes running on a system
The ps command can be a little confusing to beginners because it accepts options in a few different syntaxes. It’s a very old command that has found its way onto every (or nearly every) UNIX, BSD, and Linux system since the early 70s. As such, the current iteration has been adapted to accept syntaxes from UNIX (options preceded with a dash), BSD (options with no dash), and GNU (options preceded by two dashes).
It’s easiest to learn about the ps command through examples. To get started, use some of the following commands on your own system, and you’ll eventually have it mastered.
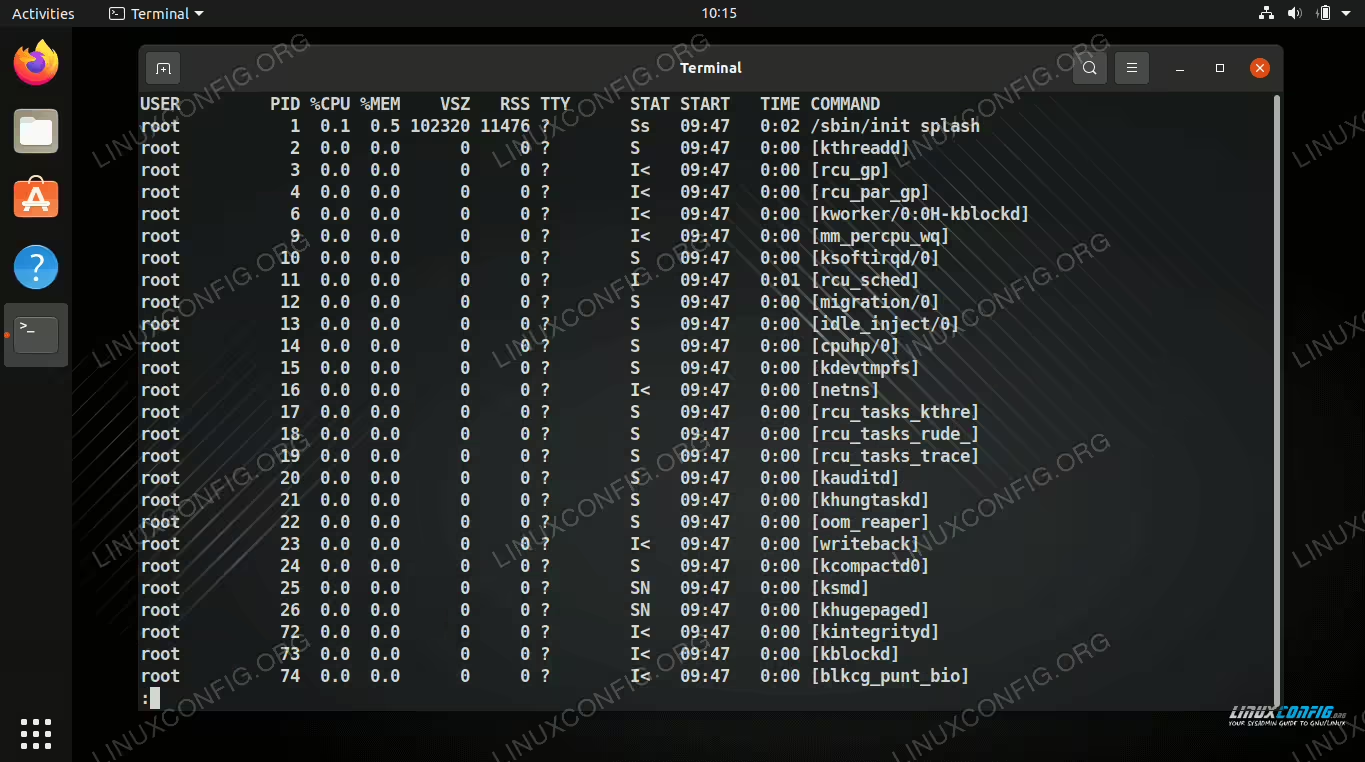
The following command will show all running processes on the system, and is probably the most used ps command in general. If there’s only one thing you remember after reading this tutorial, it should be this command.
$ ps aux
Notice that this is using BSD syntax (no dashes). Using the same options in a different syntax may produce a different result, so yes, syntax does matter. Here’s what these options do:
a– show processes from all users.u– display user oriented format (displays additional information about running processes).x– list processes that don’t belong to any tty.
This will probably produce a lot of output in your terminal. Even on freshly installed systems, there are usually quite a few processes running in the background, and ps will identify each one. Try piping the command to less or more to make the output more manageable.
$ ps aux | less
As you can see, there are quite a few columns in our output, and some of them may be cryptic to beginners. Let’s go over what each one means:
USER– The user who the process is running under.PID– The process ID (every process is assigned a number as an ID).%CPU– How much CPU percentage the process is utilizing.%MEM– How much RAM percentage the process is utilizing.VSZ– Virtual memory size of the process.RSS– The physical memory size that the process is using.TTY– Which TTY (terminal screen) the process is tied to, or?for none.STAT– The state code of the process; there are many but some common ones areS(sleeping) andR(running).START– The time when the process started.TIME– The accumulated CPU time the process has used.COMMAND– The full command that was used to spawn the running process.
How to use ps command through examples
Now that you have your bearings with the ps command, let’s go over some other helpful and common examples.
The following UNIX syntax is often used in place of the BSD syntax that we showed above. It’s more concise, making it easier to see things at a glance, but not as detailed as ps aux.
$ ps -ef
-e– display running processes from all users.-f– display full format listing (displays additional information about running processes).
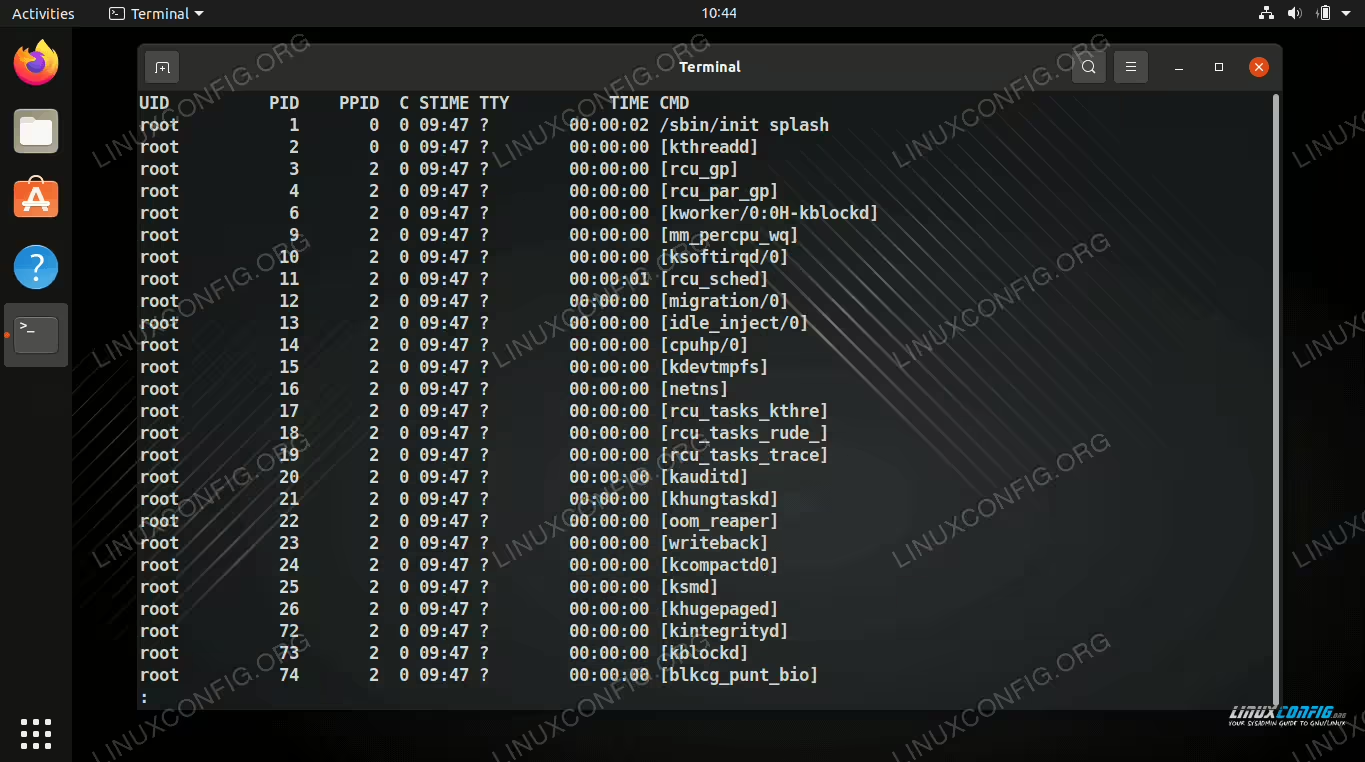
Our columns have changed a little, but they mostly mean the same thing as with the BSD syntax. Here’s a quick rundown of the new ones:
UID– User ID, same asUSERin BSD syntax.PPID– The process ID of the parent process.C– CPU utilization, same as%CPUin BSD syntax.STIME– Start time, same asSTARTin BSD syntax.
If you don’t need such detailed information, just use the -e option. The ax options will accomplish the same thing.
$ ps -e
PID TTY          TIME CMD
  1 ?        00:00:02 systemd
  2 ?        00:00:00 kthreadd
  3 ?        00:00:00 rcu_gp
........
$ ps ax
PID TTY      STAT   TIME COMMAND
  1 ?        Ss     0:02 /sbin/init splash
  2 ?        S      0:00 [kthreadd]
  3 ?        I<     0:00 [rcu_gp]
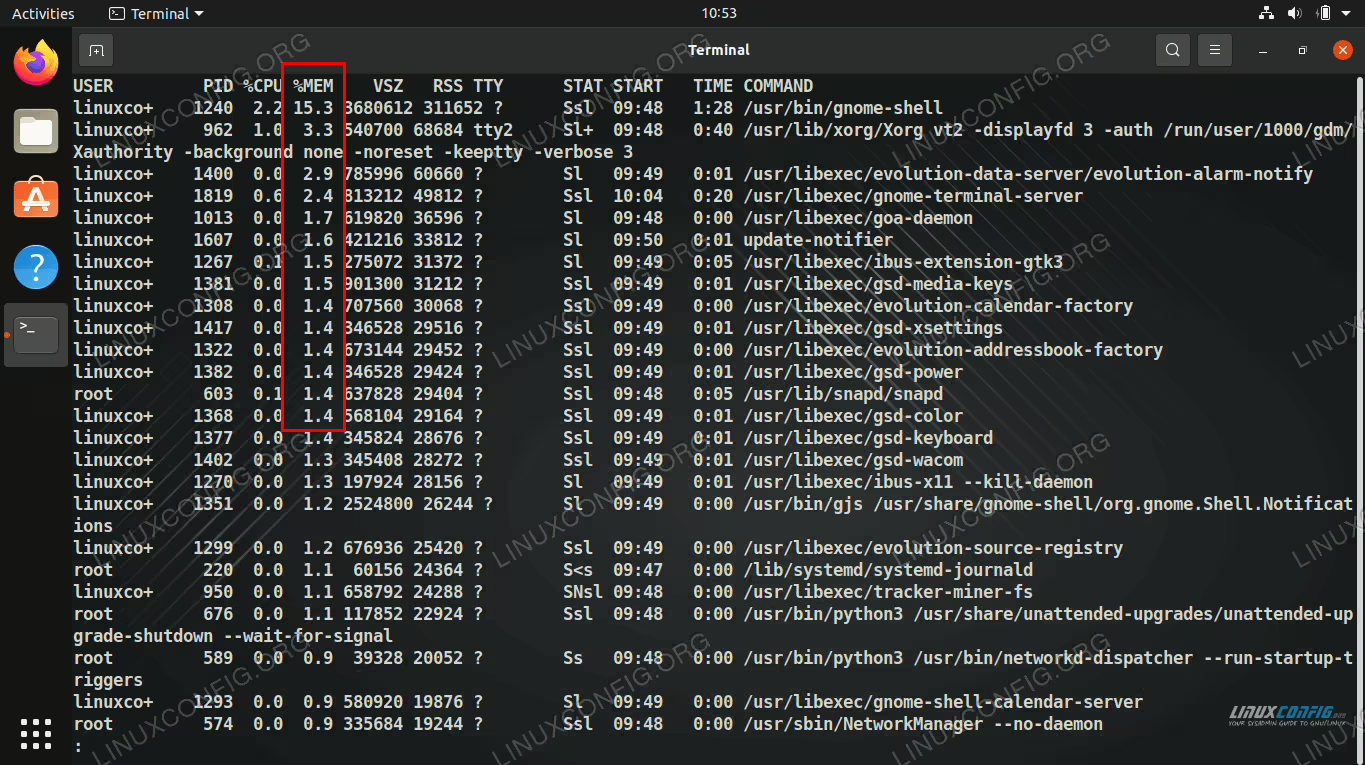
One of the best features of ps is that you can sort by any column you want. For example, to sort processes by the amount of memory they’re using:
$ ps aux --sort=-%mem | less
Or sort by CPU utilization:
$ ps aux --sort=-%cpu | less
If you’re looking for a specific process, it’s best to pipe to grep. This is especially useful if you need to quickly determine whether a process is running or not, or you need the process ID.
$ ps aux | grep apache2
The o option in BSD and -o in UNIX allows us to specify which columns we want to see. This makes the ps output very customizable, only listing the information we find relevant. All you need to do is list each column you want, separated with commas.
$ ps axo pid,%cpu,%mem,command | less

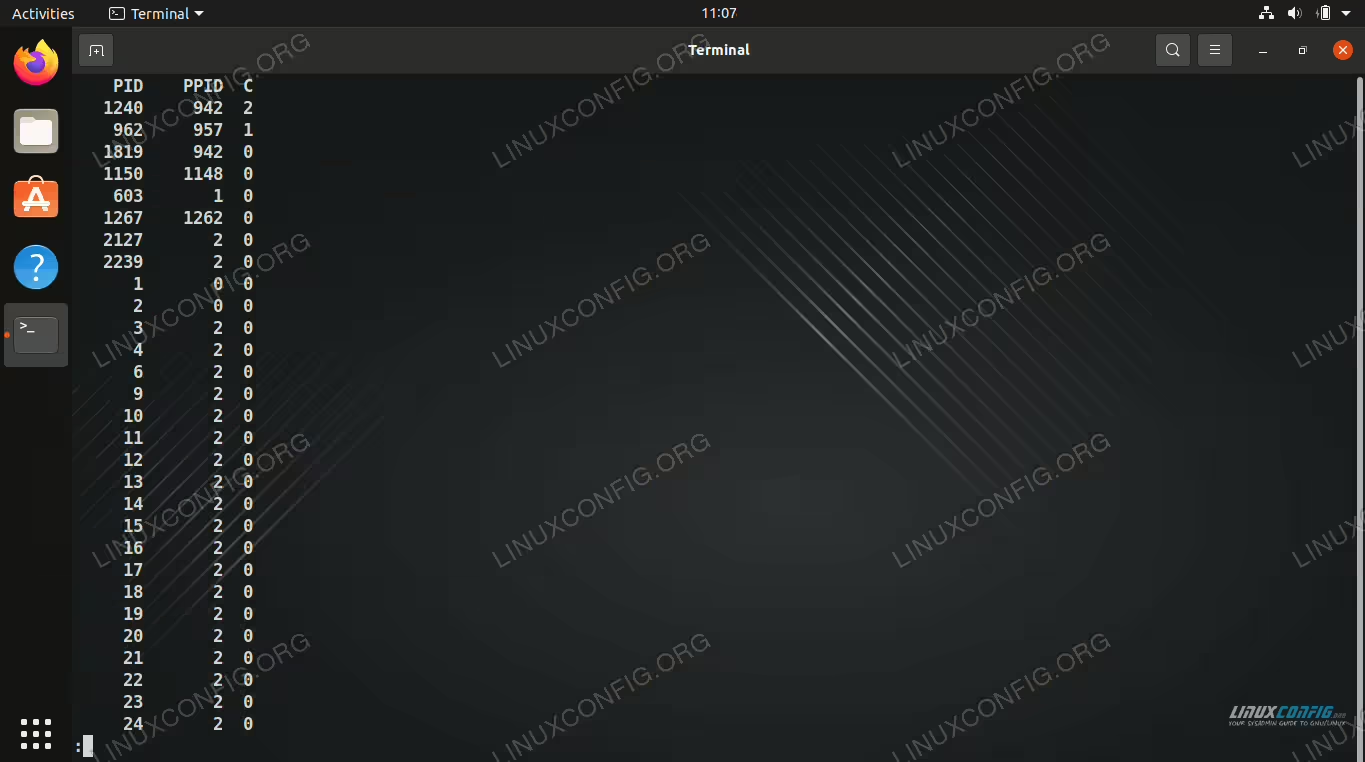
Here’s another example, but using UNIX syntax and also sorting the output by CPU usage.
$ ps -eo pid,ppid,c --sort=-c | less
Closing Thoughts
In this guide, we saw how to use the ps command on Linux to list running processes on the system. We also learned different command line examples that allow us to isolate the information we need.
The most important takeaway from this guide is the ps aux command. With this command, you can always see every process running on your system and identify all the relevant information. Piping to grep makes the command even more powerful. For more granular control, you can always consult our guide or the ps manual page.