Installing the right NVIDIA drivers on your Linux Mint system is crucial for optimizing your graphics card’s performance. Whether you’re gaming, designing, or using graphic-intensive applications, the proper driver can make a significant difference. This guide covers the recommended method to install NVIDIA drivers on Linux Mint using the built-in Driver Manager, ensuring compatibility and enhancing your system’s graphics capabilities.
In this tutorial you will learn:
- How to identify your NVIDIA graphics card
- Steps to install NVIDIA drivers using Driver Manager GUI
- How to verify and configure your installation
- Common troubleshooting solutions for NVIDIA driver issues
| Category | Requirements, Conventions or Software Version Used |
|---|---|
| System | Linux Mint 22 and higher |
| Hardware | NVIDIA Graphics Card |
| Other | Internet connection for downloading drivers |
| Conventions | # – requires given linux commands to be executed with root privileges either directly as a root user or by use of sudo command$ – requires given linux commands to be executed as a regular non-privileged user |
Identifying Your NVIDIA Graphics Card
- Check Your GPU Model: Before installing drivers, identify your NVIDIA graphics card model. Execute:
$ lspci | grep -i nvidia
This information helps you verify that the correct driver is detected and installed by Linux Mint.
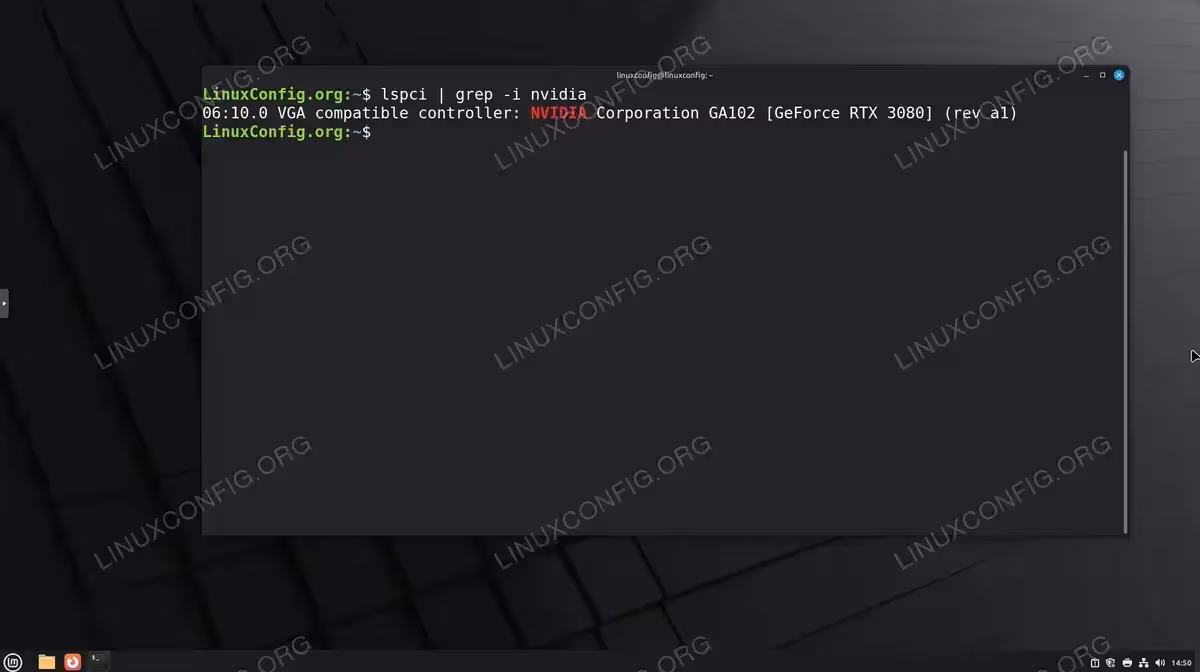
Identify your NVIDIA graphics card model using the lspci command on Linux Mint
Installing NVIDIA Drivers Using Driver Manager
- Open Driver Manager: Linux Mint includes a built-in Driver Manager that automatically detects and recommends appropriate drivers for your hardware. Open it by navigating to Menu → Administration → Driver Manager, or search for “Driver Manager” in the application menu.The Driver Manager will scan your system and display available driver options for your NVIDIA graphics card.
- Select NVIDIA Driver: In the Driver Manager window, you’ll see a list of available NVIDIA drivers. Linux Mint typically recommends the most stable and tested driver version, which will be marked as “recommended”. The available options usually include:
- Proprietary tested drivers (recommended) – These are stable versions thoroughly tested by the Linux Mint team
- Proprietary drivers – Latest available versions from NVIDIA
- Open-source nouveau driver – The default open-source driver (not recommended for performance)
Select the recommended proprietary driver by clicking on it, then click “Apply Changes”. You will be prompted to enter your password to authorize the installation.

Select the recommended NVIDIA driver in Linux Mint Driver Manager and click Apply Changes - Install the Driver: After entering your password, the Driver Manager will download and install the selected NVIDIA driver. This process may take several minutes depending on your internet connection. Wait for the installation to complete.You may see a progress indicator showing the download and installation status.
- Reboot Your System: After installation completes, you’ll be prompted to restart your computer. Click “Restart” or reboot manually:
$ sudo reboot
Rebooting is essential to load the new NVIDIA driver and unload the nouveau driver.
- Verify Installation: After rebooting, verify the driver is working correctly by opening a terminal and running:
$ nvidia-smi
This command displays your GPU information, driver version, and current GPU statistics, confirming successful installation.
- Configure NVIDIA Settings: Access the NVIDIA Settings application from Menu → Preferences → NVIDIA X Server Settings, or run from terminal:
$ nvidia-settings
This tool allows you to monitor GPU temperature, adjust clock speeds, configure multiple displays, manage power settings, and access advanced features.

Verify successful NVIDIA driver installation using nvidia-smi command and NVIDIA X Server Settings on Linux Mint
Additional Configuration Tips
- Driver Persistence: Linux Mint automatically configures the NVIDIA driver to load at boot. No additional configuration is typically needed
- Automatic Updates: NVIDIA drivers installed through Driver Manager will be automatically updated when you run system updates through Update Manager
- Switching Between Drivers: You can switch between different NVIDIA driver versions using the Driver Manager at any time without manual uninstallation. Simply select a different driver version and click Apply Changes
Troubleshooting
- Error: Unable to locate package nvidia-driver:
E: Unable to locate package nvidia-driver-xxx
Solution: This error typically occurs if your system repositories need updating. Open Update Manager and install all available updates, then try using Driver Manager again. If the issue persists, ensure your internet connection is stable and try refreshing the Driver Manager by closing and reopening it.
- Error: NVIDIA-SMI has failed because it couldn’t communicate with the NVIDIA driver:
NVIDIA-SMI has failed because it couldn't communicate with the NVIDIA driver.
Make sure that the latest NVIDIA driver is installed and running.
Solution: This usually means the driver isn’t properly loaded. First, verify the driver is installed by opening Driver Manager and checking that an NVIDIA driver is selected and active. If a driver is shown as installed, try rebooting your system. If the issue persists after reboot, use Driver Manager to switch to a different driver version, apply the changes, and reboot again.
- Error: Black screen after driver installation:Solution: If you encounter a black screen after installing NVIDIA drivers, boot into recovery mode:
- Restart your computer and hold Shift during boot to access the GRUB menu
- Select “Advanced options for Linux Mint”
- Choose a recovery mode option
- Select “Drop to root shell prompt”
Then remove the problematic driver:
$ sudo apt purge nvidia-*
$ sudo apt autoremove
$ sudo reboot
After rebooting normally, try installing a different driver version through Driver Manager.
- Error: Secure Boot preventing driver installation:
ERROR: modprobe: ERROR could not insert 'nvidia': Required key not available
Solution: This occurs when Secure Boot is enabled. You have two options:
Option 1: Disable Secure Boot in your BIOS/UEFI settings (recommended for ease of use)
Option 2: Enroll the MOK (Machine Owner Key) for the NVIDIA driver. During driver installation, you’ll be prompted to set a password. On reboot, follow the MOK enrollment process in the blue screen interface.
- Error: Conflicting nouveau driver:
$ lspci -k | grep -A 2 -E "(VGA|3D)"
Kernel driver in use: nouveau
Solution: The open-source nouveau driver is still active. The Driver Manager should handle this automatically, but if you see this after installation, reboot your system. The NVIDIA driver installation process blacklists nouveau automatically, but the change only takes effect after a reboot. If nouveau is still active after rebooting, use Driver Manager to reinstall the NVIDIA driver.
Conclusion
Installing NVIDIA drivers on Linux Mint is straightforward thanks to the built-in Driver Manager. This user-friendly graphical tool automatically detects your graphics card, recommends the appropriate driver, and handles the entire installation process. Linux Mint’s driver management system ensures you get properly tested and compatible drivers for your NVIDIA graphics card, optimizing performance for gaming, professional work, and general computing. The automatic update system keeps your drivers current, making Linux Mint one of the most beginner-friendly distributions for NVIDIA graphics card owners.