When you are adding a new disk to an existing Linux system, you will need to format and partition it, add a file system to it, and then mount the disk to some path where you plan to access it from. This might sound complex or like a lot of steps, but it really only takes a few minutes. The following tutorial will make it very easy.
In this tutorial, we will cover the step by step instructions to add a new hard drive or solid state drive to an existing Linux system. We will show the steps for both command line and GUI methods, so you can follow along with set of instructions you are most comfortable with. Let’s get started.
Table of Contents
In this tutorial you will learn:
- How to format and partition a disk with
fdisk - How to add a new file system with
mkfs - How to mount the disk permanently using
/etc/fstab - How to prepare a new disk via GNOME Disks GUI
| Category | Requirements, Conventions or Software Version Used |
|---|---|
| System | Ubuntu, Debian, Fedora, Linux Mint, or any Linux distribution |
| Software | fdisk, mkfs, mount, blkid, GNOME Disks (for GUI method) |
| Other | Privileged access to your Linux system as root or via the sudo command. |
| Conventions | # – requires given linux commands to be executed with root privileges either directly as a root user or by use of sudo command$ – requires given linux commands to be executed as a regular non-privileged user |
fdisk, format with mkfs, then mount permanently via /etc/fstab.
| Step | Command/Action |
|---|---|
| 1. Identify disk | sudo fdisk -l |
| 2. Partition disk | sudo fdisk /dev/sdX → n → p → w |
| 3. Format partition | sudo mkfs -t ext4 /dev/sdX1 |
| 4. Mount permanently | Add UUID to /etc/fstab |
How to Add New Disk to Existing Linux System via Command Line
Open a terminal and type the following commands to format your new hard drive or solid state drive:
- Identify the new disk: First, let’s figure out how to identify the new drive we wish to format. The name should start with
/dev/sdand then a letter. Type the following command in terminal to see:$ sudo fdisk -l

Find your device name in the fdisk output - Start fdisk: In our example, the new drive has been assigned
/dev/sdbdevice path. To create a new partition on the empty disk, we will provide it as argument tofdisk:$ sudo fdisk /dev/sdX
- Create new partition: The
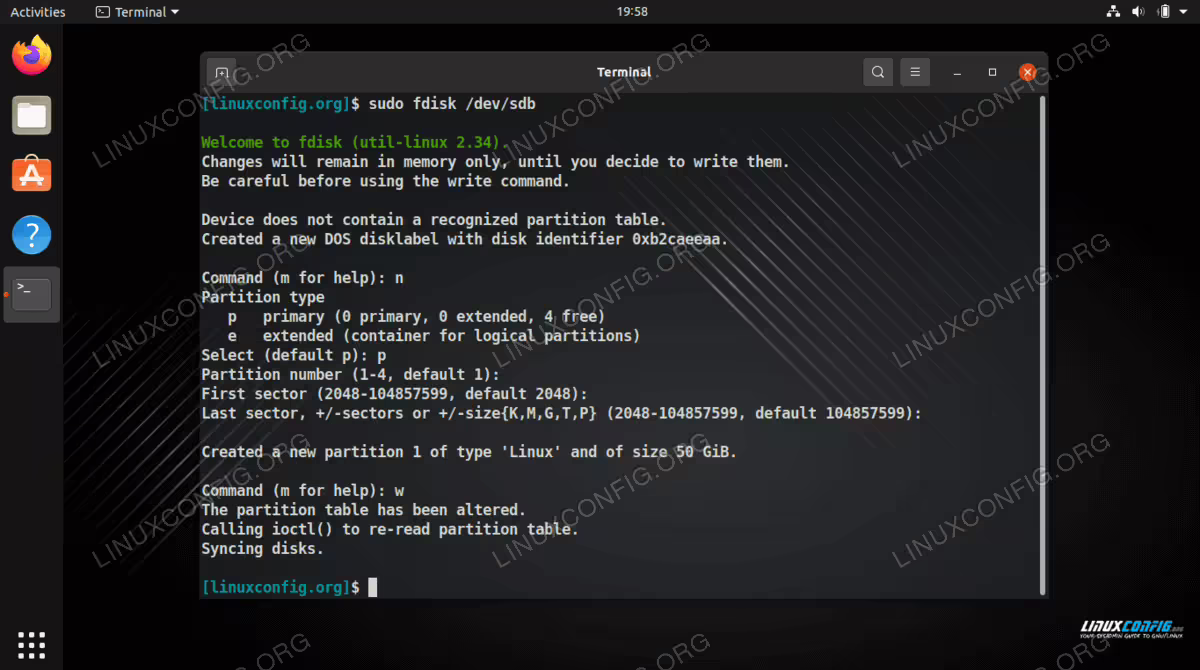
fdiskutility awaits our commands. We would like to create a new partition, so we press “n”.Command (m for help): n
- Select partition type: We are to create a primary partition, so the answer to the next question is “p”.
Partition type
   p   primary (0 primary, 0 extended, 4 free)
   e   extended (container for logical partitions)
Select (default p): p
- Accept default values: The next questions are about partition number, first and last sector, which will determine the actual size of the partition. In our example we are creating a single partition that will cover the disk, and default values are first partition, first available sector to start, and last sector to end with, which is just what we need. So we will accept the defaults for these questions.
Partition number (1-4, default 1): First sector (2048-104857599, default 2048): Last sector, +/-sectors or +/-size{K,M,G,T,P} (2048-104857599, default 104857599): Created a new partition 1 of type 'Linux' and of size 50 GiB. - Write changes to disk: The partition is now complete, but as the utility points out on start, the changes are in-memory only until we write them out to the disk. This is on purpose and the warning is in place for a good reason: by writing out the changes to the disk, we destroy anything that resided on the sector range we cover with our new partition. We are sure there will be no data loss, so we write the changes to disk:
Command (m for help): w
The partition table has been altered.
Calling ioctl() to re-read partition table.
Syncing disks.
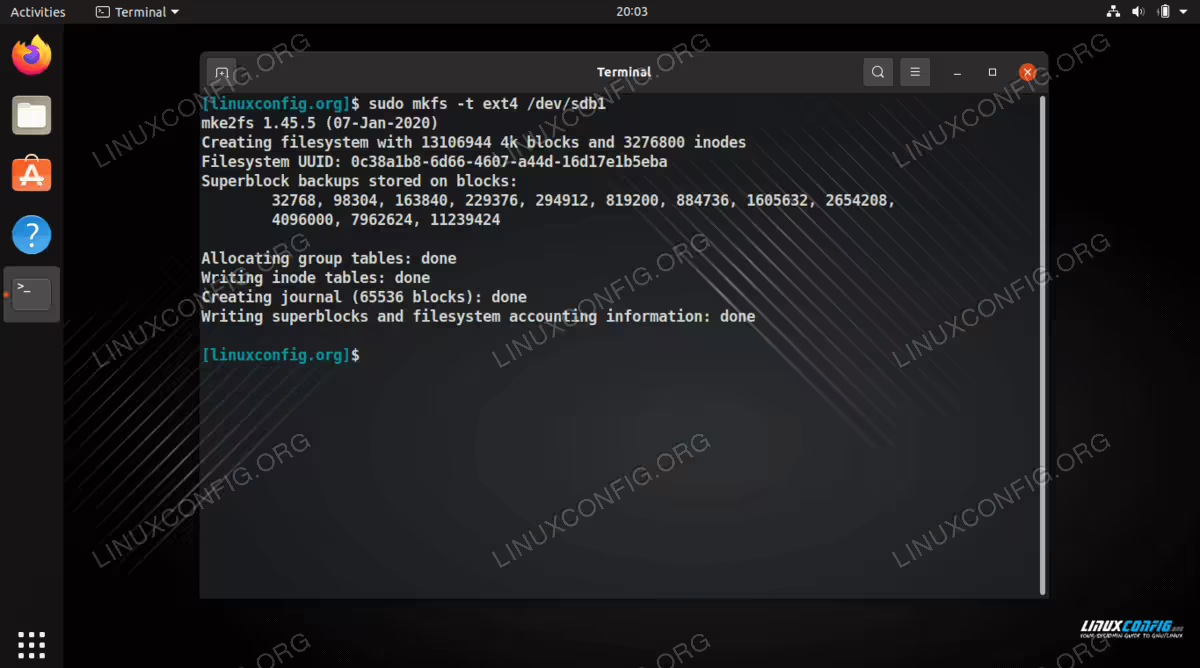
We are finished partitioning the new drive with fdisk utility - Format with ext4 filesystem: Next, we still need to add a file system to our hard disk. Our new partition is under the device path of
/dev/sdb1(usefdisk -lcommand to see your own). Use themkfscommand to format the disk with any file system you would like. In this example, we are using ext4, which is the recommended file system for new HDDs and SSDs on Linux:$ sudo mkfs -t ext4 /dev/sdX1
Formatting our new disk with the ext4 file system - Create mount point and mount: We will now use the
mountcommand to mount the newly formatted partition on our system. We will mount our new disk to the/media/diskdirectory.$ sudo mkdir -p /media/disk $ sudo mount /dev/sdb1 /media/disk
- Get the UUID for permanent mount: The disk is now mounted, but this mount will not persist after a reboot. To make the mount permanent, we need to add an entry to
/etc/fstab. First, get the UUID of the partition using theblkidcommand:$ sudo blkid /dev/sdb1
WHY USE UUID INSTEAD OF DEVICE PATH?
Device names like/dev/sdb1can change between reboots depending on the order disks are detected. The UUID (Universally Unique Identifier) is a permanent identifier assigned to the filesystem that never changes. Using UUID in/etc/fstabensures your disk always mounts correctly, even if you add or remove other storage devices. - Add entry to /etc/fstab: Open
/etc/fstabwith your favorite text editor and add a new line with the UUID:$ sudo nano /etc/fstab
Add the following line at the end of the file (replace the UUID with your own):
UUID=a1b2c3d4-e5f6-7890-abcd-ef1234567890 /media/disk ext4 defaults 0 2
- Test the fstab entry: Before rebooting, test your fstab configuration to make sure there are no errors:
$ sudo mount -a
If no errors are returned, your configuration is correct and the disk will mount automatically on every boot.
That’s all there is to it. You can now access your newly formatted drive under the
/media/disk directory or where ever you decided to mount it. For more detailed information about fstab options and configuration, see our guide on the /etc/fstab file.
How to Add New Disk via GUI
GNOME DISKS ONLY
The following instructions are specific to the GNOME Disks utility, which comes pre-installed on Ubuntu, Fedora, and many other distributions using the GNOME desktop environment. If you are using a different desktop environment such as KDE, XFCE, or MATE, we recommend following the command line method above unless you are already familiar with your desktop’s disk management tools.
The GNOME Disks utility provides a user-friendly way to partition, format, and configure automatic mounting for new storage devices. Follow these steps to add a new disk using the graphical interface.
- Open GNOME Disks and select your disk: Get started by opening the Disks application from your application menu. You should see your new disk listed among the other storage devices on your system. Select the disk you wish to format, then click the three-dot menu icon in the top right corner and select “Format Disk”.
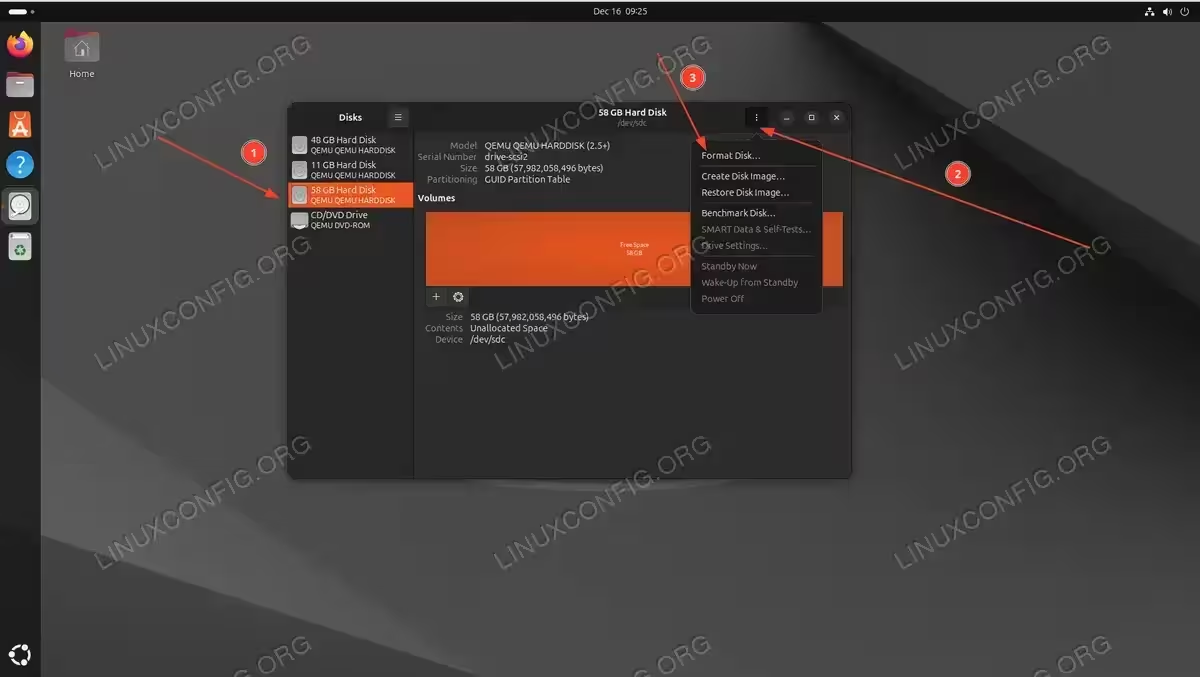
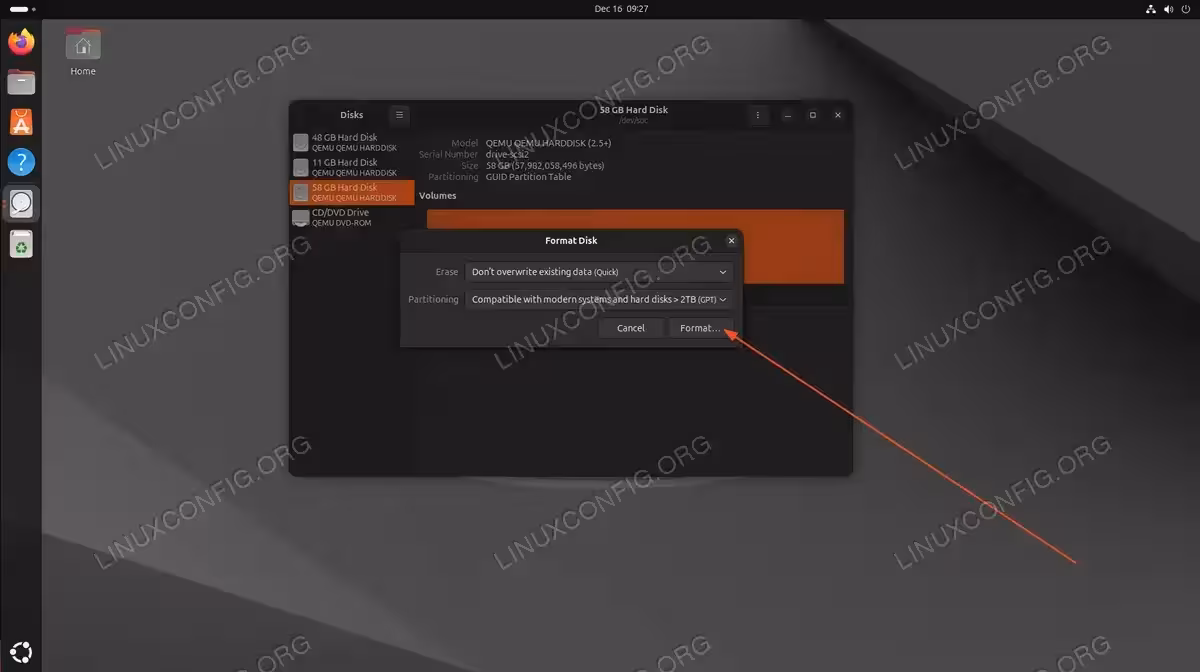
Select the new disk and choose Format Disk from the menu - Choose formatting options: In the Format Disk dialog, select the erase method and partitioning scheme. For most users, “Don’t overwrite existing data (Quick)” and “Compatible with modern systems and hard disks > 2TB (GPT)” are the recommended options. Click “Format” to proceed.
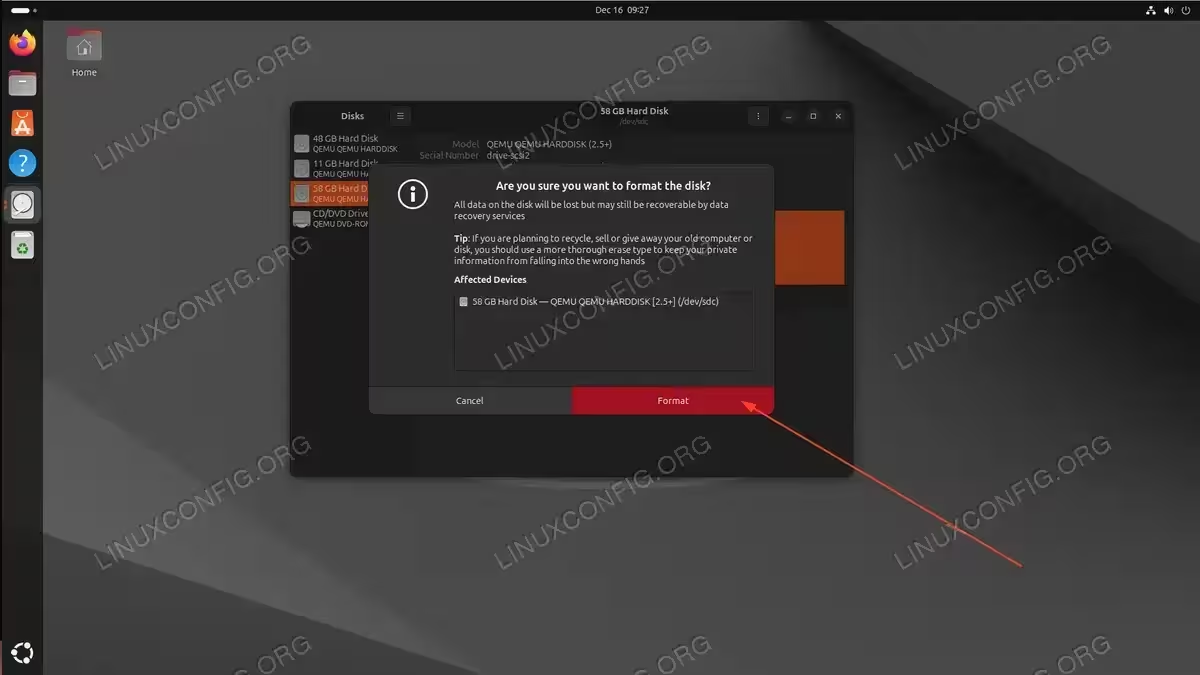
Choose quick erase and GPT partitioning scheme - Confirm the format operation: A confirmation dialog will warn you that all data on the disk will be lost. Verify you have selected the correct disk and click “Format” to proceed.
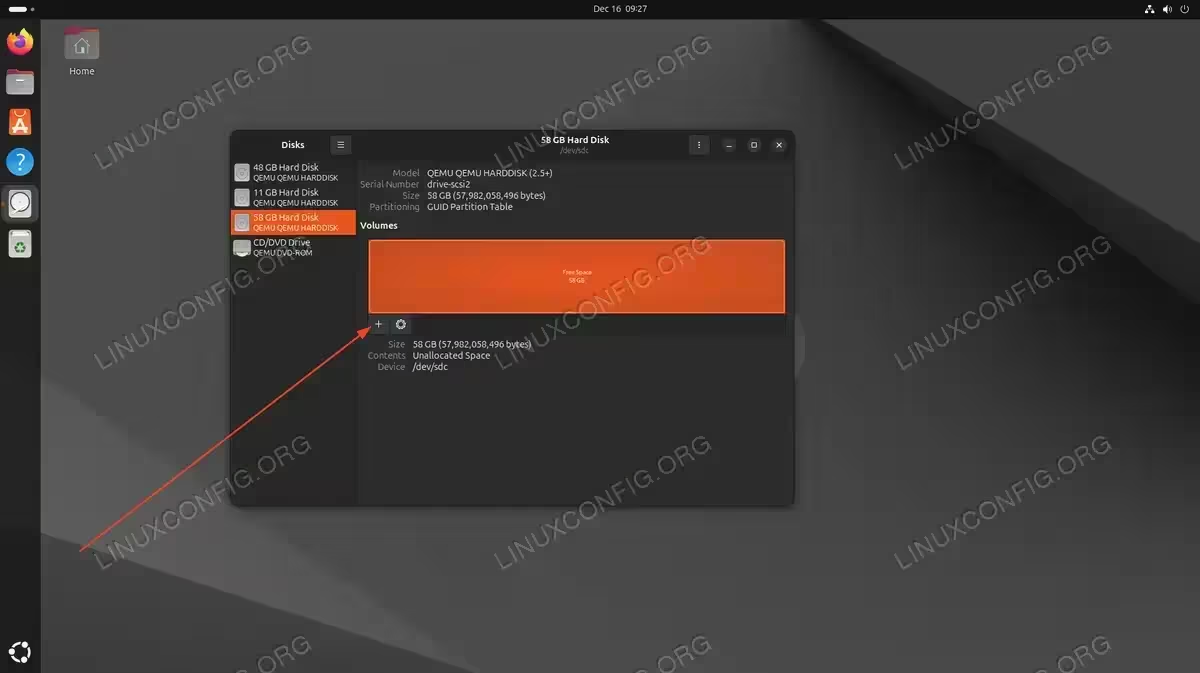
Confirm disk formatting to proceed - Create a new partition: After formatting, the disk will show as “Free Space”. Click the + (plus) button below the volume display to create a new partition.
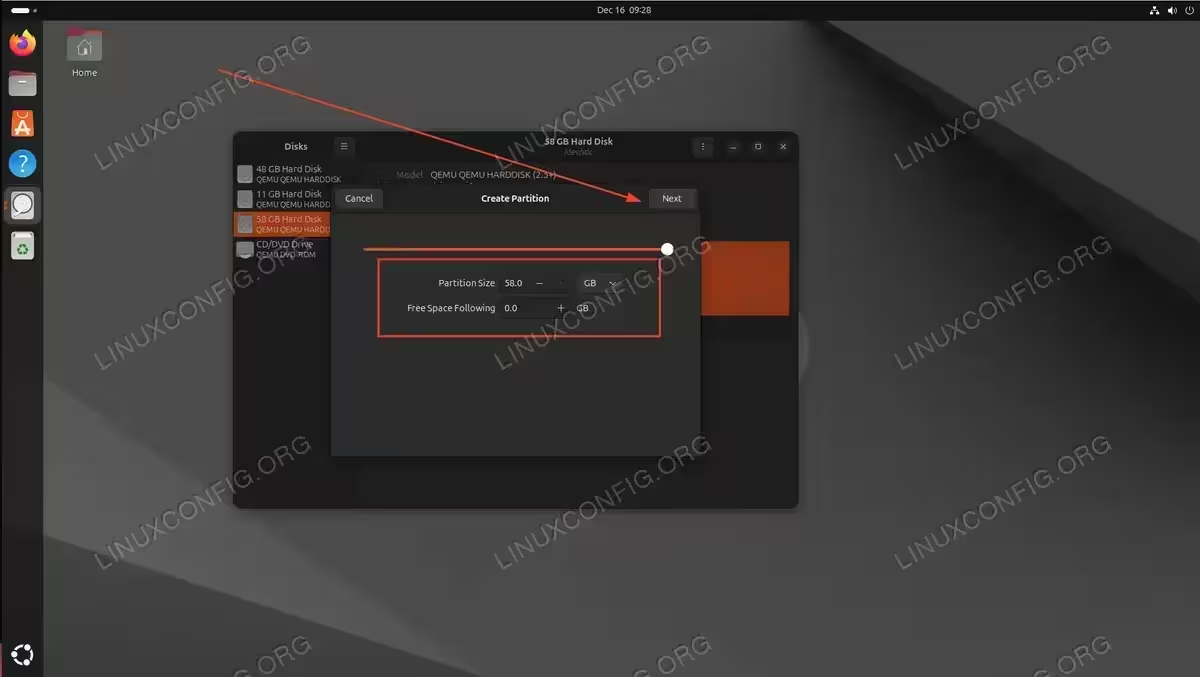
Click the + button to create a new partition on the free space - Set partition size: Use the slider or input fields to set the partition size. To use the entire disk for a single partition, leave the default values and click “Next”.
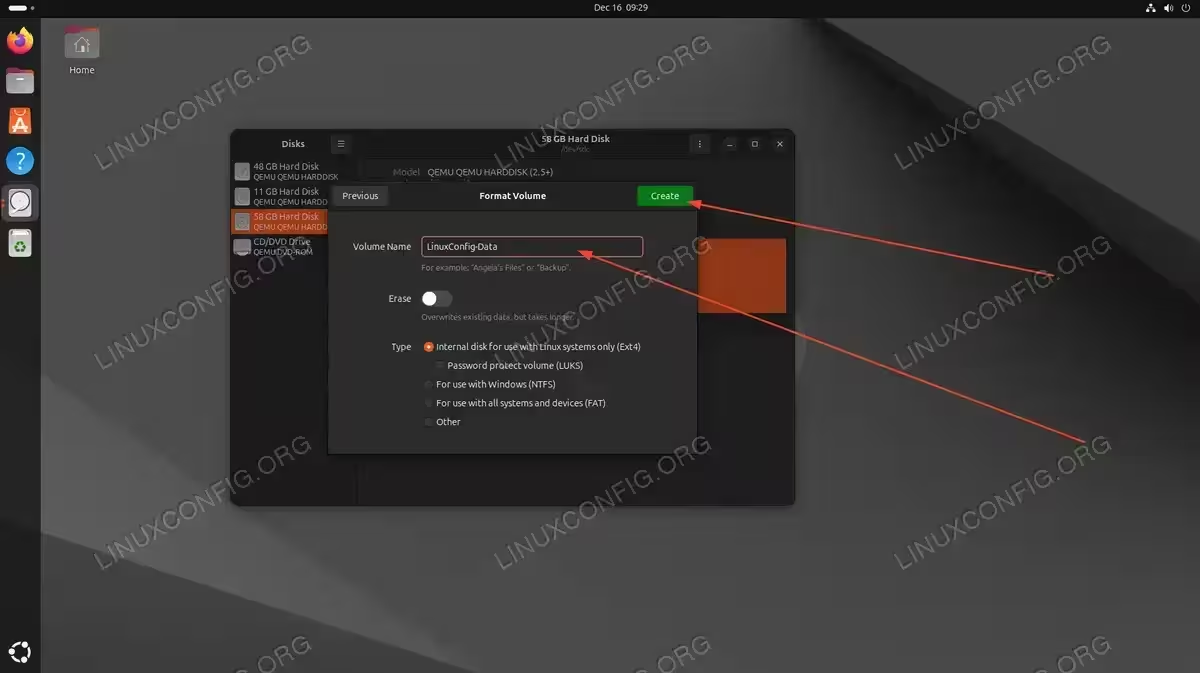
Set the partition size using the slider or input fields - Configure volume name and filesystem: Enter a descriptive name for your volume and select the filesystem type. Choose “Internal disk for use with Linux systems only (Ext4)” for the best compatibility and performance on Linux. Click “Create” to finish creating the partition.
Enter volume name and select Ext4 filesystem type - (Optional) Configure mount options: By default, GNOME will auto-mount the disk when you log in. If you want the disk to mount at system startup (before login) or to a custom location, click the gear icon below the volume and select “Edit Mount Options”.
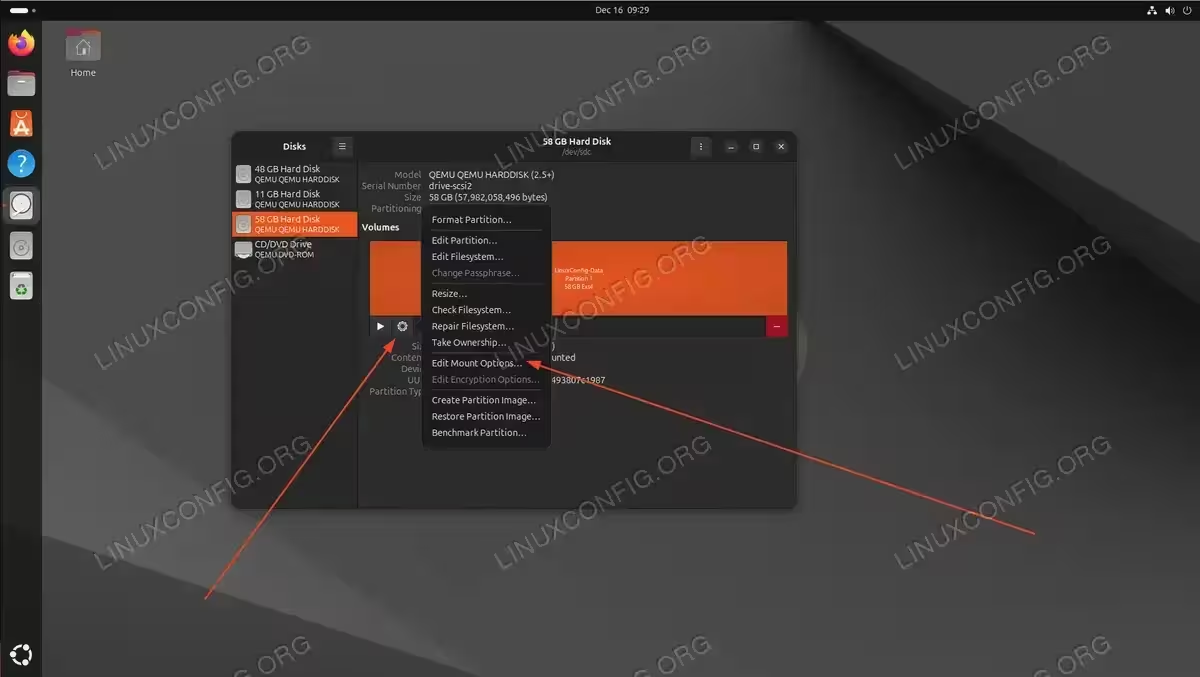
Access mount options through the gear icon menu - (Optional) Set custom mount point: In the Mount Options dialog, turn off “User Session Defaults” to unlock the configuration options. You can then enable “Mount at system startup” and change the mount point to a more readable path like
/media/storageinstead of the default UUID-based path. Click “OK” to save your changes.
Disable User Session Defaults to configure custom mount point
Your new disk is now ready to use. You can access it through your file manager or from the command line at the configured mount point.
Closing Thoughts
In this tutorial, we saw how to add a new disk to an existing Linux system using both command line and graphical methods. We used the ext4 file system to complete the job, which is the recommended configuration for optimal performance on modern Linux systems. The command line method using fdisk, mkfs, and /etc/fstab works universally across all Linux distributions and provides the most control over the configuration. The GNOME Disks GUI method is easier for beginners and handles much of the configuration automatically. For more information about disk management, refer to the official udisks documentation.
Frequently Asked Questions
- What if my disk shows as /dev/nvme instead of /dev/sd? NVMe drives use a different naming convention. Your disk will appear as
/dev/nvme0n1and partitions as/dev/nvme0n1p1. The partitioning and formatting commands work the same way, just replace/dev/sdXwith/dev/nvme0n1and/dev/sdX1with/dev/nvme0n1p1. - How do I unmount and remove a disk safely? First unmount the disk with
sudo umount /media/disk, then remove its entry from/etc/fstabif you added one. You can then safely disconnect the drive. Never disconnect a mounted disk as this can cause data corruption. - Can I create multiple partitions on a single disk? Yes. In fdisk, instead of accepting default values for the partition size, specify a smaller size using the +size format (e.g.,
+100Gfor 100 gigabytes). After writing the first partition, run fdisk again to create additional partitions on the remaining free space. In GNOME Disks, simply adjust the partition size slider when creating partitions. - What filesystem should I choose for my new disk? For Linux-only systems, ext4 is the recommended choice as it offers excellent performance, reliability, and compatibility. If you need to share the disk with Windows, use NTFS. For USB drives that need to work with multiple operating systems, exFAT is a good choice.
- Why does my disk not mount after reboot? This usually means the
/etc/fstabentry is missing or incorrect. Verify the UUID matches your partition usingsudo blkid, check that the mount point directory exists, and test the configuration withsudo mount -a. Any errors in this command will indicate what needs to be fixed.