
Behind the Scenes of Creating Biological Resin Specimens #MyFirstNote

Passing life on to the future. How VITA CAST resin specimens are made
Nice to meet you. We are VITA CAST, creators and sellers of biological resin specimens.
I started this note because I wanted to connect with everyone who loves resin and living things!
Well then...
The fine veins of an insect's wing. The hard contours of a beetle. The time that plants have layered over themselves.
Living things possess a three-dimensional beauty that photographs alone cannot convey. However, dried specimens are delicate, and it is not easy to pick them up casually or observe them from the back.
That is why we at VITA CAST create specimens by encasing living things in transparent resin, allowing them to be picked up and observed from various angles.
In this post, I will introduce what VITA CAST aims to achieve and the eight steps involved in creating a single resin specimen.
What is VITA CAST?
The name VITA CAST embodies the idea of Vita (life) / cast (re-casting). Our motto is 'Encasing Life: The Everlasting Biopedia.' It is a biological specimen project that aims to record the dignity and beauty of life and pass it on to the future.
At the starting point was the limitation of conventional specimen technology that I felt while continuing biological research.
Resin specimens preserve the form of living things within a transparent three-dimensional space. Unlike fragile dried specimens or flat photographs and illustrated books, you can intuitively observe their shape and color from the front, side, and back. Not only can they be enjoyed as exhibits, but they also have the potential to be used in education and research as 'touchable illustrated books' that can be carried into the field.
Handcrafted, one by one
It is not finished just by putting it in resin.
To leave as few air bubbles as possible, keep the specimen in the desired position, and finish with a transparent surface, we repeat the processes of cleaning, fixing, double resin injection, degassing, curing, and polishing. Since each specimen differs in size and shape, it does not always finish with the same method. We adjust the process while observing the characteristics of each individual.
1. Cleaning the specimen

First, we carefully clean and disinfect the specimen with ethanol. Removing dirt from the surface is an important preparation that affects how it looks after completion. We carefully tidy up even the fine irregularities and between the legs without damaging them.
2. Creating the first layer of resin

We pour two-part epoxy resin into a silicone mold to first create a 'scaffold' to support the specimen. By curing the first layer first, we can place the specimen in a stable position within the finished product.
3. Applying UV resin for fixing

Apply a small amount of UV resin to the parts that touch the base, such as the tips of the specimen's legs. The main focus is the creature itself. I work little by little, carefully identifying the necessary spots so that the fixing agent does not stand out.
4. Fixing the specimen with UV light

Shine UV light from under the mold to fix the specimen to the first layer of the base. This is a tense process where the orientation and posture are determined. Fixing it firmly here prevents shifting when pouring the next layer of resin.
5. Pouring the second layer of resin

Slowly pour the two-part mixed epoxy resin to cover the fixed specimen. I proceed while checking the condition of the specimen to ensure the resin reaches even the smallest gaps. As the transparent layer fills up, the creature's form transforms into a 'specimen artwork'.
6. Collecting air bubbles with a degassing device

Inside the resin, fine bubbles generated during pouring and air remaining inside the specimen appear. Using a degassing device, I collect them at the liquid surface. This is an important process to increase transparency and make the details of the creature easier to see.
7. Removing surface bubbles one by one
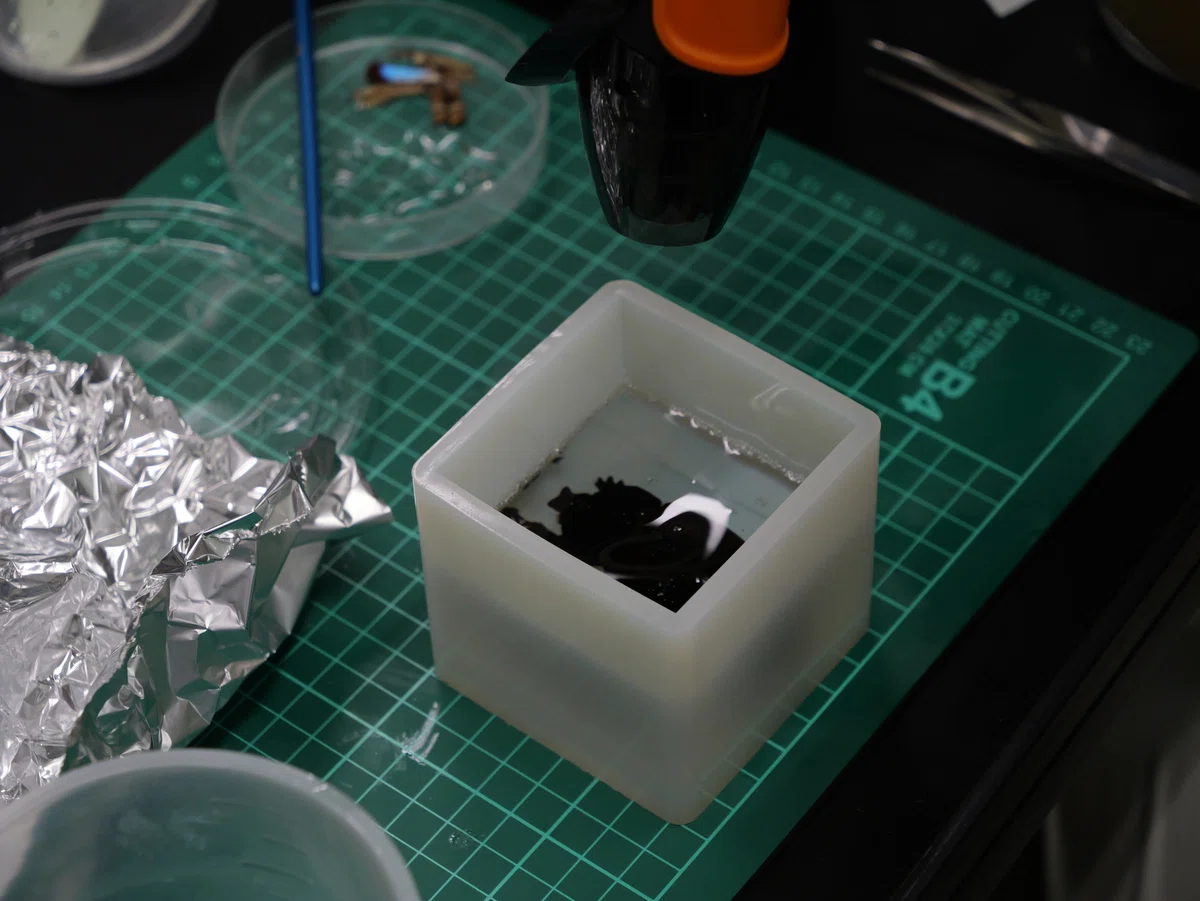
Carefully remove the bubbles gathered on the liquid surface using a heat gun or tweezers. After the process using large equipment, a fine finishing touch by eye and hand awaits. Because the resin is transparent, I must address even the smallest bubbles.
8. Finishing the surface after complete curing

After it has completely cured under appropriate temperature and humidity, remove it from the mold. I smooth out any sharp parts or surface scratches created during production using an art knife, compound, and polishing equipment. It is finally complete after confirming its safety when held and the transparency that allows one to see through the specimen.
*The photos include examples of finishing for other works.
Turning specimens into something even those who dislike insects will find themselves staring at
In 'Shonai Tsu!!', a local media outlet that introduced the 2025 'Tsuruoka Science Park Festival', VITA CAST was featured as an activity launched by students researching at the Keio Institute for Advanced Biosciences.
What was impressive about the article was that even the interviewer, who is not fond of insects, was able to observe various aspects of them without touching them directly through the resin, and looked at them "intently." On the day, the event also introduced resin specimen making experiences involving insects, plants, and seashells, as well as an exhibition of rare specimens.
Transparent resin bridges the gap between "I can't get close because I don't like them" and "I want to know more." What VITA CAST wants to create is exactly that kind of new encounter with living things.
Passing a small, transparent ark to the next generation
No two natural forms are the same. In a specimen, the time that the individual lived overlaps with the memories of the person who has gazed upon it.
Based on the philosophy of a "modern ark" inspired by Noah's Ark, VITA CAST aims to preserve the beauty of living things as a record for culture, science, and education. When you pick up a small, transparent ark, you are sure to make new discoveries, even about creatures whose names you did not know.
Currently, you can view resin specimens of insects, arachnids, plants, and more in our online shop. We have listed specimens that differ in both shape and color, such as the large metallic Euchroma giganteum, tarantulas, and pinecones.
If you find one that catches your eye, please be sure to look at it not just from the front, but from various angles.


