Eclipse highlights variables, methods, and other elements when the cursor is positioned over them, along with line and text selections. While useful, the default colors may not always suit our theme or preference. Eclipse allows us to customise these highlights for improved readability. In this article, we’ll walk through how to change different highlighting options in Eclipse.
1. Change Highlight Color for Mark Occurrences
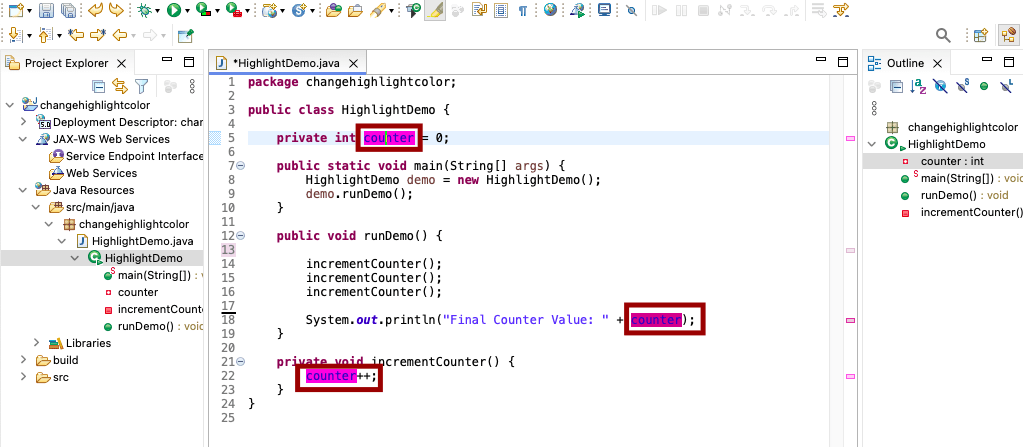
This refers to the colored background applied to all instances of the currently selected element. When our cursor lands on a method, variable, or other element, all its occurrences get highlighted, making it easier to track usage across our code.
To change that highlight color, navigate to:
- Preferences > General > Editors > Text Editors > Annotations
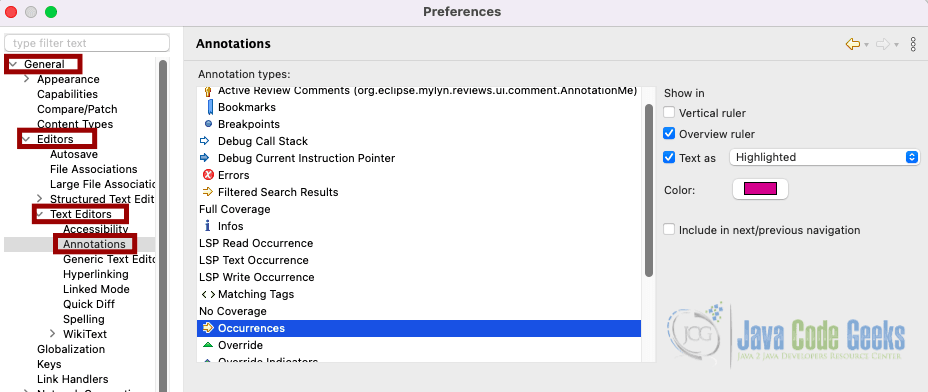
In the Annotation types list, look for entries such as:
- Occurrences (read references)
- Write Occurrences (write references).
Select one, make sure Text as Highlighted is enabled, and then choose your preferred color.
2. Change Text Selection Background & Foreground Colors
Eclipse allows us to fully customize both the background and foreground (text) colors used when selecting code in the editor. Adjusting these settings ensures that our selections remain visible and comfortable to read, regardless of whether we are using a light or dark theme.
To configure these options, go to:
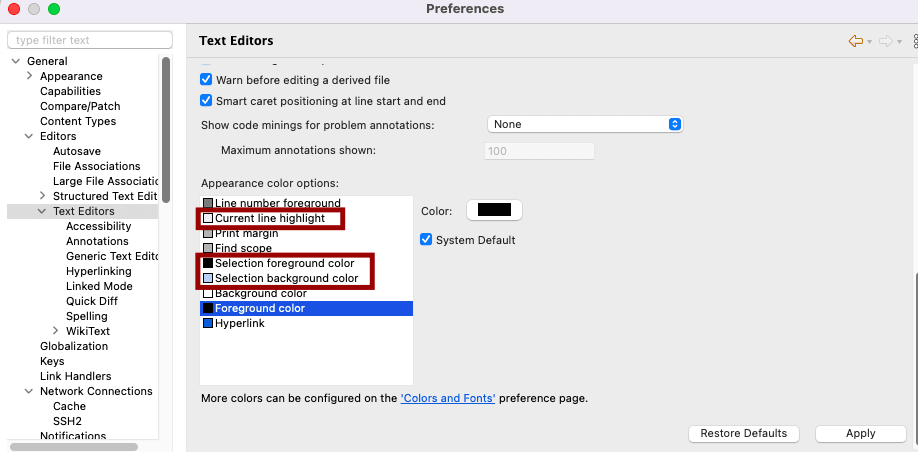
- Preferences > General > Editors > Text Editors
Scroll down to the Appearance Color Options section. Here, we can adjust:
- Selection Background Color – the highlight color that appears behind selected text.
- Selection Foreground Color – the color of the selected text itself.
- Current Line Highlight – the background color of the line where the cursor is placed, useful for navigation.
By carefully choosing contrasting colors, we can avoid situations where text becomes unreadable (for example, dark text on a dark background or light text on a light background). Many developers using dark themes prefer a bright accent color (like blue or green) for the selection background and a white or yellow foreground to make the text pop.
3. Modify Search Result Highlight
When we use Eclipse’s search feature (for example, Ctrl+F or Ctrl+H), all matches are highlighted in the editor. By default, this color may not stand out depending on our theme. Fortunately, we can customize it. Go to:
- Preferences > General > Editors > Text Editors > Annotations
In the list of Annotation types, select Search Result.
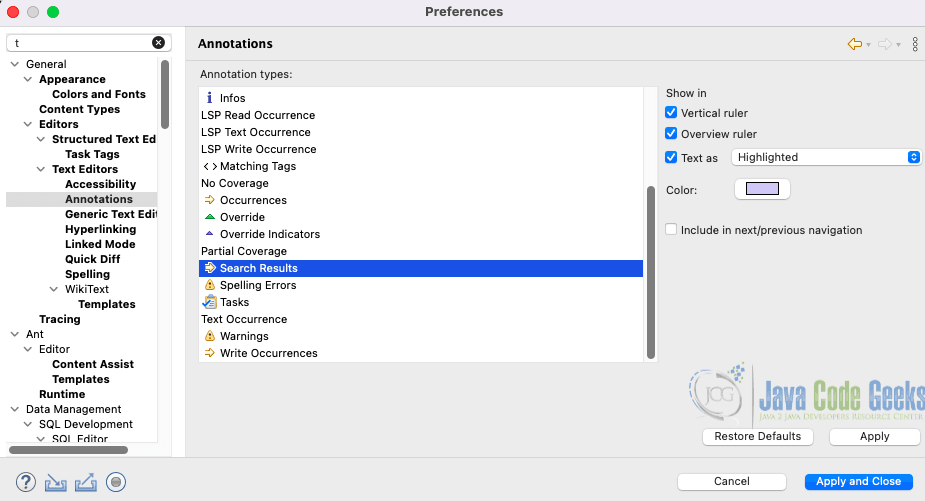
Ensure Text as Highlighted is checked, then pick a new background color. We can also adjust how search results appear in the vertical ruler (the sidebar markers). This makes it easier to distinguish search hits, especially in large files with many matches.
4. Customize Syntax Colors
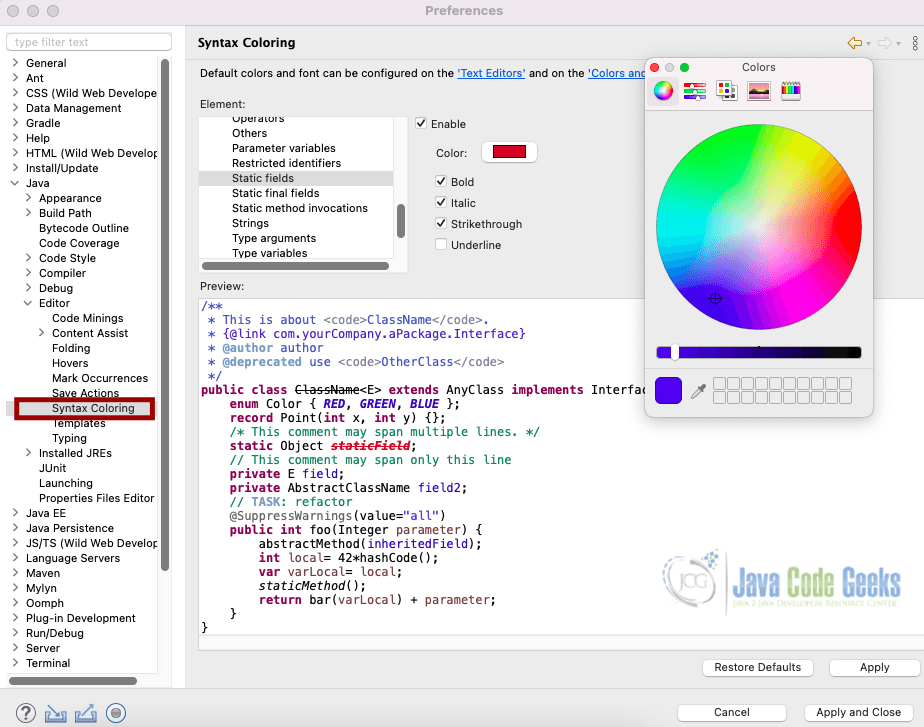
Syntax coloring controls how Eclipse displays code elements such as keywords, strings, comments, and annotations. Customizing these colors can make our code easier to read, reduce strain, and better align with our preferred theme. To change syntax colors, go to:
- Preferences > Java > Editor > Syntax Coloring

Expand the Java category to view options such as Keywords, Strings, Comments (single-line and multi-line), Annotations, Operators, Enums, and many more.
Select an element, then adjust the foreground color, and optionally apply bold, italic, or underline styles. For example, you might set Keywords to bold blue, Strings to green, and Comments to gray.
These visual cues help distinguish different parts of our code quickly.
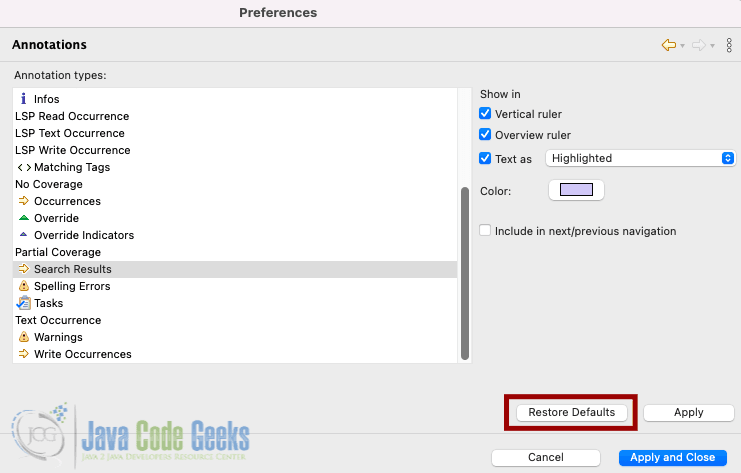
5. Restore Default Colors
If you have experimented with different settings and want to go back to Eclipse’s default colors:
- Open the relevant preferences page (e.g., Text Editors > Annotations or Syntax Coloring).
- Select the color option you modified.
- Click the Restore Defaults button in the preferences window.
- Apply and close the dialog.
This immediately resets the selected color back to Eclipse’s original scheme, which is useful if we are troubleshooting or want a clean slate.
Tip: You can right-click a highlighted element in the editor and select Preferences… to jump directly to this dialog.
6. Conclusion
In this article, we explored how to customize different highlight and color settings in Eclipse to improve code readability and comfort. We covered adjusting occurrence highlights, customizing text selection background and foreground colors, modifying search result highlights and personalizing syntax coloring. We also examined how to restore all these settings to their defaults when needed. Small adjustments to colors can make a big difference in our overall coding experience with Eclipse.
This article explained how to change the highlight color in Eclipse.
