Reliable configuration management is essential for modern applications. Apollo provides a centralized, dynamic platform that simplifies managing settings across environments and ensures real-time updates to client applications. In this article, we cover how Apollo works and how to integrate it into Spring Boot applications.
1. Understanding Apollo Configuration Centre
Apollo is an open-source configuration management system originally developed by Ctrip (now Trip.com). It provides a unified platform to manage, version, and distribute configuration settings in real time. Apollo supports multiple environments, clusters, and namespaces, making it suitable for cloud-native and microservice architectures.
Apollo consists of a service, which delivers configuration data to clients and handles change notifications, and a user-friendly web interface that allows administrators to add, modify, release, and audit configuration values.
With Apollo, we can change configurations centrally and have them automatically propagated to running applications without redeployment. This capability, known as hot release, helps maintain flexibility and reduce downtime.
1.1 Concepts in Apollo
Before integrating Apollo into an application, it’s important to understand a few foundational terms:
- Project (appId): Each Apollo client needs a unique application identity to fetch its configuration at runtime. The appId is configured within the application.
- Environment: Defines which set of configurations the application uses, such as DEV, TEST, or PROD. The same code can access different configurations in different environments. By default, it is read from the machine, but it can also be set at runtime.
- Cluster: Groups instances of an application, often by location or data centre. Clusters can have different configuration values. By default, the cluster is read from the machine, with runtime overrides supported.
- Namespace: Organises configurations under an application, similar to a file. Different types of settings, such as database or RPC configurations, can be stored in separate namespaces. Applications can use public namespaces or inherit them to override specific values.
This structure allows teams to organise configurations cleanly while maintaining separation between environments and services.
2. Setting Up Apollo
Apollo can be deployed locally or using Docker. The simplest way to get started is to run the Quick Start package. After downloading and extracting, the folder contains a jar file named apollo-all-in-one.jar file.
Since Apollo writes logs to /opt/logs, elevated permissions may be required depending on your operating system. On macOS, we must run the jar with sudo because writing to /opt/logs usually needs administrator privileges. Start Apollo with:
sudo SPRING_PROFILES_ACTIVE="github,database-discovery,auth" java -jar apollo-all-in-one.jar
This command runs Apollo with administrator privileges and starts the JAR using the specified Spring profiles for GitHub config, database discovery, and authentication. Once Apollo is running, access the Apollo Portal (typically at http://localhost:8070).

Once the service starts, open the Apollo Portal in your browser. You can log in using the default credentials:
- Username:
apollo - Password:
admin
Creating a Project
Log in to the Apollo Portal and click “Create Project.” Provide the required details such as App ID, Name, Owner, and Department, then click Submit to create the project.

Each project represents an application whose configuration settings will be centrally managed within Apollo.
Creating Clusters
Clusters enable us to manage different configuration sets for environments or logical groupings. When a new project is created, it automatically includes a cluster named default. To create additional clusters, click Add Cluster, provide a cluster name, and save.
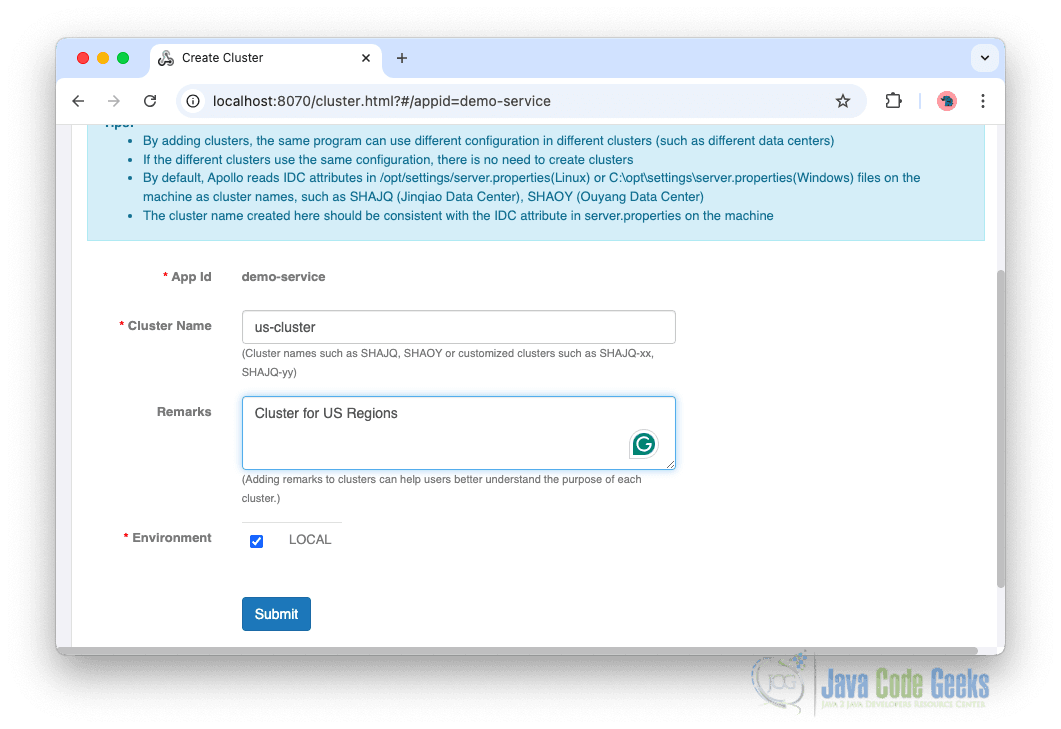
Clusters help isolate environment-specific configurations while keeping them organised under the same project.
Adding a Namespace
Namespaces act as logical configuration files. Apollo provides default namespaces like application, but we can create custom ones based on our needs. To add a namespace, from the navigation menu click Add Namespace. Select a namespace type, such as properties, JSON, YAML, or XML, provide a name, and save.
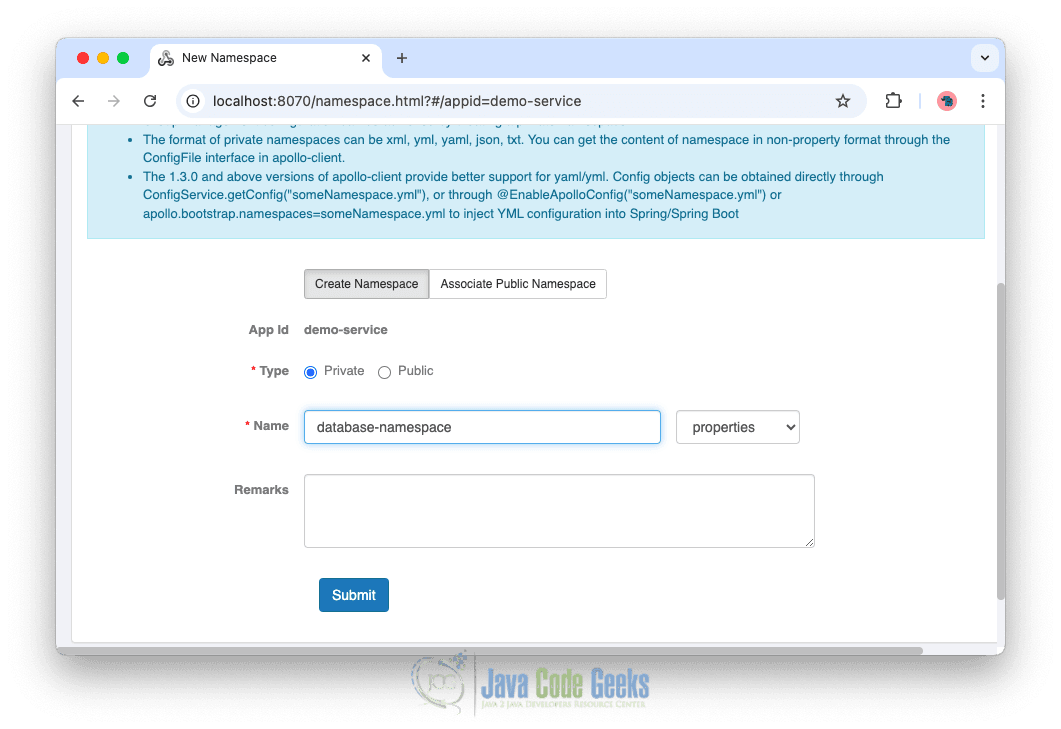
Namespaces help organise our configurations cleanly and independently.
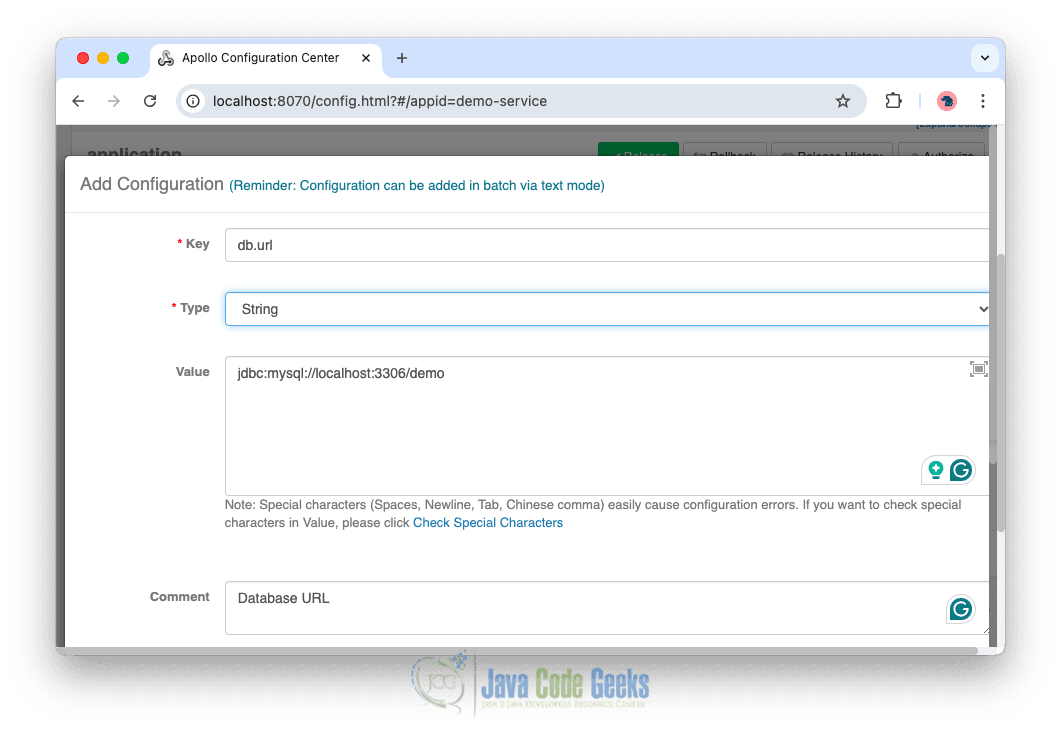
Adding Configurations
Configuration settings in a project are organised under a specific cluster and namespace. To manage these settings correctly, ensure you have selected the appropriate cluster and namespace. New configuration entries can be added by clicking the Add Configuration button within the selected namespace.
Releasing Configurations
A configuration change in Apollo only takes effect once it is released. To publish configurations, make the necessary changes within a namespace and then click Release.
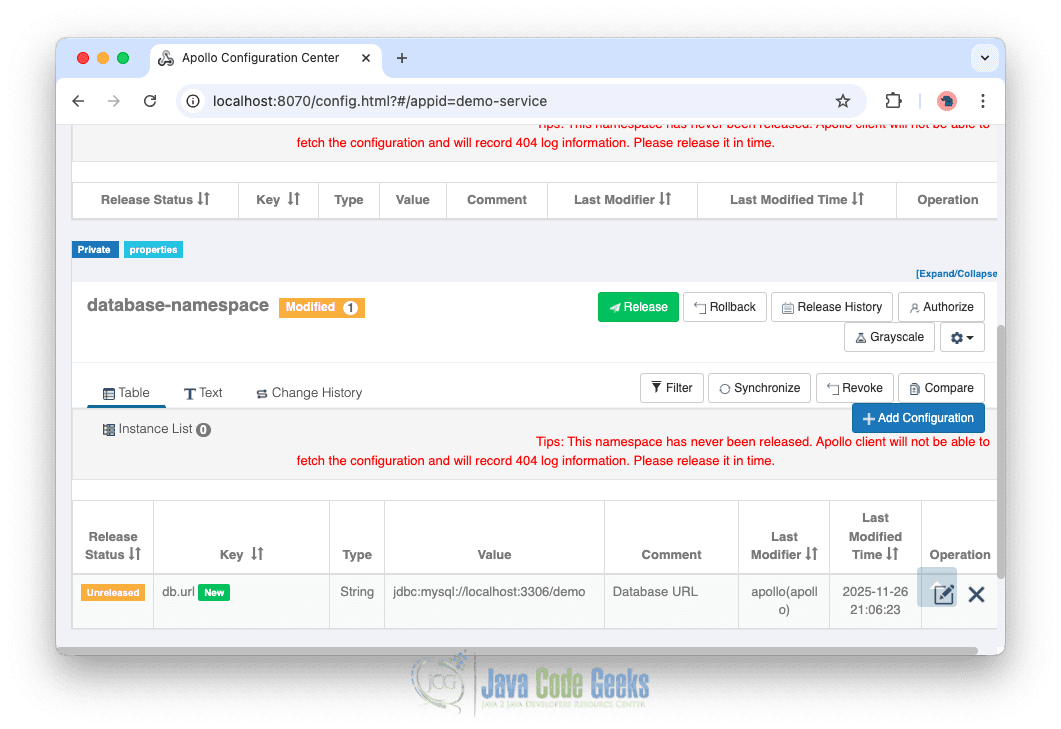
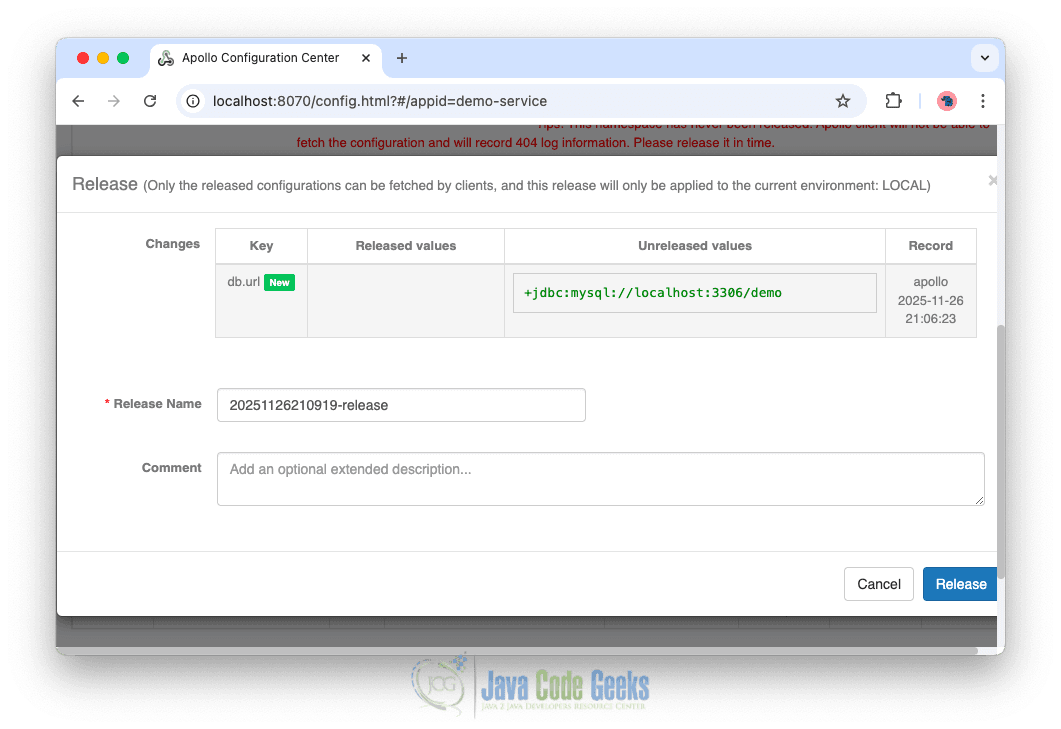
Once released, the updated values become available to client applications.
3. Integrating Apollo with a Spring Boot Application
Apollo provides seamless integration with Spring Boot, allowing applications to consume configuration values directly from the central server.
Add Maven Dependencies
Add the Apollo client library to your project’s pom.xml.
<dependency>
    <groupId>com.ctrip.framework.apollo</groupId>
    <artifactId>apollo-client</artifactId>
    <version>2.4.0</version>
</dependency>
This dependency enables our application to communicate with Apollo and automatically load configuration properties.
Configure Application (Set Apollo connection & metadata in your application.properties or environment variables)
Add the required settings to application.properties to define the Apollo server address, application ID, and cluster name.
app.id=demo-service
apollo.meta=http://localhost:8080
apollo.cluster=us-cluster
These values tell the client which Apollo server to connect to and which configurations to fetch.
Enable Apollo in Spring Boot
Annotate the main application class with @EnableApolloConfig. This activates Apollo’s configuration loading mechanism within the Spring context.
@SpringBootApplication
@EnableApolloConfig({"database-namespace"})
public class ApolloConfigDemoApplication {

	public static void main(String[] args) {
		SpringApplication.run(ApolloConfigDemoApplication.class, args);
	}

}
Once this annotation is added, Apollo automatically loads configurations from the specified namespaces and merges them into the Spring Environment.
Reading Configuration Values (Use configuration values as normal Spring properties)
Configuration values stored in Apollo can be consumed using standard Spring mechanisms such as @Value.
@Component
public class DatabaseConfig {

    @Value("${db.url}")
    private String url;

    // getters and usage methods
}
Then we can inject and use the configuration in a service:
@Service
public class DatabaseService {

    private final DatabaseConfig databaseConfig;

    public DatabaseService(DatabaseConfig databaseConfig) {
        this.databaseConfig = databaseConfig;
    }

    public void connect() {
        System.out.println("Connecting to database: " + databaseConfig.getUrl());
    }
}
Apollo keeps these values synchronized, and any updates made from the Apollo Portal are automatically reflected in the application without needing a restart.
4. Conclusion
In this article, we explored how Apollo simplifies centralized configuration management and ensures consistent settings across services and environments. By integrating Apollo with Spring Boot, applications can dynamically receive updated configurations without redeployment, enabling more efficient, flexible, and reliable application management.
5. Download the Source Code
You can download the full source code of this example here: apollo configuration management
