Running multiple instances of a Spring Boot application can be beneficial for testing interactions, configurations, and resilience patterns. With IntelliJ IDEA, we can quickly set up and manage these instances. This article explains the process concisely.
1. Prerequisites
Before proceeding, ensure the following:
- A working Spring Boot project
- IntelliJ IDEA installed
- Basic knowledge of application properties and profiles
2. Create a Basic Spring Boot Application
Start with a simple Spring Boot application that runs on a default port.
server.port=8080
spring.application.name=multi-instance-demo
This configuration sets the default port to 8080.
Duplicate Run Configuration in IntelliJ
Open the Run/Debug Configurations dialog in IntelliJ IDEA and select your existing Spring Boot configuration. Create a new configuration and set the required options such as the main class and Java version. Rename each configuration, for example, App Instance 1 and App Instance 2. Each configuration represents a separate running instance of the application.
3. Assign Different Ports Using Program Arguments
Each instance must run on a unique port to avoid conflicts.
Using Program Arguments
--server.port=8081
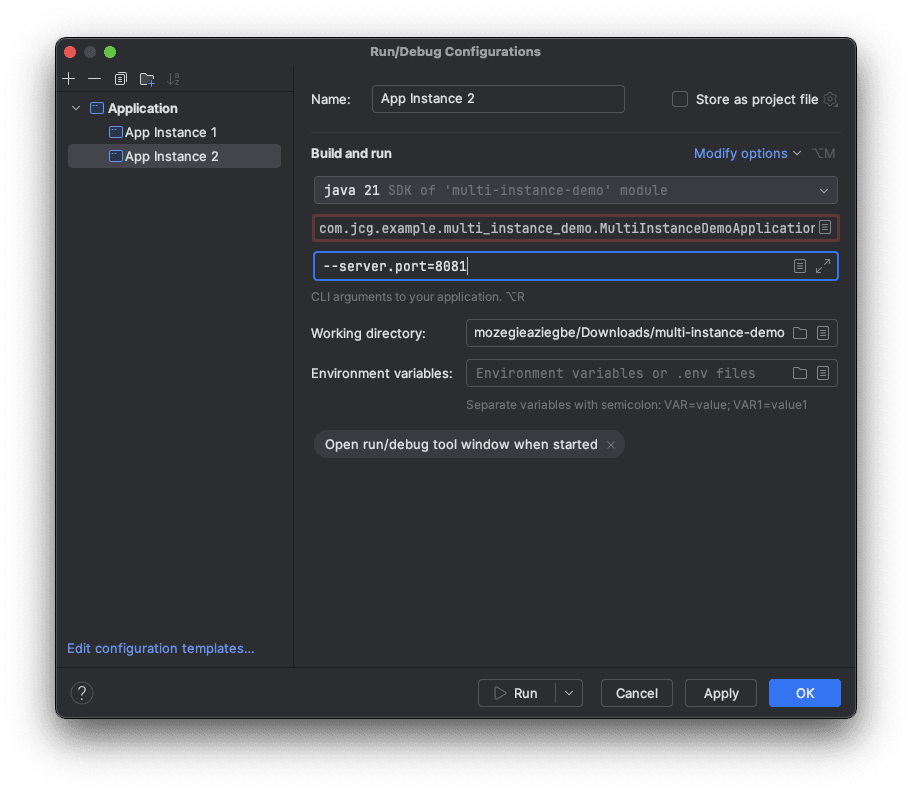
This overrides the default port defined in application.properties. We can verify the instances by exposing a simple REST endpoint.
@RestController
public class HelloController {

    @Value("${server.port}")
    private String port;

    @GetMapping("/hello")
    public String hello() {
        return "Running on port: " + port;
    }
}
Run Multiple Instances
By default, IntelliJ may stop a running instance when a new one starts. To prevent this:
- Go to Run/Debug Configurations
- Select each configuration
- Go to Modify options > Allow multiple instances
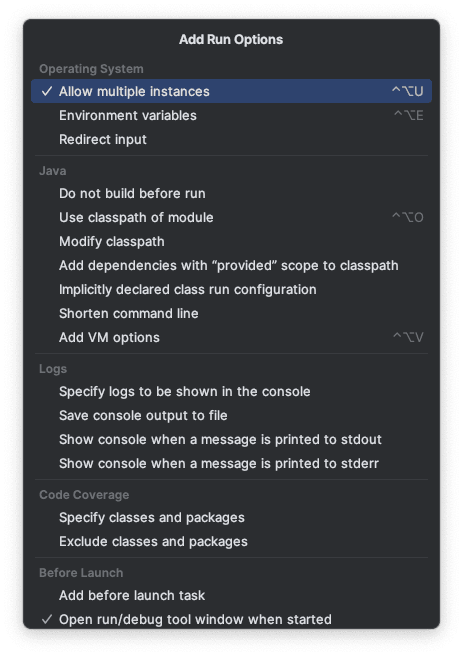
This ensures multiple instances can run simultaneously. We can now start each configuration independently by running App Instance 1 and App Instance 2 in IntelliJ IDEA. You should then see the corresponding instances running on their assigned ports.
- App Instance 1: Tomcat started on port 8081 (http) with context path ‘/’
- App Instance 2: Tomcat started on port 8082 (http) with context path ‘/’
You can verify the instances by accessing:
http://localhost:8081/hellohttp://localhost:8082/hello
Each instance should return a different port number.
4. Use Spring Profiles
When working with multiple instances of a Spring Boot application, using profiles provides a clean and maintainable way to manage environment-specific configurations. Profiles allow you to isolate settings such as ports, database connections, and feature flags for each instance without modifying the main configuration file.
Example application-dev1.properties
server.port=8083
Example application-dev2.properties
server.port=8084
Then, in the IntelliJ IDEA run configurations, specify the settings using VM options:
-Dspring.profiles.active=dev1
and
-Dspring.profiles.active=dev2
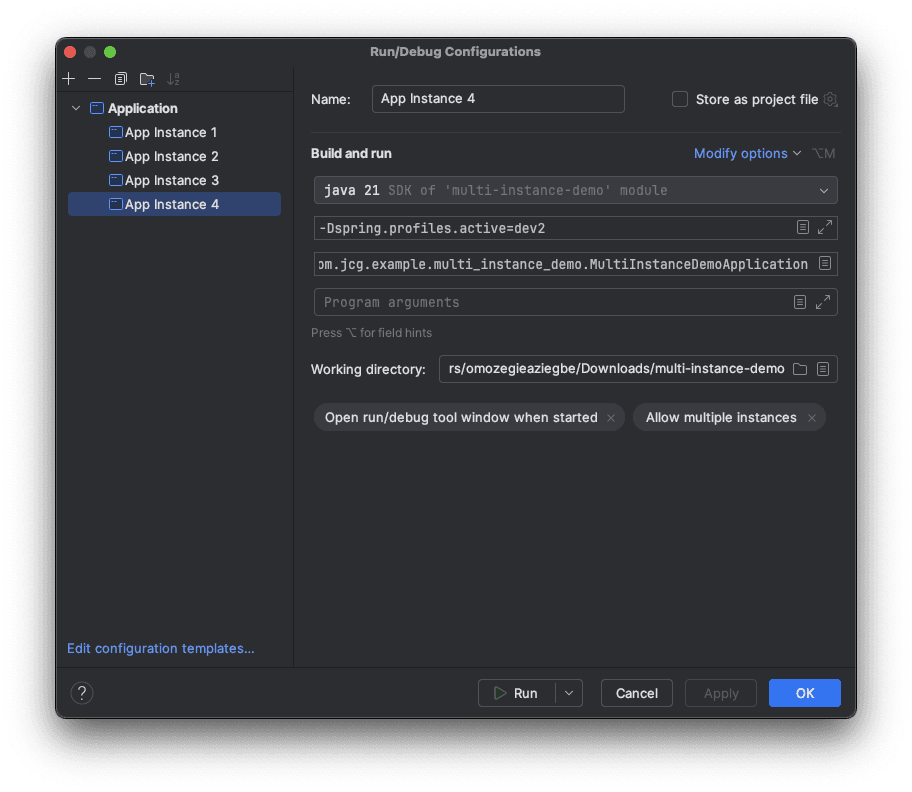
When running the application with Spring profiles, each instance starts using its respective profile configuration. As a result, each instance runs on the port defined in its profile. The console output in IntelliJ IDEA will indicate the active profile and the port each instance is running on.
Example Console Output for dev1
[main] c.j.e.m.MultiInstanceDemoApplication     : The following 1 profile is active: "dev1"
[main] o.s.boot.tomcat.TomcatWebServer          : Tomcat initialized with port 8083 (http)
5. Conclusion
Running multiple instances of a Spring Boot application in IntelliJ IDEA is straightforward and highly beneficial for development and testing. By creating separate run configurations, assigning different ports, and optionally using profiles, we can simulate real-world distributed systems effectively on a local machine.
This article discussed running multiple instances of Spring Boot applications in IntelliJ IDEA.
