
Create a VRChat World from Scratch, Place Items, and Upload! Pimax Edition

Hi there! It's your VR guide, Ocutanbot. This time, I'll be explaining from scratch how to create a simple world for VRChat, place items, and upload it!I'll guide you through the steps!
The items to place are 3D assets of the high-end VR equipment, the "Pimax VR headset"! If you change the assets, this will also serve as a reference for other items.

In hand: The high-resolution and very powerful-looking Pimax Crystal Super
Head: The high-resolution, modern-designed new Pimax Dream Air
Back left: The Pimax Crystal Light, with slightly lower resolution than the Crystal
Back right: The monster VR device with a 170-degree field of view, the Pimax Vision 8KX
If you already know how to do this and just want to use the Pimax assets, jump from the table of contents below! Also, by the way, there are special discount coupons too.
Plus, there's a 🎁 collaboration campaign happening too!
ハイエンドVRデバイス #Pimax 新3Dモデル公開記念
— おきゅたんbot🥽VRガイド🏖宝来すみれ (@OculusTan) April 25, 2026
VRガイドおきゅたんコラボプレゼント🎁キャンペーン🎉
🎁賞品【アマギフ】
5,000円 × 1名
1,000円 × 5名
✅応募方法
①@OculusTan と @Pimax_Japan をフォロー
②このポストをいいね&RP
5/9まで。リプや引用で確率Up✨
➡モデル無料DLは記事から! https://t.co/2vl8dSNntq pic.twitter.com/YHRNWySTXT
VRChat World Creation Guide: From SDK Installation to Upload
Before creating a world, let's prepare the tools and development environment needed to make a VRChat world. If you've already done this, skip to the next section.
1. Installing VCC
To create a VRChat world, you need a specific version of Unity and the VRChat SDK. We use a tool called VRChat Creator Companion, or VCC for short, to manage these.
First, log in to VRChat from the web and go to the download page, and a page where you can download various things will appear.

The explanation of the steps is around the middle here. If you click "Setting up the SDK," an English explanation page will appear, and you can just follow that, but here is an excerpt of the beginning in Japanese.
-
Please install the VCC.
The default installation location is %LocalAppData%/Programs/VRChat Creator Companion, but you can change it if necessary.
The VCC should launch automatically. If it does not, please search for "Creator Companion" in Windows.
Note: Are you uploading to Android, Quest, or iOS?Please see the platform page.

2. Installing Unity
At the time of writing, "Unity 2022.3.22f1" is the version of Unity for VRChat.
This is a tool mainly used for game and video production, but it is also used when creating worlds in VRChat or modifying and uploading avatars. It can be a bit difficult, but once you learn it, the possibilities are endless!
There is a detailed explanation of how to install Unity on the Virtual Market page, so please refer to that!

© UTJ/UCL
3. Creating a Project and Launching Unity
Launch the VCC and create a new project for your VRChat world!
Once the VCC is launched, click "Create New Project" in the top right.

Select the "Unity 2022 World Project" template and enter your preferred project name. Press "Create Project" to generate a project with the necessary SDKs automatically included.

Once the project is created, you will be on the Manage Packages screen; if you select "Open Project"...
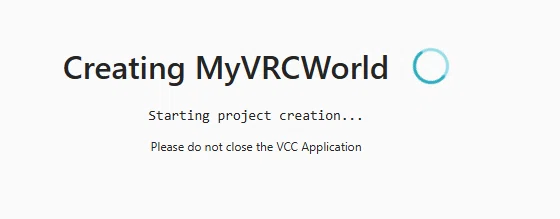

Unity is launching.

After waiting a while... Unity will launch and open the project you created.

Uploading the world!
Once Unity is open, before you start building the shape of your world, let's try uploading it as is to see if it works!
There is an item called "VRChat SDK" in the top menu of Unity. Click it and select "Show Control Panel" from the options.

Logging into your VRChat account in Unity
A VRChat SDK window will open. Enter your VRChat account information (username or email address and password) there and click Sign In.
*Please create and use a VRChat account instead of a Steam account.

Were you able to log in? If so, select the "Builder" tab at the top of the same window, and it's finally time to upload your world.

In other words, it is telling you to set a name and thumbnail before uploading.
Setting the world name and thumbnail
Enter the name of your world in the Name field, and click "Capture In Scene" to save a screenshot for the world's thumbnail image.

Setting layers and the collision matrix
Does it sound difficult? Don't worry. You just need to press the buttons, so try doing them in order!
Press the second button, "Setup Layers for VRChat," to configure the Unity layer settings for VRChat. You only need to do this once per project.


Once the Layers part is complete, a button will appear for the Collision Matrix, so click "Setup Collision Matrix." This is something like aligning how objects collide with each other to match VRChat's specifications. You only need to do this once per project as well.

If a warning dialog appears for this as well, click "Do It!".

Building and uploading the world
The message at the bottom will disappear, and you will be able to select "Build and Publish," so click it. This means you are building and publishing (default is private) the world.

A consent dialog regarding copyright ownership will appear; if you agree, click "OK."

"By clicking OK, I certify that I have the necessary rights to upload this content and that it does not infringe upon the legal or intellectual property rights of any third party."
The world build will begin...


Great work! With this, your VRChat world has been uploaded as a private world.
If you click "See it on the VRChat Website," you can open the world's information page on the web, so you can also update information from there if you need to.

Also, if your world contains sexy elements, horror elements, or anything that requires a warning, make sure to check the appropriate checkboxes!
You can find the world you just uploaded under "Uploaded" in the "My Worlds" section of the "Worlds" menu in VRChat, so let's enter it to check... You've successfully entered a world that is just a floor!


Creating a simple scene and placing items
Now, finally—let's create a simple room in Unity using cubes and place some items in it!
Saving the scene with a new name
However, I don't think it's a good idea to keep overwriting the VRCDefaultWorldScene, so let's create a separate scene. Select "Save As..." from the File menu at the top of Unity.

Let's save it as MyVRCWorld in Assets/Scenes.

Projects and Hierarchy
Unity manages the data (assets) and scripts within your project using the "Projects" window.
The contents of the currently open scene are managed in the "Hierarchy" window. Looking here, you can see that there are already several objects, such as the VRCWorld object for basic world settings, a Floor object, and a Directional Light.

How to move in the Scene view
In the Scene view labeled "Scene," you can change the viewing direction by right-dragging, zoom in and out with the mouse middle wheel, or move forward, backward, left, and right like an FPS game by holding down the right mouse button and using the WASD keys.

the screen will move to center on that object.
Building a room with cubes
Right-click in the Hierarchy to open the menu, then select 3D Object > Cube to create a 1m x 1m x 1m cube object.


Since it is buried 0.5m into the ground, set the height to +0.5.
The information for the selected object is displayed in the Inspector, so just set the Y-coordinate value there to 0.5!


You can use the Scale tool to change the red (X-axis) and blue (Z-axis) dimensions to make it a long, thin board—

Using the Rect tool makes it easy to stretch just the top edge to create a wall.

adjust the numbers when you want to be precise.
Rename the object to "Wall" and then duplicate it. You can duplicate using Ctrl+D or via the menu.

Since you won't be able to tell it's been duplicated if it's in the same spot, move it aside.

Duplicate it two more times, rotate them 90 degrees on the Y-axis, and move them into position to form the walls of the room.

It's starting to look like a room. You can make a roof the same way, but we'll leave it open this time for a better view.
*By the way,ProBuilder, an official Unity add-on, is even more convenient as it allows you to model various floor plans directly within Unity!
Let's also create a cube in the middle to serve as a table.

By the way, adding box-like pillars in the four corners of the room can increase the sense of realism, so
give it a try if you have the time.
Let's also make a floor. Since the original floor around it was named "Floor", I named this one "RoomFloor".

Apply a texture.
Pure white is fine, but it's a bit dull without a texture, so let's download awood grain texturethat is CC0 licensed (commercially usable, no credit required) and released into the public domain from a helpful site calledCC0 Textures and apply it.

Extract the downloaded zip file and copy it into the Assets folder of your project. This time, I created a folder called Assets/Textures and put it in there.

Now that the wood grain texture is ready, drag and drop it onto the RoomFloor object. It will look like wood grain just like this!

However, the pattern feels a bit too large, so I'll adjust the material. With the RoomFloor object selected, click the ▶ next to the Wood... section at the bottom of the Inspector to reveal the details.

I set the values for the Tiling property to 2, 2 to double the density.

I used a Cube this time, but you can also create and apply it to a flat 3D object like a Plane or Quad. I often use Quads when I want to display photos. Try this out when you're making a room to your liking.

Saving the scene
It would be sad if the scene you worked so hard to edit disappeared, so let's save it!
You can overwrite the scene by selecting "Save" from the File menu or by pressing Ctrl + S. Saving frequently is important!!

If you want to keep past versions of your scene, it's also a good idea to save it under a different name or make a copy.

About the "Pimax" series of VR headsets
As a way to promote VR headsets,Pimax, I'm going to place the VR headset models released by them into the world. It's fun to look at VR equipment in VR, isn't it? One of the great things about VR is being able to get a sense of the appearance and scale of various devices.
So, it's time for a commercial break!
A story about being surprised by Pimax
Pimax is a VR headset manufacturer that specializes in high-end features like resolution and field of view, and they release some interesting products.
When it comes to high resolutions like 8K, I was surprised becauseit wasn't just "clear," but it felt incredibly "real", and here is the introduction video where I report on that.

🎉Campaign!!
They are currently running a campaign calledPimax Vridge, and the Pimax Crystal series is available at a great price. They say it's the best deal ever.


then it gets cheaper with the VR-Bridge campaign,
and it also comes with limited additional benefits.
Furthermore,in the survey section of the above campaign, or even during a regular purchase,,if you enter the referral code below, you will get an additional 2% discount.
Pimax Crystal Super / Light Discount coupon code: ocutanbot
Pimax Dream Air / Air SE Discount coupon code: ocutanbot25

Personally, if I were buying one now, I'm interested in the new Pimax Dream Air because it looks lightweight and has a smart design, but since the current Crystal Light and Super models are also on sale, it's a tough choice.
Pimax Crystal Super has a budget version called Pimax Crystal Light, and Pimax Dream Air has a budget version called Pimax Dream Air SE. All of them have higher resolution than the Meta Quest 3, but the Crystal Super and Dream Air offer an entirely different level of ultra-high resolution.
Huh? Does it seem like you need a super-powerful PC? That's true! It's PC-tethered only, and it's better to have a high-performance PC, but it seems you can also use a feature called GPU upscaling to artificially achieve high resolution as a way to reduce the load. If you're interested, look into it.
Place the "Pimax" VR headset on the table
Now, let's try placing the VR headset model released by Pimax into your world!
Download the model
Download URL from the official Pimax website to get the unitypackage containing the Pimax model.

With your Unity project open, double-click the unitypackage. A dialog will appear to load (import) the data, so please select "Import".

Once imported, an Assets/Pimax folder will be created in your project. Let's open the "Pimax Sample" scene located inside it.

This will display a VRChat sample world scene with the Pimax headset placed in it. There are three that look shocking pink, though!
The three in the front are models with materials using the Standard shader, and the ones in the back use the lilToon shader. Since I haven't installed the lilToon shader, they are displaying as shocking pink error colors.
If you want to use lilToon
You can use either the Standard shader version or the other one for this, but if you want to use the lilToon shader, let's download lilToon 2.x.x from this link.

Double-click the "jp.lilxyzw.liltoon-2.x.x-installer.unitypackage" inside the zip file to install the lilToon package.

A dialog will appear, so select "Import".


please select Install.
Once the installation is finished successfully, the three models in the back are now displayed correctly!

You can also upload this world as it is.

Bringing items into your own world
Since I have already created a room in advance, let's use that.
First, copy either the "Pimax lilToon" or "Pimax Standard" object placed in the scene to your clipboard. You can select the object and use "Copy" from the right-click menu, or just press Ctrl + C.

Please double-click MyVRCWorld in the project's Assets/Scenes folder to open the scene.

Once opened, you can place the Pimax model you copied earlier by right-clicking in the Hierarchy and selecting "Paste," or by pressing Ctrl + V.

It's placed successfully! Great job!


Also, instead of copying from a sample scene like we did this time, you can also drag and drop each VR headset from the Assets/Pimax/Prefabs folder directly into the scene or hierarchy.

Using the middle mouse wheel works too.
Testing the world in Unity
Now that it's placed, let's test the world's operation in Unity!
Running the test
Press the ▶️ button at the top.

The Game window tab will become active, and the VRChat Client Simulator dialog will appear inside the game screen.
If you select "Close Menu" to close the dialog, you can move forward, backward, left, and right using the W, A, S, and D keys on your keyboard, and change your view by dragging with the mouse.

When you get close to an item, you can pick it up by left-clicking and dragging.

Ending the test
Pressing the ESC key will bring up the dialog again, where you can press "Exit Playmode" or click the ▶️ button again to end the test.

If you finish and it stays on the Game tab, make sure to select the Scene tab to switch back.


Adjusting the player's starting position
If you want to move the player's starting position to the opposite side, just change the position and rotation of the "VRCWorld" object in the hierarchy.

Move it to the opposite side and rotate it 180 degrees on the Y-axis! The blue arrow (Z+) on the VRCWorld object indicates the direction the player is facing.

When I tried running it, I was able to stand right in front!


Why you can hold objects
You don't need to tinker with this right now, but I'll explain the mechanism behind holdable objects! Holdable objects have a component called "VRC_PickUp" attached to them, and...


since that often leads to accidental activation, I've set it short at 0.1 (10cm).
Along with that, I've set up a box for collision detection using the Box Collider component.

adjust the size. Entering numerical values is also fine.
I've set up the physical movement using Rigidbody.

If you turn Is Kinematic On, you can make it stop perfectly still (it will stop behaving physically).
However, just doing this only results in "local movement," and the movement of the object you are holding won't be reflected for other players, so we also add a component called VRC Object Sync.

Be careful not to place too many global items.

Optimization: Disappearing when far away
Everything is mostly fine up to this point, butPimaxin this model, I have also configured an LOD Group setting for optimization.
This is a feature that allows you to switch models (meshes) when the appearance on the screen falls below a certain percentage, and then to another model when it falls below another percentage. In thisPimaxmodel, I've set it so that it's only visible within a certain distance and invisible at other distances. *If you don't need this, you can just turn off or delete this component.

Upload the completed world!
Well then, I digressed a bit with the explanation, but all that's left is to upload it using the same steps as when you uploaded it earlier. In the VRChat SDK window (displayed via Show Control Panel under VRChat SDK at the top of Unity), select the Builder tab... and since we're at it, let's update the thumbnail image.
After setting the scene view to look good, select Capture In Scene and press the Capture button.

Select Save Changes to apply the thumbnail.

Then, it will show a display that looks like it's saving and uploading, but please note that this is just applying information like the thumbnail.

Next, to upload the world itself, press the "Build & Publish" button in step 3.

If green text appears, it's a success! Great work!!


When you enter VRChat and move to the world—yay, Pimax headsets everywhere!


Actually, I was in charge of these Pimax models this time, reducing them to about 1/10th of their original size by looking at each part in Blender, as well as adjusting the materials.
Although there are polygon reduction assets in Unity, using Blender is really convenient because you can make fine adjustments! Being able to use Blender has really expanded what I can do. Hehe.
By the way, on the actual product, you can set the color of the "V" on the front panel to any color you like, so I think it's a good idea to set the V material to your favorite color or your own theme color.

You can create your favorite room by placing various furniture and exhibits in the same way, so give it a try. I often use VRChat world assets purchased on BOOTH and 3D assets from the Unity Asset Store as well.
Specs for each Pimax model
Pimax Crystal Light specs

Pimax Crystal Super specs

Pimax Dream Air / Pimax Air SE specs

Video: From Basics to Advanced
If you want to see Static settings for optimization, light baking, effects using PostProcessing, or information about Udon, please refer to this video as well! *Since it is an old video, some operations might differ in detail. CyanTrigger support has ended.
For a slightly newer video showing how to place various commercial assets and renovate, look here.
Have a great VR life!!
Need help with anything virtual? I'm accepting work!
I work full-time in the virtual space, doing everything from performing to behind-the-scenes production. For companies, local governments, and individuals: talent work, PR, avatar setup, world creation, Unity production, video production, event planning and management, production progress, and execution.
Check out my portfolio here!
Join my membership and you might find all sorts of 'good things'!?
In my note membership, I share various useful information I've found about VR and VTubers, as well as off-shots for fans.
Furthermore, there are plans that allow you to use convenient tools such as AutoCamera-tan, PhotoComic-tan, PopinCap, and VRCPhotoToWorld.
If you'd like, please be friends with me!
Virtual Support Sponsor
Pimax has also joined, and there are also plans for Virtual Support Sponsors!
🆕Pimax Technology Co., Ltd. *Discount codes for Pimax products are
ocutanbot or ocutanbot25
Seek Amusement Co., Ltd.
ROOX Inc.
NuNuAI Co., Ltd. *The Ocutan discount code for NuNuPC is
OCUTANBOT
Ocutopia If you go to this VRChat world, there are sponsor booths like this. There are schools, taverns, art museums, movie theaters, game shops, and various other places, so please go and visit. Once you can create worlds in earnest, you won't just be able to make rooms, you'll even be able to create kingdoms!


