
[Stable Diffusion] How to use Lama Cleaner to erase parts of an image

"There's one extra finger, I want to erase just that part..."
For those struggling with "I want to delete a specific object..."
In this article, I will explain how to use "Lama Cleaner," which allows you to delete parts of an image.
What is Lama Cleaner?
Lama Cleaner is a feature that allows for partial deletion.
For example, it's common to have an image rejected because there is one too many fingers, right?
In such cases, by using "Lama Cleaner" to specify the finger area, you can erase the extra finger as shown in the image below.

It is also a useful feature when you want to delete objects other than fingers.
Accessing Lama Cleaner
Lama Cleaner is also available as an extension for Stable Diffusion Web UI, but since it often has errors and may not work, I recommend using the Lama Cleaner available on Hugging Face.
Therefore, in this example, I will explain the method using the Lama Cleaner on Hugging Face.
Please access the Lama Cleaner link below.
https://huggingface.co/spaces/Sanster/Lama-Cleaner-lama
How to use Lama Cleaner
Here, I will explain how to use Lama Cleaner.
Upload an image
Please upload an image by clicking the center area or by dragging and dropping.

Switch to manual deletion
Please click on "Settings" in the top right corner.

Please turn on the toggle to the right of "Manual Inpainting Mode".
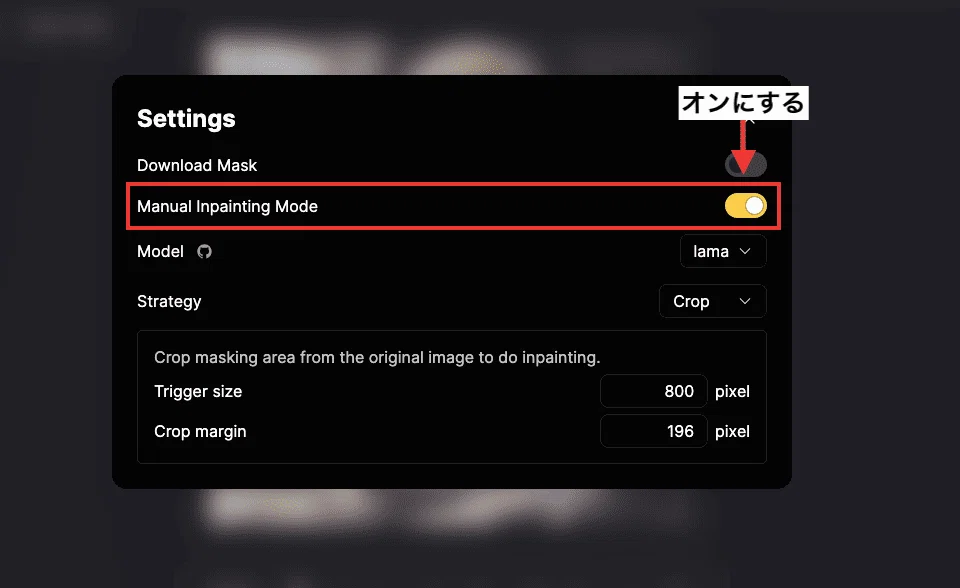
Once turned on, you can add the "Run Inpainting" icon in the bottom right corner.
If "Manual Inpainting Mode" is off, deletion starts automatically after you mask the part you want to erase, but if it is on, it switches to manual mode.
After masking the part you want to erase, you can start the deletion by clicking the added "Run Inpainting" button, so the on setting is recommended.

How to erase objects
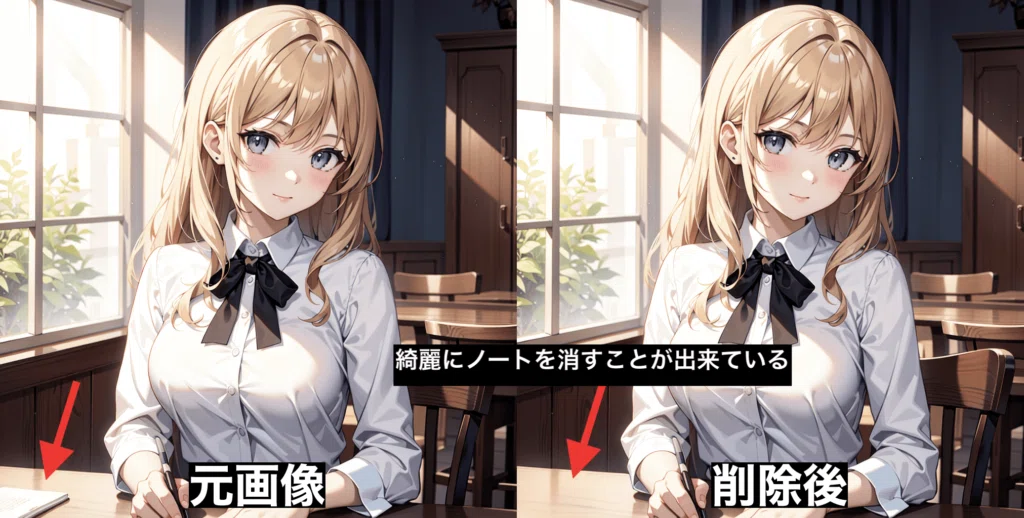
In this example, we will try to erase the notebook in the bottom left of the image below.

As shown in the image below, adjust the brush size using the slider in the "Brush" section.
Use the brush to paint over the notebook part in the bottom left.
The painted area will turn yellow.
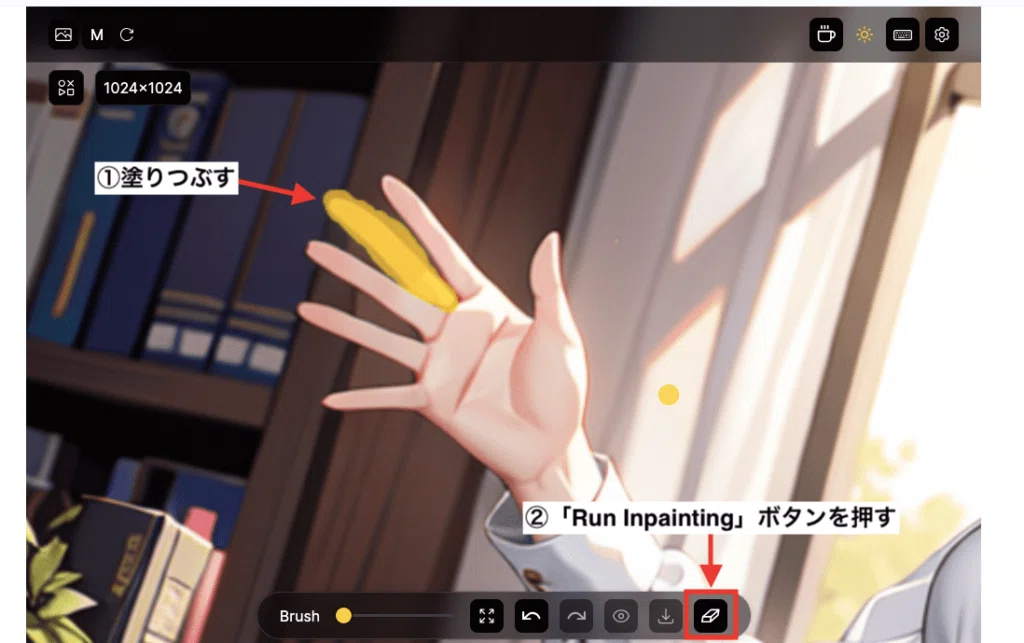
Please click the "Run Inpainting" button.
After flashing repeatedly, the notebook part will be erased after a short while.

The image below shows the comparison between the "Original Image" and the "After Deletion" result.
You can naturally erase the note at the bottom left.
Click the "download icon" at the bottom to save the image.

Hover your cursor over the "cycle icon" at the top left to check the masked area.

How to erase extra fingers
Next, let's try deleting the part where there are extra fingers.
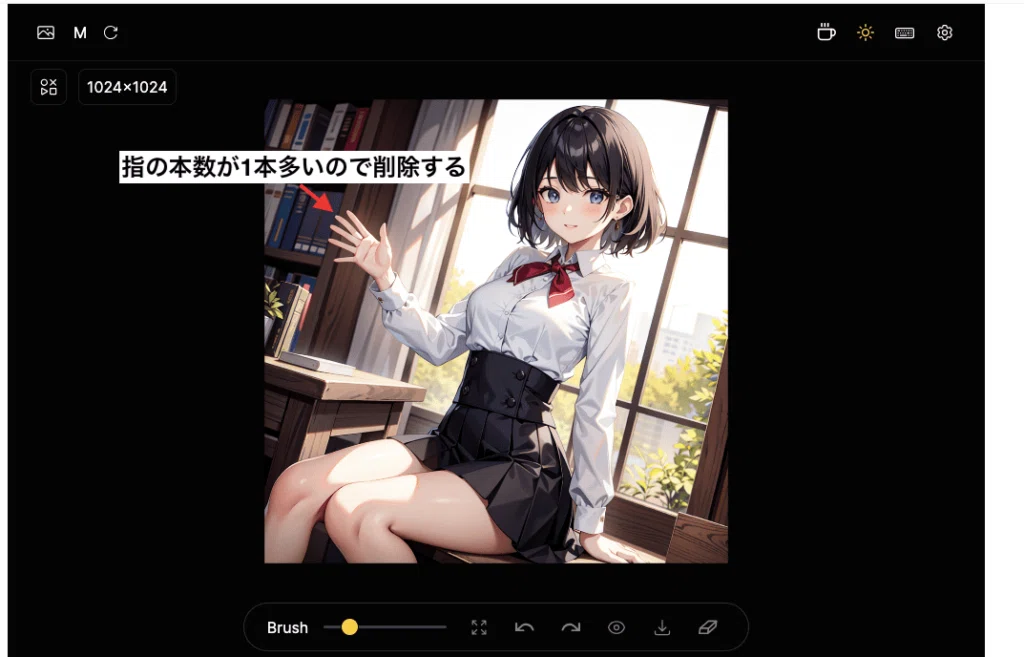
You can zoom in and out by using the mouse wheel on the screen, so zoom in on the part you want to delete.
Paint over only the extra finger area and then click the "Run Inpainting" button.
As shown in the image below, I was able to erase the extra fingers.
However, a slightly blurry red part remains, so I will try deleting that as well.
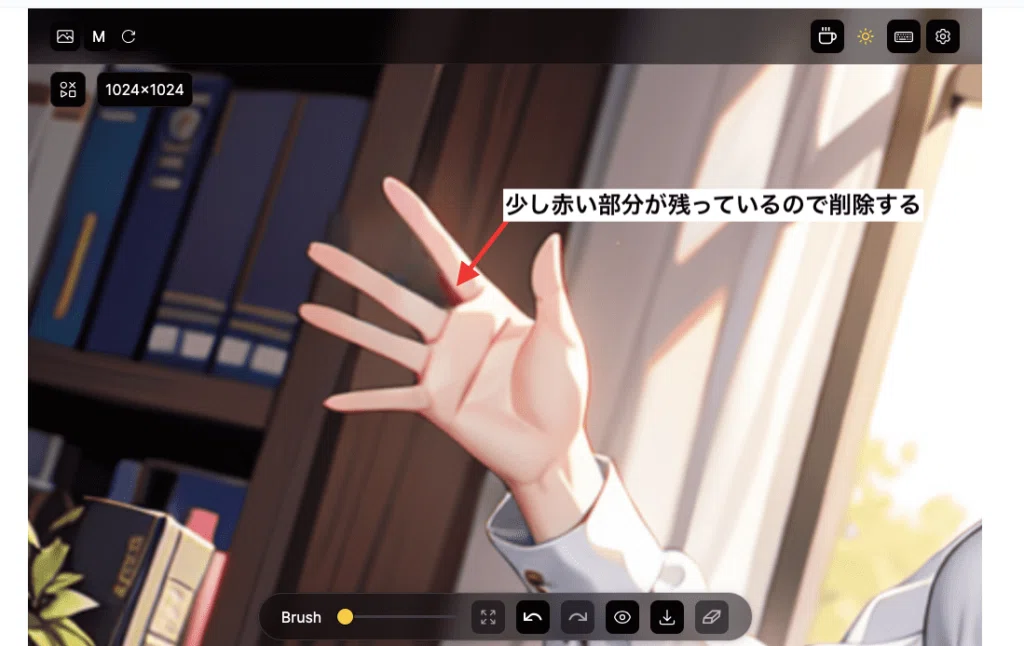
Paint over the red part and click the "Run Inpainting" button again.

I was able to cleanly delete the red part.
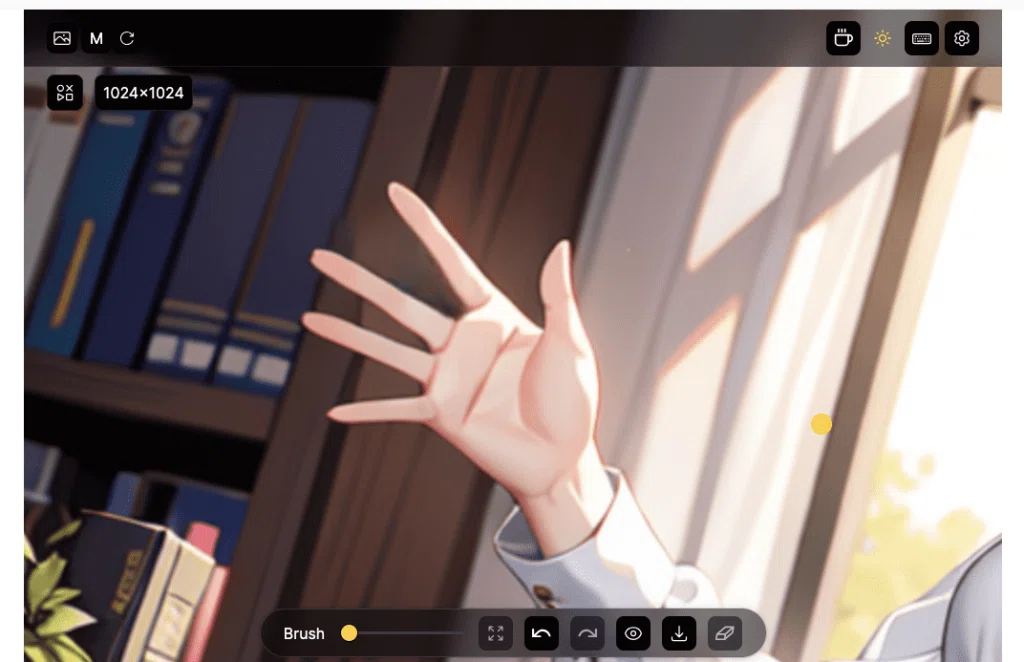
The image below shows the comparison results between the "original image" and the "after deletion" version.
You can cleanly erase the extra fingers.
As shown here, Lama Cleaner is a useful feature when you want to delete specific parts of an image.
Summary
I have explained how to install and use Lama Cleaner.
Lama Cleaner is a feature that allows you to easily erase parts of an image.
Although there is a "Lama Cleaner" extension for Stable Diffusion Web UI, it does not work, so it is better to use the version of "Lama Cleaner" available on Hugging Face.
Please try using it when you want to delete extra fingers generated in an image or when you want to remove objects.