
[April Knitting Log] Spring Solo Puzzle Tournament

Introduction
April has become warmer.
Perhaps prompted by the spring breeze,
I felt like doing some redecorating, changing my wardrobe, decluttering,
and going on a diet,
so one way or another,
I've been busy doing various things
typical of the change of seasons.
I plan to summarize my diet review
in a separate article.
For those who want to start self-improvement
in preparation for the arrival of the season for light clothing,
I hope it serves as a spark of motivation,
so I am continuing my diet.
Now, regarding knitting,
April is my original accessory case production
self-campaign period.
I made two items
that are structured by combining multiple elements or parts.
None of them were as easy
as they look at all, but
I packed them full of ingenuity and original elements,
repeated trial and error,
and was able to make them very enjoyably - ̗̀ ( ˶'ᵕ'˶) ̖́-
So, let's look back.
This time, even though there are few items,
the review is surprisingly voluminous by our standards.
Please enjoy.
◈Knitting logs so far◈
◈Last month's issue◈
◈Recent extra edition◈
◈Recent independent research◈
Tabletop card storage to reach those hard-to-scratch places
I have been making tabletop accessory storage
for board games as a hobby on and off for a while.
The reason is that designing and making
accessory storage related to board games
is great training.
Board games have
many cards and components,
and they are designed to fit neatly into the original box when stored,
so that's not a problem, but
when you take the contents out and spread them on the table
to interact with them frequently during play,
if you haven't prepared properly,
there are times when you surprisingly don't have
storage that is just right and easy to use.
This "seems like it should exist but doesn't"
"anything seems like it could be a suitable container,
but it falls just short of being truly useful" is
the key.
This kind of balance
becomes a catalyst for thinking and creating on your own.
"How can I get rid of that"
"How can I make it possible to do that"
thinking through these things is super fun.
The 100-yen shop goods for board game storage
adopted by board game cafes,
storage goods developed by board game makers
who know the demands of play inside out,
and the points that furniture makers who produce
overseas board game tables care about,
as well as the designs and ideas used to meet those demands,
are always a great learning experience.
When you take your own ideas and give them shape,
and successfully achieve a "like this, like this,
I met this kind of demand in this way" result,
it is useful and it does get appreciated
when you bring it to a gathering, but
if anything, the person on this side who had it used
is the one who is overjoyed,
so it ends with me feeling overwhelming gratitude lol
Also, while I am doing this with knitting with full understanding,
if I say something very blunt
first,
............I think the best material for storing small items
used during board game play is clear acrylic ()
And if you want both a high-quality feel and functionality,
I think the best material is wood ()
Yarn
cannot possibly replace acrylic or wood, but
if you want to feel cozy or feel warmth,
I would be happy if you could remember it
as one option.
Maximizing card insertion and removal efficiency
The introduction has become long.
This time, I made a card storage item that seems like it would be useful
while playing board games.
Since it meets a few pinpoint demands,
please let me explain.
This time, I started from an idea similar to
the first board game small item storage knitting project
I made in the past.

Last time, while practicing pine stitch,
I knitted around a polyester card holder,
but
what I wanted to do is the same this time too,
I want a container that functions well
as a draw pile and discard pile.
As for the specific points I wanted to achieve,
✅ Satisfactory storage capacity in a compact size
→ Can secure space on the tabletop
✅ Holding power so the card stacks don't collapse
→ Achieves tabletop organization, and
makes game progress smooth
✅ Easy to insert and remove cards
→ Makes shuffling and drawing from the deck efficient, and
allows for better focus on the game
are listed.
※ The knitting log from that time, which
summarized the making-of details, is here↓
Building on last time,
the point I especially wanted to evolve
this time is the third one: ease of insertion and removal.
While several approaches seemed possible,
this time I challenged myself to adopta slanted bottomdesign.
Regarding this ease of insertion and removal,
it has been a huge success.

the cards don't stick together,
making drawing from the deck comfortable and smooth.
As in the image above,
with slanted card deck storage,
compared to the wide surface of the cards being at the bottom,
or storing them completely vertically,
it becomes fareasier to take them out one by one.
“Oh, sorry,
I took one too many, so I'll put it back”
hardly ever happens anymore.
A tremendoussense of relief.
Also, when you need to take everything out to shuffle,
it slides right out just bytilting it,
so this is also smart and provides a
tremendous
sense of exhilaration.

You can probably imagine it somewhat from the image above,
but there is one more
my-good-designpoint
regarding taking them out all at once.
That is the point that I madethe slanted bottom 2-way.
Actually, here,
even as you tilt the card holder to empty out one deck,
and then tilt it further until it is
nearly perpendicular to the floor,
the other deck is held firmly in place
and won't fall out with it, so it's safe.
(I was doing a lot of
experiments & calculations
on angles and load capacity (´ω`;))
Depending on the total number of cards,
if you use this 2-way directional slanted bottom storage,
you can integrate the draw pile and discard pile into one location
.
Integration, centralized management,
putting everything in one place—
these are buzzwords that attract efficiency enthusiasts, so the satisfaction of this aspect is also a point I want to highlight.
The diagonal structure is amazing. Thank you, diagonal.
I want both functionality and cuteness.
The next thing I would like you to pay attention to is
this partition structure in the middle.

you can pick it up and move it
with zero worry about it falling or collapsing.
It looks plain at first glance, but
it is the best handle I could think of.
It is easy to just slap on a handle, but
when you imagine how it will be used,
there are many things you want to avoid.

For example, a handle that
straddles the top blocks access from the sides.
Since board games are table games where multiple players
sit around a table,
ensuring access from all directions is a must.

take up extra space.
This type doesn't block the space above, but
because the handles protrude from the sides,
they occupy that much tabletop space.
However, since there should be many things you want to spread out on the table,
you shouldn't want to waste even a little bit of space,
so I want to avoid that.
At this point, the idea of getting rid of the handle
might also come to mind, but
whether you are using it or putting it away,
you frequently need to adjust its position,
and swapping contents between containers or adjusting the number of items
is part of the process.
So, it is definitely better to have
a handle one hundred percent.
Therefore, I implemented an
arch-door style structure that serves as both a divider and a handle,
which is also perfectly compatible with 2-way orientation.

Since the arch shape has no corners on top,
you can reach for it quickly without hesitation or fear of injury
when you go to grab it.
And the shape is easy for the hand to get used to,
making it easy to grasp.
The height and area have been trimmed to the bare minimum
as a divider,
so the
visibility from all directions is good,and there is
zero feeling of being blocked or crowded, reducing the strain when you just glance overto check on things.
If I might add,
arch shapes are just so cute.
When you incorporate them well into the highlights of your craft,
it suddenly creates a cute and soft
atmosphere, so it is an element
I want to treasure.
As for how to knit a semicircle,
I have compiled an independent research article in the past,
so please check it out if you are interested.
How to make a sturdy diagonal base
To begin with, there is the problem of
how to make a diagonal base.
I don't think there are that many people who have made a diagonal inner base with knitting.
Let me introduce the structural design
of this project.
Once you see the diagram, you will probably say "I see!"
but as someone who hasn't done much crafting or drawing,
and whose spatial imagination is unfortunately lacking,
It was a real puzzle until I figured it out.
First, the strength issue, which was also the theme of the previous knitting log, is something that always follows me around.
Since this is a storage item that emphasizes practicality by holding many cards, strength becomes even more important.
Strength becomes even more important.
Especially this diagonal bottom part.
I definitely want to ensure enough strength to support a stack of cards.
When I want to be extra careful, I don't push it and instead knit a reinforcing material into a hidden area.
I imagine that if there were any yarn fundamentalists, they might call it heresy.
However, even if it's impure knitting, I believe that when it comes to achieving strength, this is no time to be picky about the means.
So, as for the strength-reinforcing candidate to be knitted inside this time, any rectangular accessory case with a convenient size will do.
The specific criteria for a convenient size is a size that allows for the short side of a standard card multiplied by two, plus extra room for dividers and the thickness of the yarn fabric.
I had a leftover Daiso accessory case at home that was just right, so I chose that.

First, I'll just knit around this without a word.
Since it's spring, I wanted to make green tones the star and come up with a color scheme and pattern that evokes the image of fresh green sprouts.
I'm incorporating an original pattern that I had been prototyping since the blocking board edge knitting a little while ago.

I brought the bobble-stitch style pattern from the design above to the upper part of the basket's sides, and combined it with basketweave stitch for the lower part of the sides.
Since the parts with bobble stitches bulge, when knitting around something, that part alone deforms and affects the volume and silhouette, so I calculated to keep the usage range to a degree that wouldn't be bothersome.

The color scheme is mainly green and white, with
forest green (outer side),
olive (outer side),
off-white (outer side and edges)
and as sub-colors
light gray (outer side),
dark gray (inner side),
heath gray (outer bottom, arch divider)
combined.
For the sake of SDGs,
I didn't give up on using up leftover yarn,
and within those self-imposed constraints,
I think I did my best.
You know how it is.
It's like that phenomenon where
when you use a three-color ballpoint pen,
the ink never runs out at the same time; I experience that infinitely with knitting...
The forest green I forced myself to use this time
was quite dark, so
it stood out a bit too much.
But since this was the main target for consumption,
a reflection meeting on my lack of sense
regarding the number of colors and color distribution areas
continued for a while.
On the other hand,
the dark gray I used to make the boundary
between the diagonal bottom and the cards clear,
and to act as an element to erase the presence of the inner side,
blended in quite nicely.

By the way,
once the wrapping is complete,
the remaining structure
becomes the diagonal bottom and the arch-shaped divider.
Incidentally, the inner side and inner bottom
will undergo special processing after this, so
at this point, only the outer bottom and outer sides
are wrapped.

Now, finally, for the diagonal bottom and the divider,
my image is that I want it to look like this ↓.


Around this point, I calculate as much as I can
to see if the added thickness
and the remaining space will be sufficient
when all the parts are put together.
The plastic divider used during the calculation
is difficult to adjust in terms of thickness and length, so I cut separate cardboard
to use as reinforcing material to be wrapped in knitting.
The divider is a simple arch shape as it looks,
and I prepared the cardboard to match that shape.

Because the diagonal bottom requires strength, I filled it with additional cardboard
between the pieces folded into a V-shape.

In the photo, the filling cardboard is only in half of the V-shape,
but after repeated adjustments,
I have filled all the gaps with cardboard.

The internal knitting wrap
is not processed to follow the box,
but is handled to match these two structures.
This is the diagram.

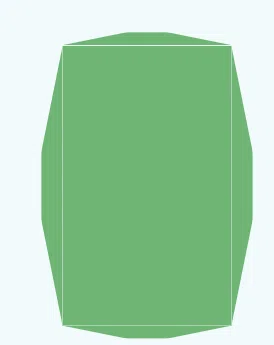

It is a two-color herringbone stitch.

…for some reason, it turned out very much like a honeybee (´ω`;) Bzzzz
Once you knit this far,
the inside is mostly filled,
but four spots remain on the inner side.
I will fill in these four spots.

I will knit back and forth from the opening
until it reaches the required size,
then fold it down and secure it.
I drew the red pen and blue pen sections separately to make them easier to understand,
but since they are actually connected,
I will knit them all together as one piece from the corner of the red side to the partition of the blue side,
then fold it down and secure it.
I will process the opposite side in the same way.
And with that, it is complete!

Click here for a video of how it feels to use and its size.
<Finished version image video>
Low-quality high-speed GIF below

For high quality, check my Instagram below
High-quality MP4 (Instagram) below
Pizza Party Style Accessory Case Happy Set
This is the second structural accessory case that
took an excessive amount of time.
The initial rough concept was like this.
Something that looks like a pizza, has a
funparty vibe, is a
large plate-likeshallow basketfilled with
pizza slice-like,
removable accessory casesthat are
packed inside,
Also, although it might be hard to tell
due to the thickness of the yarn in the end,
I wanted to make it into an angular shape.
The accessory cases are
kite-shaped, and the outer basket is
polygonal
is what I meant.
Here is what I made ↓


Once again, it is an ensemble of
whims and sudden ideas.
To achieve the look that appears simple,
there were indeed various puzzles to solve.
Kite shape and polygon
First, the kite shape.
Triangles are used more often, but
with a straightforward knitting method,
it results in the shape shown below.

If you knit a triangle in the round,
it becomes a shape close to an equilateral triangle.
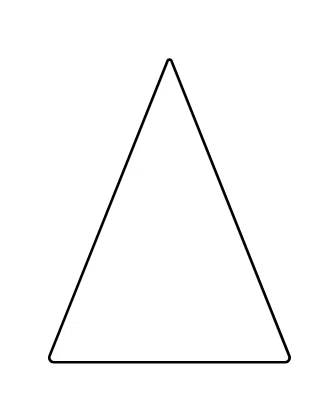
If you knit vertically using the same method as a rhombus
with back-and-forth knitting,
it tends to become a pointy triangle
with the balance shown above.
(Though you can make both acute and obtuse angles by adjusting the increases)
However, although there is no particular meaning or necessity,
this is the shape I want to make this time ↓

I came up with this relatively easily.
If you increase stitches in the middle while knitting back and forth,
you get this kind of balance.
Roughly speaking,
it's just increasing in the middle,
but the details are summarized
in the knitting notes below.

For the polygon of the outer basket,
you do the opposite of preventing corners in a circle,
and align the increase positions for each row.

intended to hold six kite shapes.
The kite-shaped parts are knitted back and forth,
while the outer basket is knitted in the round.
Because the knitting methods are different
and there is the thickness of the sides to consider,
I have to be careful about matching the sizes.
However, theoretically,
since both create corners at the increase positions,
if you intend to align the increase corner positions,
they should theoretically match for the most part.
……That said, if I make a mistake,
it would be sad if they didn't all come together,
so I am trying to check
as frequently as possible (`・-・´)9
Party vibes
While this accessory case isn't
limited to board game storage,
I kept it in the back of my mind
that it could also serve as a token holder.
In the case of board game storage,
as I touched upon in the previous section
regarding tabletop card storage,
I want a design where the handles
do not obstruct the view, space,
or the user's access as much as possible.
So,
the handles for this project
need to have a party vibe
while being designed not to get in the way.
…I can't really explain now
how it ended up like this,
but the idea I ultimately arrived at was,
this sticking-out
star wand.


and with perfect visibility from every angle.
I've previously released the knitting pattern
for making stars with extra-thick yarn in few rows,
so feel free to use it if you're interested ↓
Order is important
Now that the overall structure and design are set,
it's time to start working.
At this point, I realize that because of the
strange, protruding star-shaped handle
attached to it,
I need to carefully consider the order
in which I make the parts.
In other words, it's about how to ensure
enough strength for a thin, stick-like object
with almost no contact surface
to function properly as a handle
for a large-sized box.

and it won't be able to support the overall balance when held.
Inserting wire
is the solution here.

the contact surface is artificially expanded.
As a result, the stick stands perfectly straight,
there is no fear of it coming off when held,
and the basket holding all the small items
won't tilt either.
The goal was 100% achieved.
If I make the double bottom (which of course includes cardboard for strength)
first,
I won't be able to do this,
so I will proceed carefully so as not to skip the order.


Outer basket side
Phew... most of the problems have been solved.
I can move on to the design phase.
Since it's a spring accessory case,
I'll do my best with a spring color scheme this time as well.
The main colors will be purple and green,
and I'll round it out with yellow, pink, and white
as secondary colors.
The bottom half of the sides
uses a two-color rib grid pattern
with a diagonal lattice
created using post stitches.

forms a series of horizontal diamonds
with a sense of depth that takes advantage of the texture.
It's a pattern that can achieve
the kind of feel you want for baskets.
For the top half of the sides,
I've placed firm, round bobble stitches
between the post stitches, and finished the edge above that with reverse single crochet.


Multi-color patterns
that show off the inside beautifully are the best.
I was experimenting with laundry starch during this period.
After finishing the outer basket, I applied laundry starch to the inside
to make it stiff and crisp.
It's hard to convey perfectly in words, but
as a personal experimental observation,
laundry starch significantly
ruins the feel of the yarn.
Also, since it is just laundry "starch" after all,
regardless of the concentration, what you can do with starching
is to make it "stiff and crisp."
It might be able to keep it
stretched out straight,
but it does not fundamentally change
the load-bearing capacity or the strength to bounce back from strong pressure
determined by the material itself.
I feel that the disadvantage of ruining the texture
is significant, so
my conclusion is that you need to think carefully
about where, how, and how much to use it.
For things like accessory cases,
I personally think it's best to limit it
to applying it to the inside of the sides.
For things like lace knitting,
shape is the top priority,
so the approach changes.
6 Kite-shaped accessory cases
Strength is important, so
(How many times do I have to say that? (´ω`;)...)
I'll start with a double bottom.
6 pieces x 2 layers = 12
kite-shaped bottoms, mass-produced quietly.

I don't fear the markers I need.
Because finding out the stitch count doesn't match later
is much scarier (´ω`;)...
To improve strength,
I'm taking my time with the split-stitch method
to create a sturdy fabric
with tightly packed stitches.
I've summarized the features and knitting instructions for the split-stitch method
in a separate article in the past,
so please check it out if you're interested ↓
Once the double bottom is done,
I'll design the sides.
The outer basket
used a post-stitch
pattern,
so I came up with an original colorwork pattern
that also uses post-stitches
to match.

The construction is simple.
The triangular parts are colorwork,
and the diagonal lines surrounding the triangles are post-stitches.
Here is my very rough knitting memo (´ω`;)↓

The yellow markers
correspond to the previous row where the color change occurs.
If you change the color of the chain part there first,
the colorwork will look cleaner.
(The same process is needed for the row before the first row,
but it's omitted in the memo)
It's a basic color-changing technique,
but if you don't cut corners and remember to do it,
the finish will be different.
The color scheme is as decided for the whole set.
The background colors are 3 green and 3 purple,
and the color variations for the triangular colorwork
include yellow, white, and pink.
Well then,
since I did some colorwork,
even if I'm careful with the inside,
it gets a bit messy.
I'm calculating it so it can also be used as a token holder,
so for the inside of the accessory case,
I want it to be a clean, light color
that makes it easy to see what's inside.
And, I also want it to be sturdy.
(something something...)
So, it's decided that I'll make an inner lining.
I'll knit the inner lining
in a natural light beige.

The inner lining meanders in the opposite direction
to the outer layer,
so I learned this time that I need to
take that into account.

because they meander in opposite directions, if you check and adjust for the shifted stitch count,
they will line up perfectly
(this time it's off by exactly 3 stitches)
It's almost finished, but
there is one more goal remaining.
Yes, ease of access.
I thought about various things
for the tab structure of the accessory case,
going back and forth,
but in the end,
a sailor suit collaris what I decided on (huh?
Draping down from the back of the neck,
(where is the neck, anyway?)
and hanging over the side of the outer basket,
if it harmonizes with the whole
to create a layered fashion
vibe, that would be great.
With that image in mind, I went through trial and error,
and a sailor-collar-style tabwas born.

I've arranged it into a cute shape
with gentle curves.

to create a spring-like feel ✿
With this, it should be easy to grab (I'm sure of it

the eye-catching flower are
not just cute, but also
a user-friendly
guiding design that leaves no doubt
about where to grab
(or so I intend)

and having it slide right out.
It's a feeling only the maker
can truly savor, though...
Yes, thank you for waiting.
With this, it is complete!!
<Finished Version Image Video>
Low-quality high-speed GIF↓

For high quality, check my Instagram↓

High-quality GIF (click to play on Instagram)↓
<Making-of Video>
High-quality MP4 (click to play on Instagram)↓
Bonus: Wireless Earphone Case
I also tried making a
wireless earphone case
that looks like tamagoyaki sushi, but
I forgot to account for the weight of the earphones themselves,
and there were various other things I didn't think through,
so it didn't go well.
I'll include it as a bonus.
Hmm, the position of the tamagoyaki was particularly disappointing.
It looks like it's balding (゚´Д`゚)……
Conclusion
Thanks for your hard work!
My knitting life this month
was all about making small containers like this.
I rambled too much in the "Introduction",
so I've run out of
trivial things to talk about for the "Conclusion,"
so I'll wrap things up quickly here.
I think I'll continue doing this on a whim from next month onwards,
so please feel free to come by
whenever you feel like it.
See you later!
いいなと思ったら応援しよう!
 「なんら意味があったよ!」「わかりみあったよ」
「なんか知らんけどスッキリ感得たよ!」
「謎に役に立ったところがあったよ!」でしたら幸いです。
いつもありがとうございます。
「なんら意味があったよ!」「わかりみあったよ」
「なんか知らんけどスッキリ感得たよ!」
「謎に役に立ったところがあったよ!」でしたら幸いです。
いつもありがとうございます。