


 本文档介绍了如何在WildFly上利用HTTPS/TLS保护WebSocket通信,包括创建密钥库、启动WildFly、配置安全领域和HTTPS监听器,并提供了一个简单的示例展示基于TLS的WebSocket安全性。
websocket wss
这个博客的第50条提示,是的!
技术提示#49说明了如何使用用户名/密码和Servlet安全机制保护WebSocket的安全。 本技术提示将说明如何在WildFly上使用HTTPS / TLS保护WebSockets。
让我们开始吧!
- 创建一个新的密钥库:
keytool -genkey -alias websocket -keyalg RSA -keystore websocket.keystore -validity 10950
Enter keystore password:
Re-enter new password:
What is your first and last name?
  [Unknown]:  Arun Gupta
What is the name of your organizational unit?
  [Unknown]:  JBoss Middleware
What is the name of your organization?
  [Unknown]:  Red Hat
What is the name of your City or Locality?
  [Unknown]:  San Jose
What is the name of your State or Province?
  [Unknown]:  CA
What is the two-letter country code for this unit?
  [Unknown]:  US
Is CN=Arun Gupta, OU=JBoss Middleware, O=Red Hat, L=San Jose, ST=CA, C=US correct?
  [no]:  yes

Enter key password for <websocket>
	(RETURN if same as keystore password):
Re-enter new password:
使用“ websocket”作为便捷密码。
- 下载WildFly 8.1 ,解压缩,然后将“ websocket.keystore”文件复制到
standalone/configuration目录standalone/configuration目录中。 - 以以下方式启动WildFly:
./bin/standalone.sh - 使用jboss-cli连接到它:
./bin/jboss-cli.sh -c - 将新的安全领域添加为:
[standalone@localhost:9990 /] /core-service=management/security-realm=WebSocketRealm:add()
{"outcome" => "success"}
并配置它:
[standalone@localhost:9990 /] /core-service=management/security-realm=WebSocketRealm/server-identity=ssl:add(keystore-path=websocket.keystore, keystore-relative-to=jboss.server.config.dir, keystore-password=websocket) { "outcome" => "success", "response-headers" => { "operation-requires-reload" => true, "process-state" => "reload-required" } } - 将新的HTTPS侦听器添加为:
[standalone@localhost:9990 /] /subsystem=undertow/server=default-server/https-listener=https:add(socket-binding=https, security-realm=WebSocketRealm) { "outcome" => "success", "response-headers" => {"process-state" => "reload-required"} } - 可以从github.com/javaee-samples/javaee7-samples/tree/master/websocket/endpoint-wss获得一个简单的示例,以显示基于TLS的WebSocket安全性。 克隆工作空间并将目录更改为“ websocket / endpoint-wss”。 该示例的部署描述符具有:
<security-constraint>
  <web-resource-collection>
    <web-resource-name>Secure WebSocket</web-resource-name>
    <url-pattern>/*</url-pattern>
  </web-resource-collection>
  <user-data-constraint>
    <transport-guarantee>CONFIDENTIAL</transport-guarantee>
  </user-data-constraint>
</security-constraint>
这样可以确保任何传入此应用程序的请求都将自动定向到HTTPS URL。
- 通过提供以下命令来部署示例:
mvn wildfly:deploy
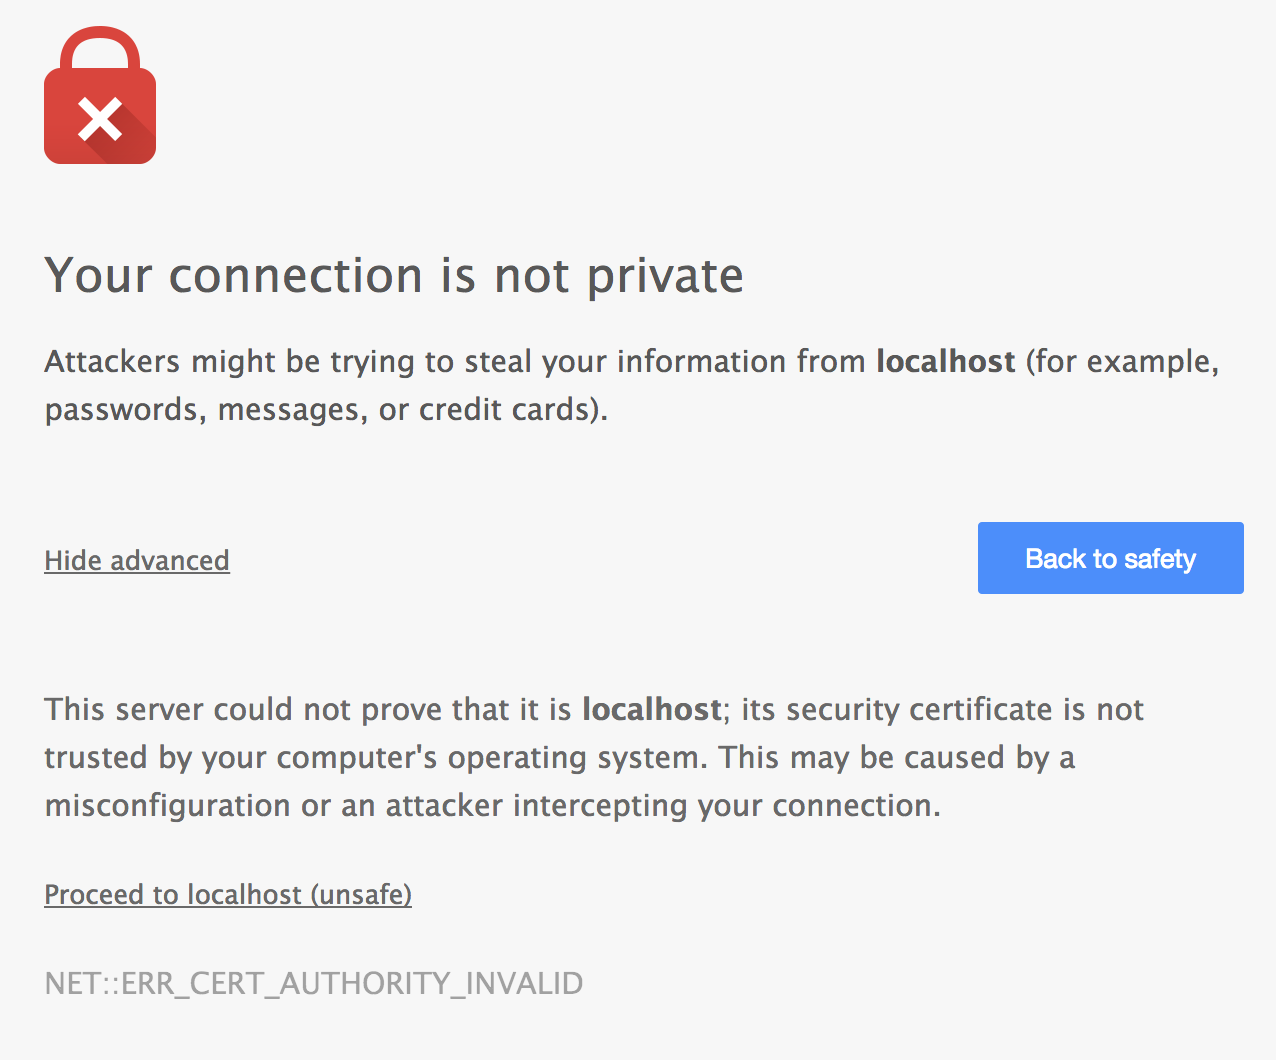
现在访问http:// localhost:8080 / endpoint-wss重定向到https:// localhost:8080 / endpoint-wss 。 浏览器可能会抱怨自签名证书。 例如,Chrome显示以下警告:
Safari显示以下警告:
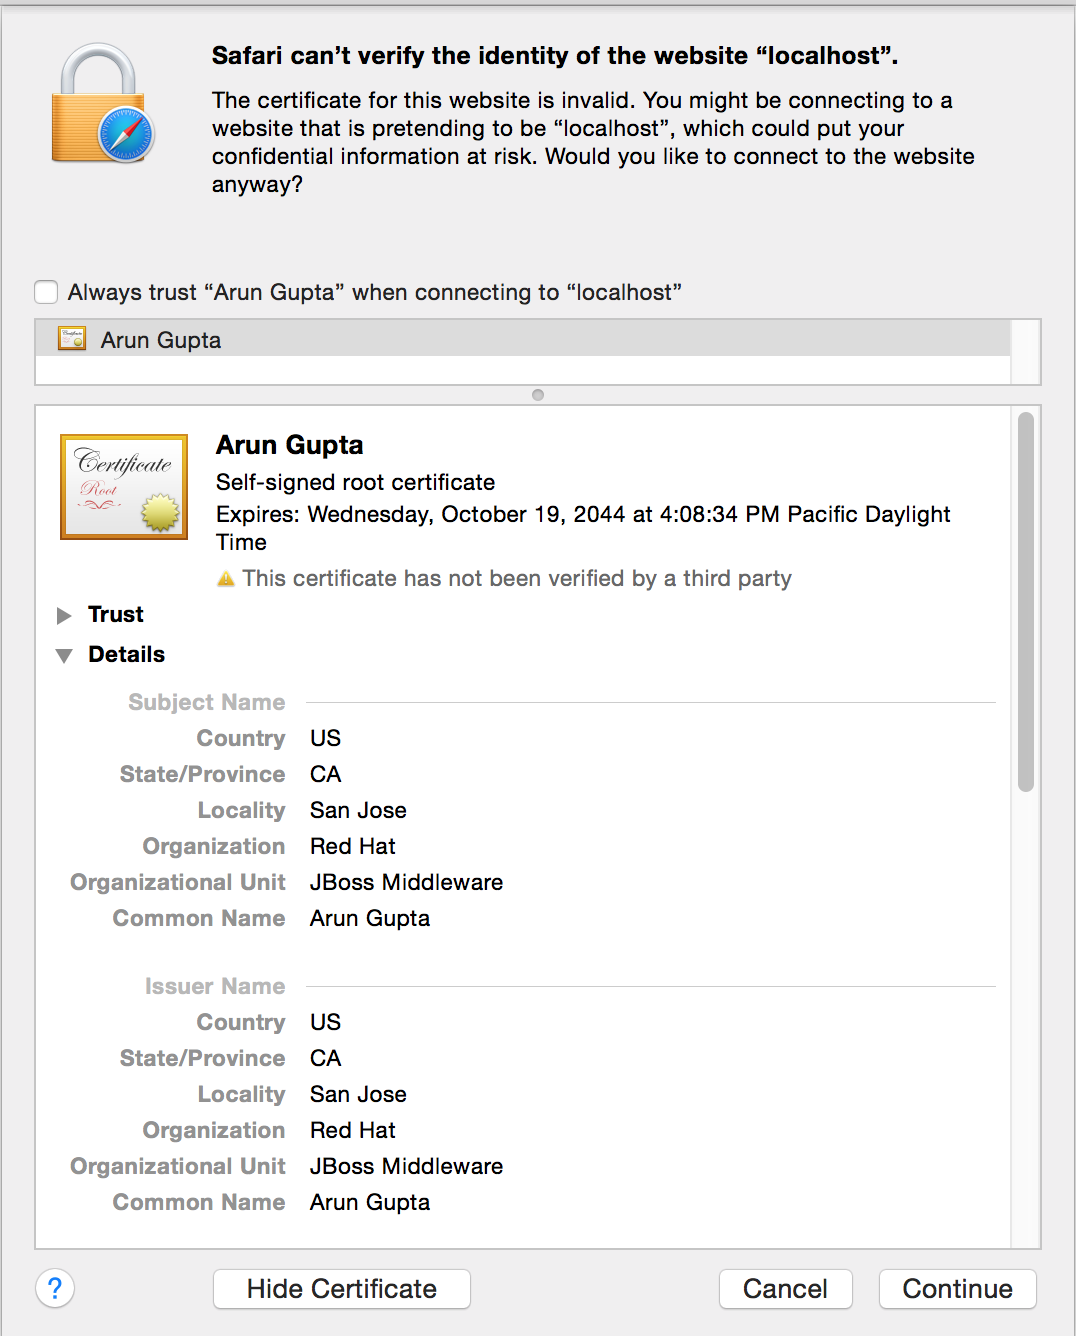
无论哪种情况,都单击“继续到本地主机”或“继续”以继续进行。 然后,建立安全的WebSocket连接。
要理解的另一个相关要点是,不能从受https保护的页面建立不安全的WebSocket连接。 例如我们示例中的以下代码:
new WebSocket("ws://localhost:8080/endpoint-wss/websocket");将在Chrome开发者工具中引发以下异常:
[blocked] The page at 'https://localhost:8443/endpoint-wss/index.jsp' was loaded over HTTPS, but ran insecure content from 'ws://localhost:8080/endpoint-wss/websocket': this content should also be loaded over HTTPS.
Uncaught SecurityError: Failed to construct 'WebSocket': An insecure WebSocket connection may not be initiated from a page loaded over HTTPS.
请享用!
翻译自: https://www.javacodegeeks.com/2014/10/securing-websocket-using-wss-and-httpstls.html
websocket wss


 2471
2471

 被折叠的 条评论
为什么被折叠?
被折叠的 条评论
为什么被折叠?
 到【灌水乐园】发言


